12 Bedrooms With a Window Seat You Can Actually Build
Yes, you can build a bedroom window seat without rebuilding the whole room. Most of the seats in this guide use a simple box, a plywood top, and a cushion you can order or make, and they fit a standard window in a weekend or two. The trick is getting three things right before you cut anything: the seat height, the depth, and how the base will carry weight. Get those right, and the rest is mostly finish work.
Plan for a finished seat height of about 18 to 19 inches, so you can sit with your feet flat on the floor, and a depth of 18 to 22 inches, so you can lean back in comfort. Build a storage base from 3/4-inch plywood, support it every 16 to 24 inches, and check for heaters, vents, and radiators before you buy lumber.
Costs below are realistic ranges for materials and a basic cushion, not a contractor quote. Prices shift with lumber, fabric, and tools you already own. If a project feels beyond your comfort with saws and fixings, a carpenter can usually build the base in a day, and you can handle paint and cushion yourself.
1. The Classic Built-In Bench With Storage Drawers
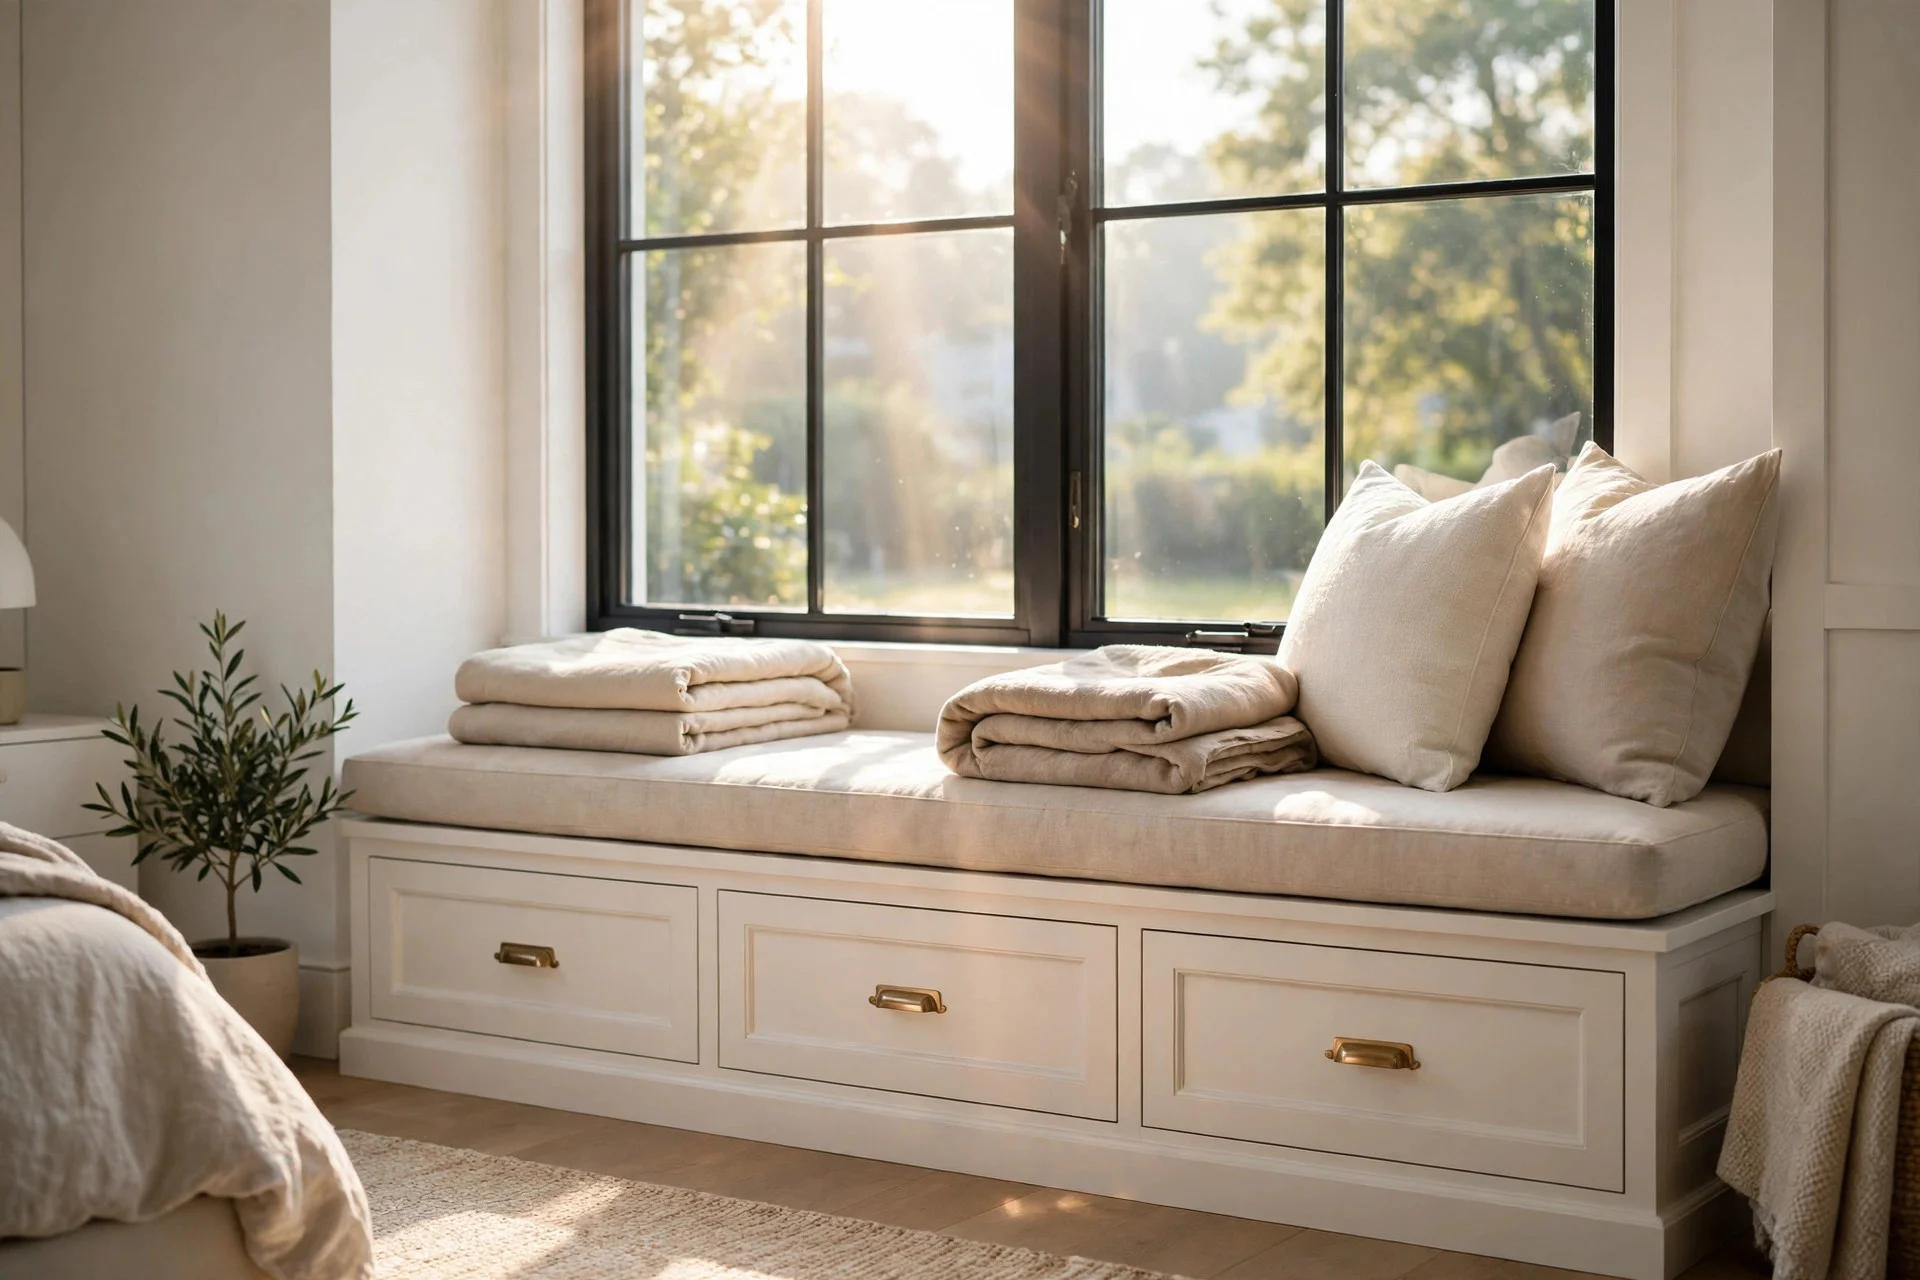
This is the window seat most people picture: a bench running wall to wall under the window, with drawers underneath for bedding or spare pillows. Painted to match the trim, it looks like it was always part of the room.
Build the base as a simple box with a plywood top overhanging the front by about an inch. Use full-extension drawer slides, since half-opening drawers get frustrating fast. Leave a 1/8-inch gap around each drawer front so paint does not make them rub.
Cost: $350 to $900 for plywood, drawer slides, paint, and a basic cushion.
Difficulty: Moderate; plan on a full weekend, plus drying time for paint.
Tip: Build the cushion cover with a zip so you can wash it, and pick a medium-density foam at least 3 inches thick so the seat does not bottom out.
Watch out: Drawers need clear floor space in front to open, so this design suits rooms where the bed or a dresser does not block the bench.
2. A Low Platform Seat for a Wide Bay Window
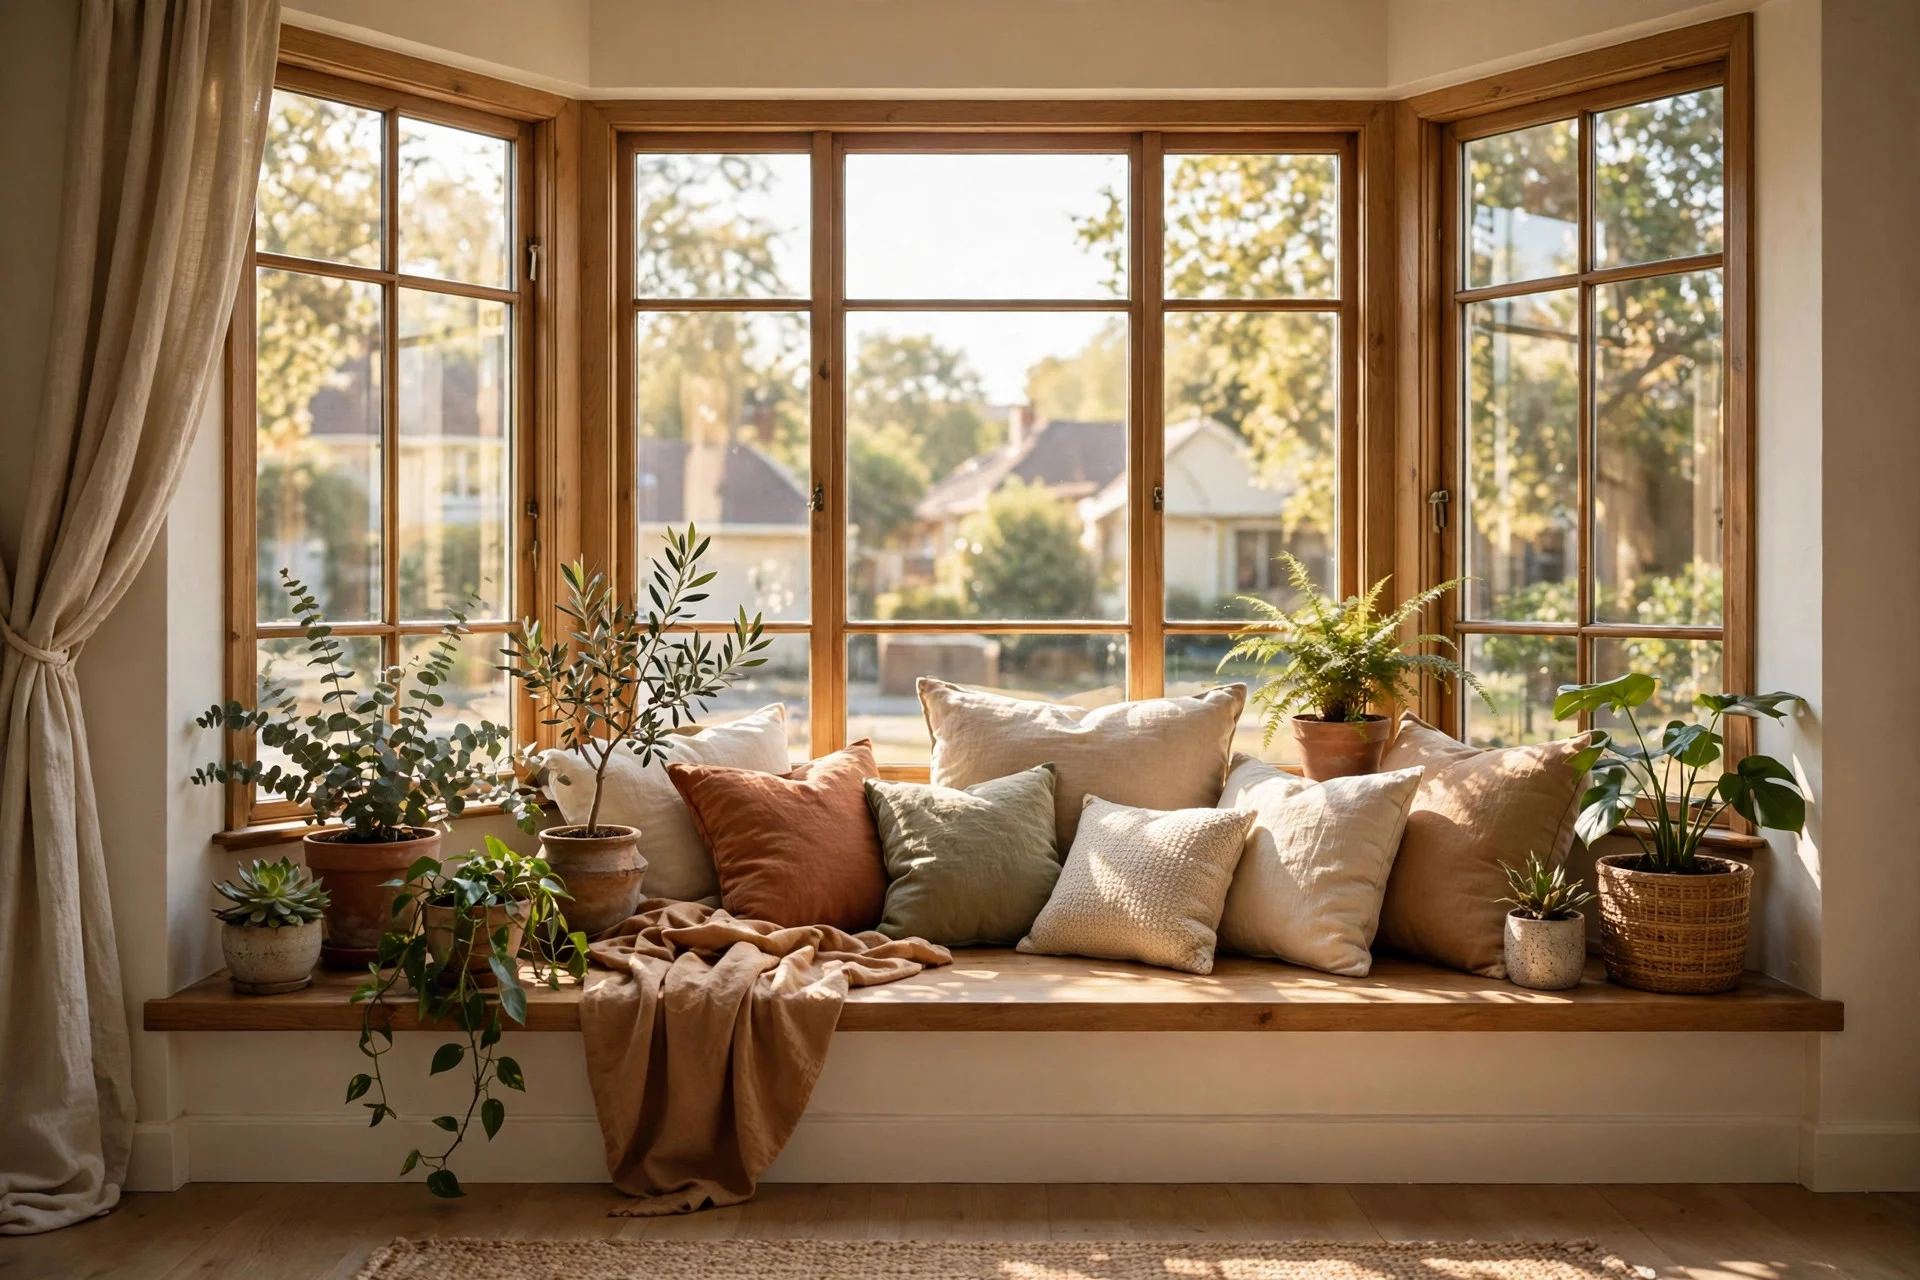
A bay window already gives you the shape, so you only need a low platform that follows its angles. Sitting slightly lower than a standard bench, it keeps the view open and suits a low sill.
Measure each bay section separately, since bays are rarely perfectly even. Build three boxes, join them with screws from inside, and tie them together with a single plywood top cut to the full bay shape.
Cost: $300 to $800, depending on the width of the bay and the cushion fabric.
Difficulty: Moderate; the angled cuts take patience, but the build is still basic joinery.
Tip: Make a cardboard template of the bay footprint first. It is faster to fix a template than to recut a plywood top.
Watch out: Check that the platform does not cover air vents or trap damp air against the window frame. Leave a small vent gap at the back if the wall feels cold in winter.
3. The Reading Nook With Bookshelves on Both Sides
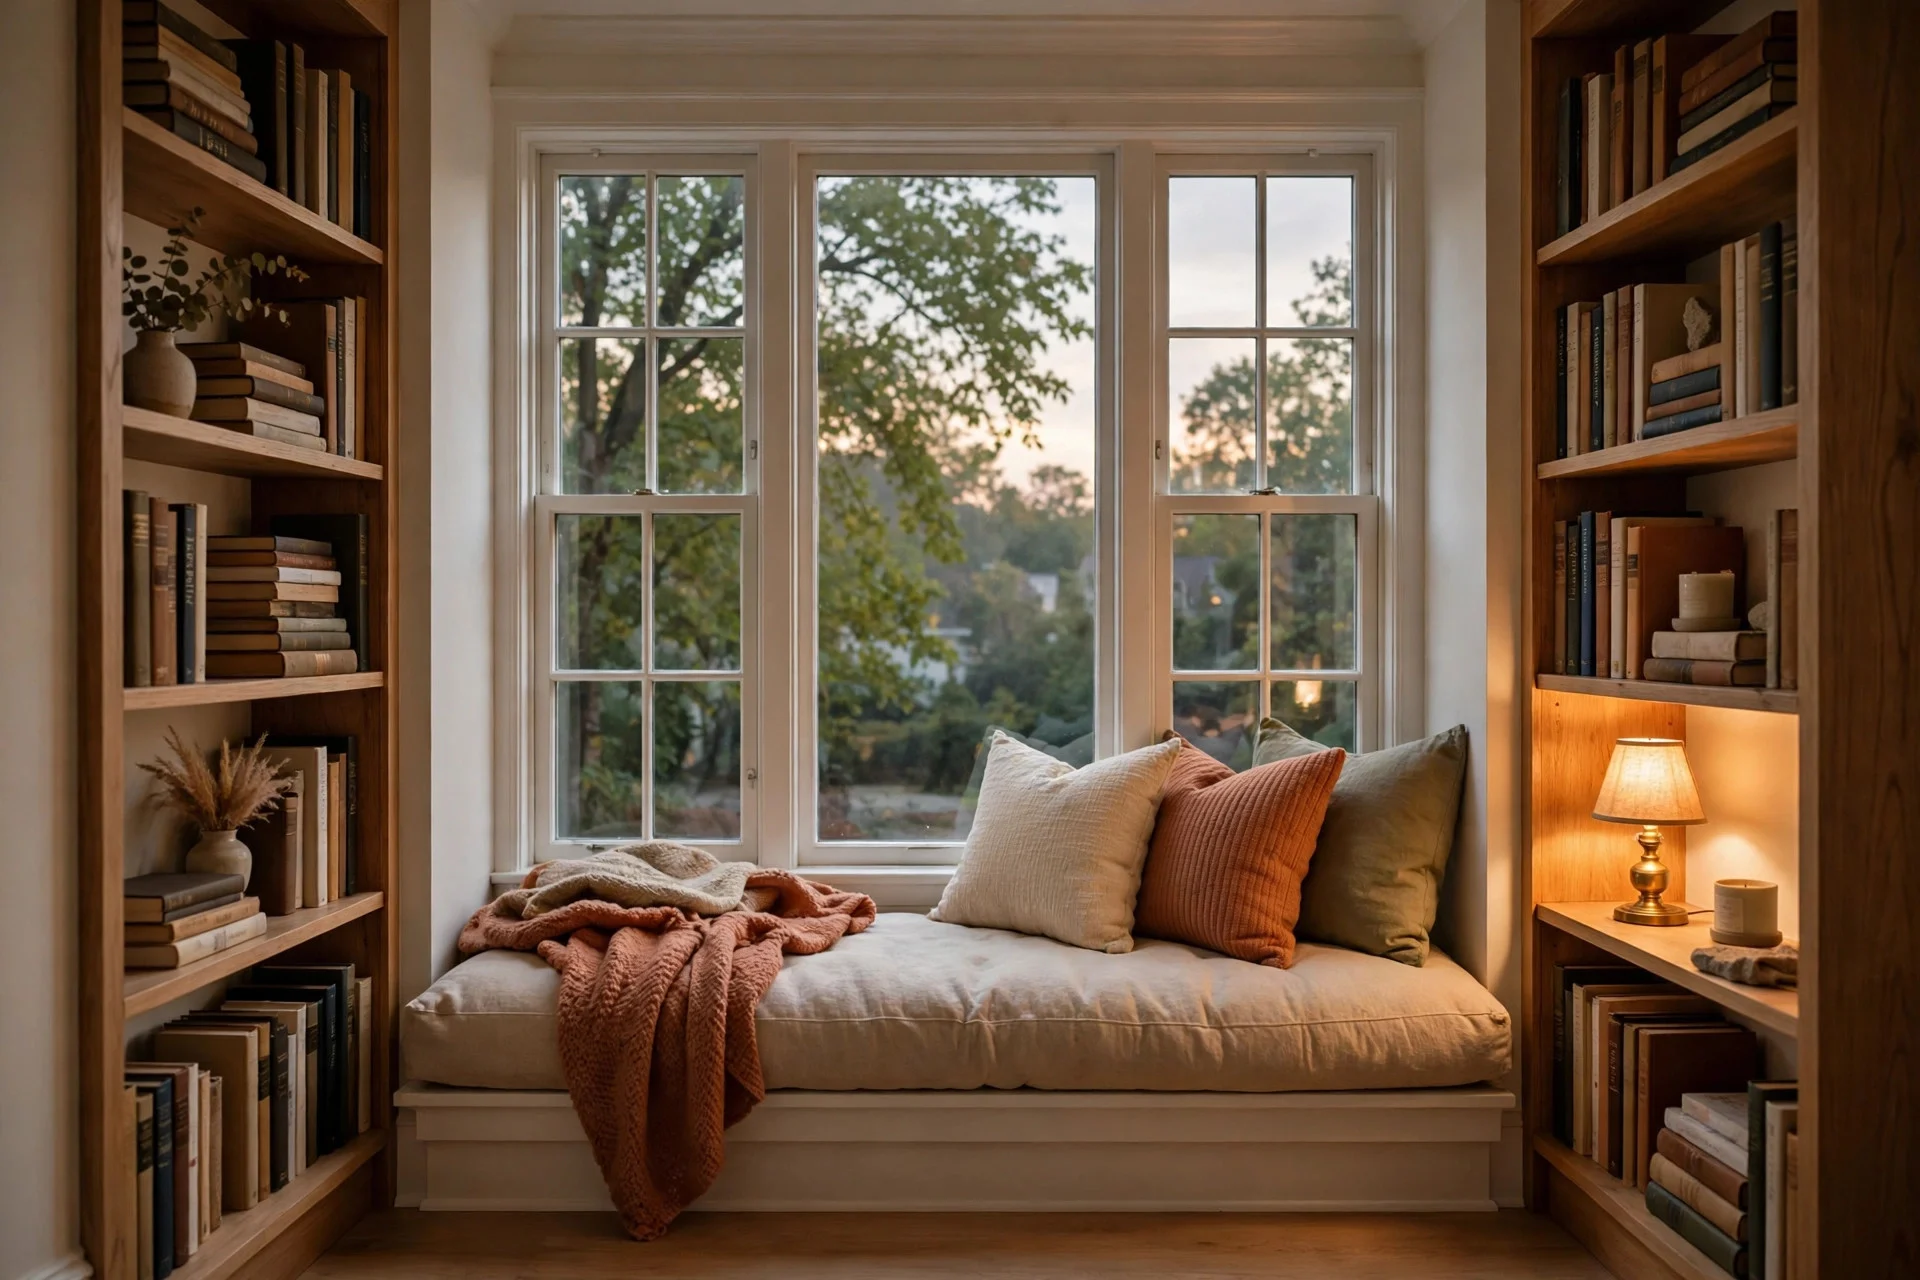
A bench between two narrow bookshelves gives you a defined reading spot, books within reach, and daylight to read by. The shelves frame the window, so the whole wall looks planned.
Keep shelves shallow, about 10 to 12 inches deep, and anchor every unit to wall studs. Add a small reading light on one shelf rather than relying only on the ceiling light.
Cost: $400 to $1,100, including two shelf units, the bench base, and a cushion.
Difficulty: Moderate; a weekend for the bench, plus an extra day if you build the shelves from scratch.
Tip: Leave one shelf bay open at seat height for a basket with your current book, a charger, and a pair of reading glasses.
4. A Window Seat That Doubles as a Guest Bed
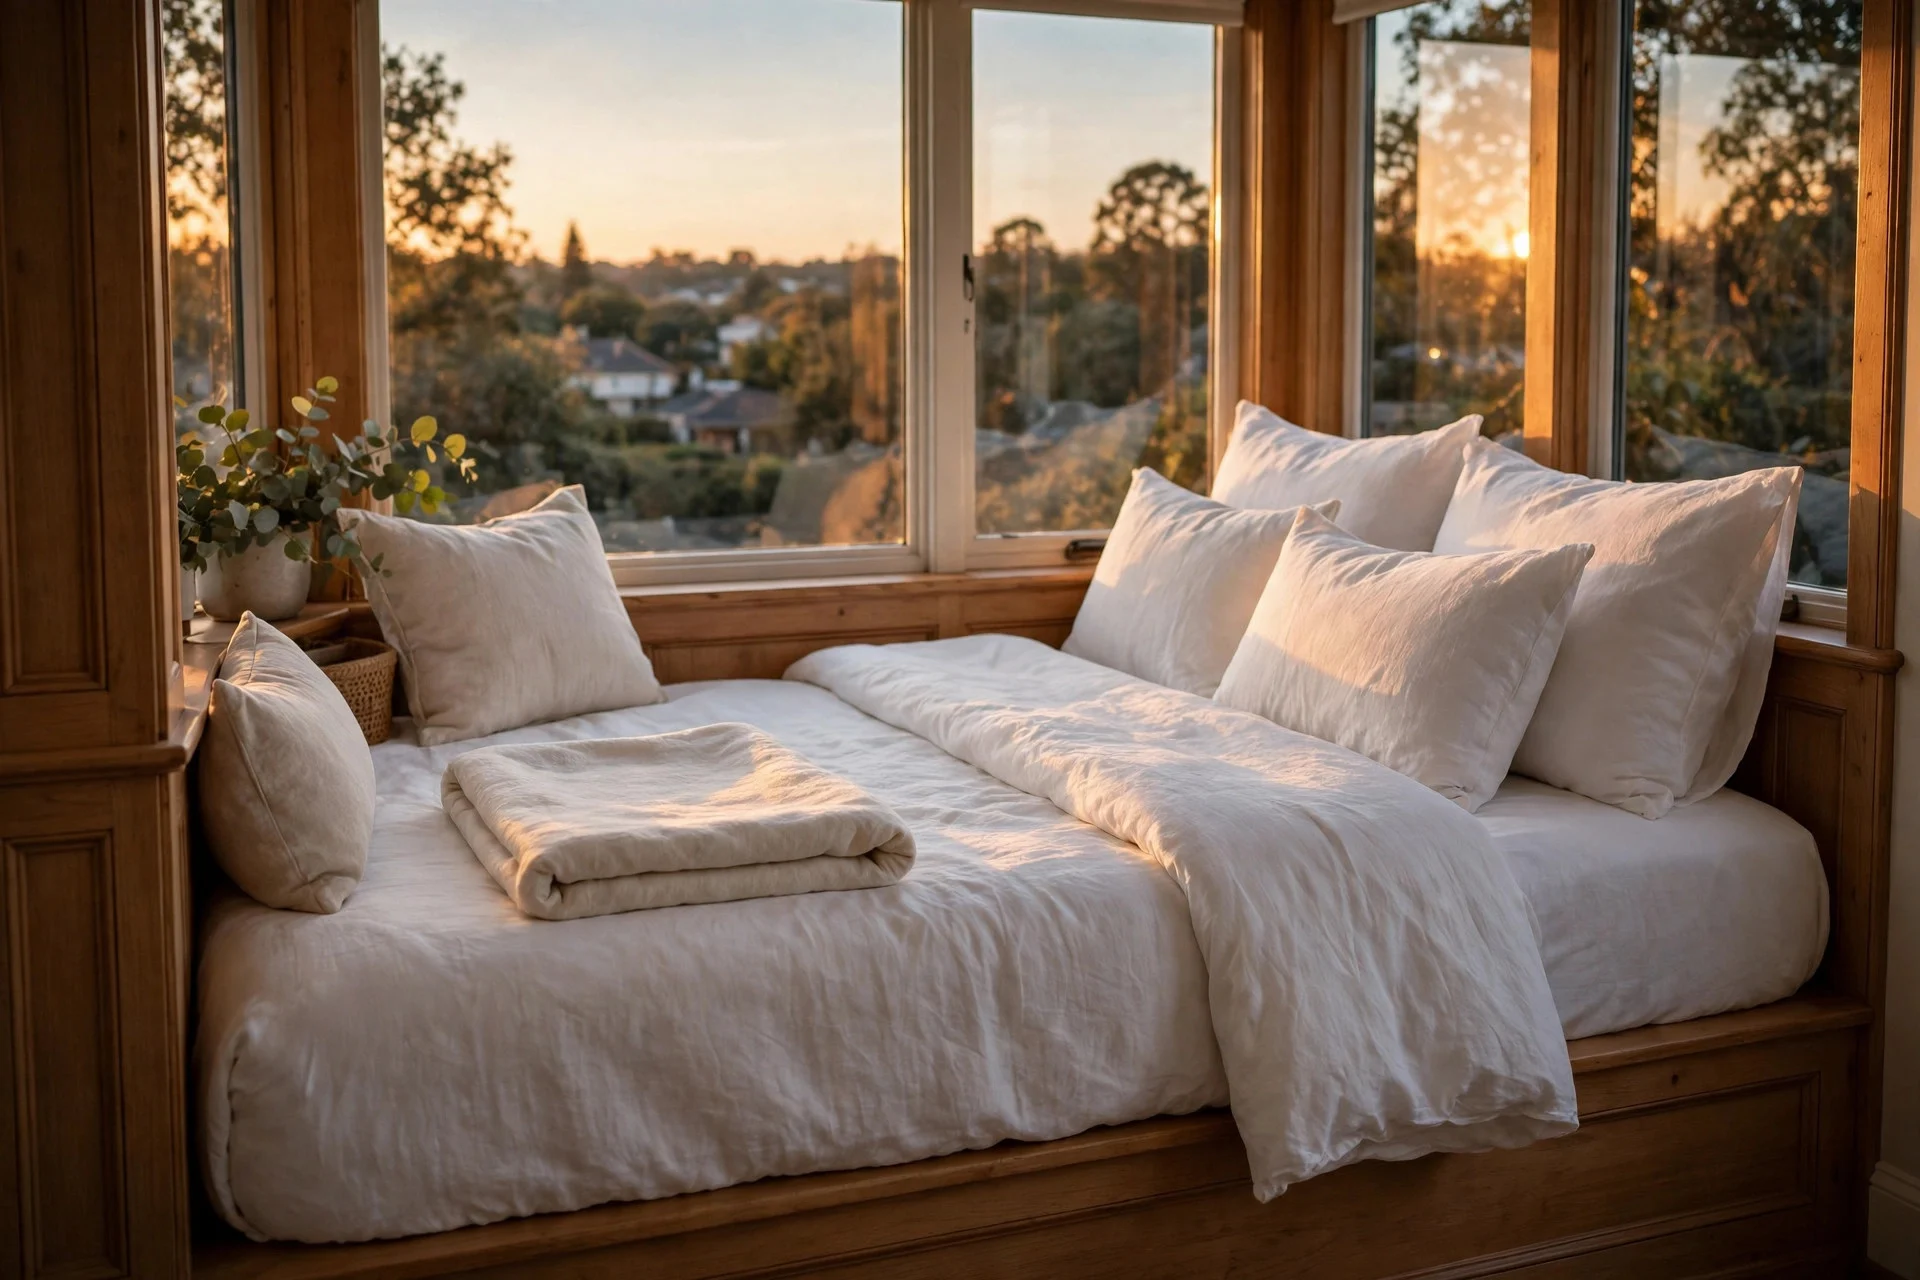
A deep window seat can double as a single bed for an overnight guest, handy in a home with no spare room. A standard bench is too narrow for sleeping, but a 30- to 36-inch-deep platform works for one adult, especially with a fold-out or pull-out section beneath it.
Use a proper single mattress or a foam pad at least 4 inches thick, not just the seat cushion, or your guest will feel every board joint by morning. Store bedding in the base, and test any pull-out section fully loaded before you finish the paint.
Cost: $500 to $1,400, including the deeper base, a foam mattress, and bedding storage.
Difficulty: Moderate to advanced, depending on if you add a pull-out section.
Tip: Make the sleeping surface in two pieces with a hinged join, so the daytime seat stays at a normal depth and the bed only extends at night.
Watch out: Measure the door swing and walking path first. A bed-length seat can block the route to the closet or bathroom if the room is tight.
5. The Floating Bench for a Small Bedroom
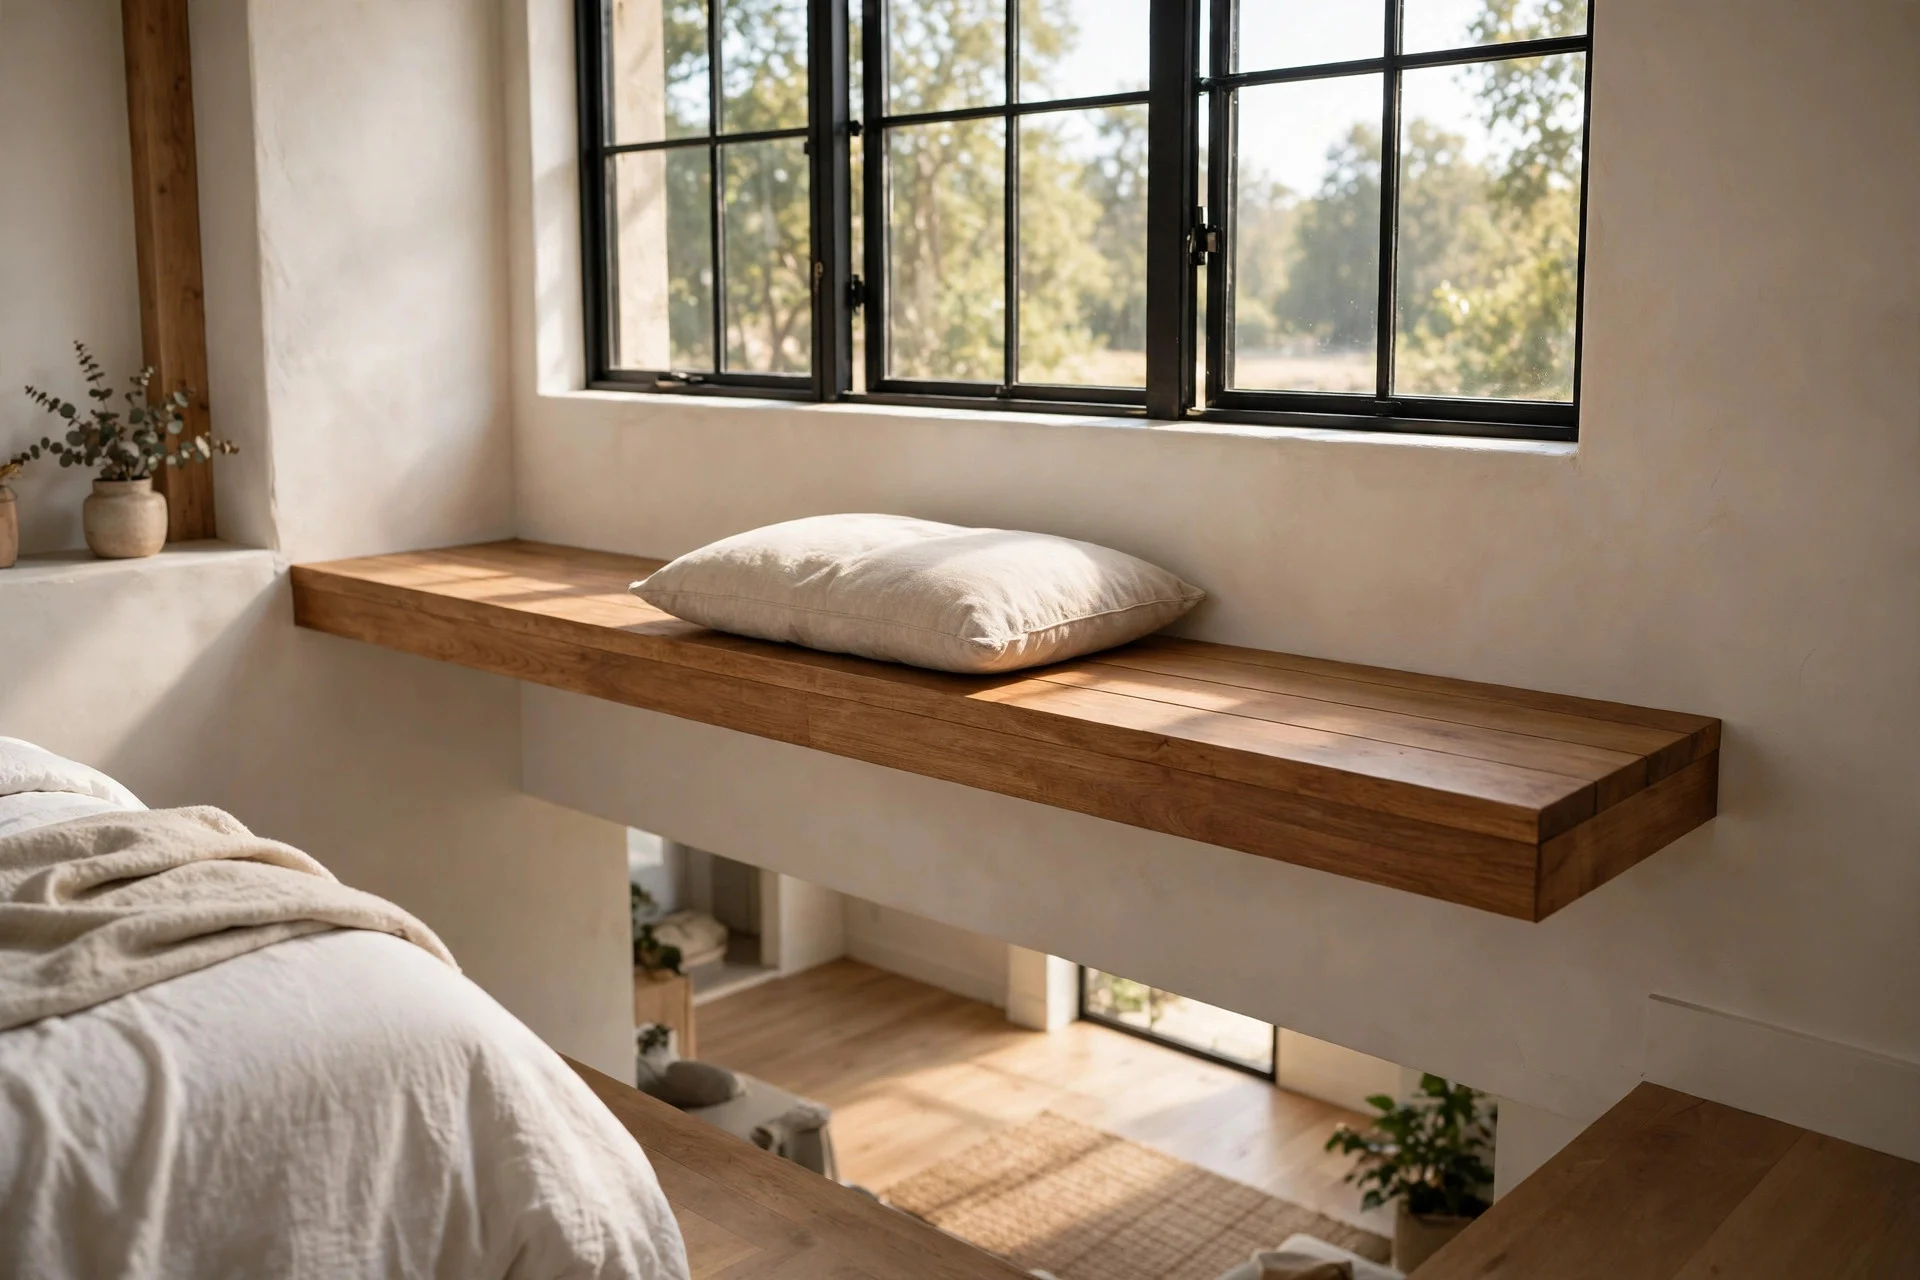
A floating bench mounts straight to the wall, keeping the floor visible and making a small bedroom feel less crowded. It also makes cleaning easier, since you can mop right under it.
Do not hang this on drywall alone. It needs lag screws into studs, plus a bracket or cleat rated for two seated adults. Use a hardwood top at least 1 1/2 inches thick, or plywood with a solid wood edge, and keep the span under about 5 feet unless you add a center support leg.
Cost: $250 to $700 for lumber, brackets or cleats, fixings, and a cushion.
Difficulty: Moderate; the hard part is finding studs and getting the bench level, not the cutting.
Tip: Fit a thin strip of felt under the cushion so it grips the bench and does not slide every time you sit down.
Watch out: If your wall is plaster over lath or an older construction type, get the fixings checked before you trust the bench with full weight.
6. A Seat With Open Cubbies for Baskets
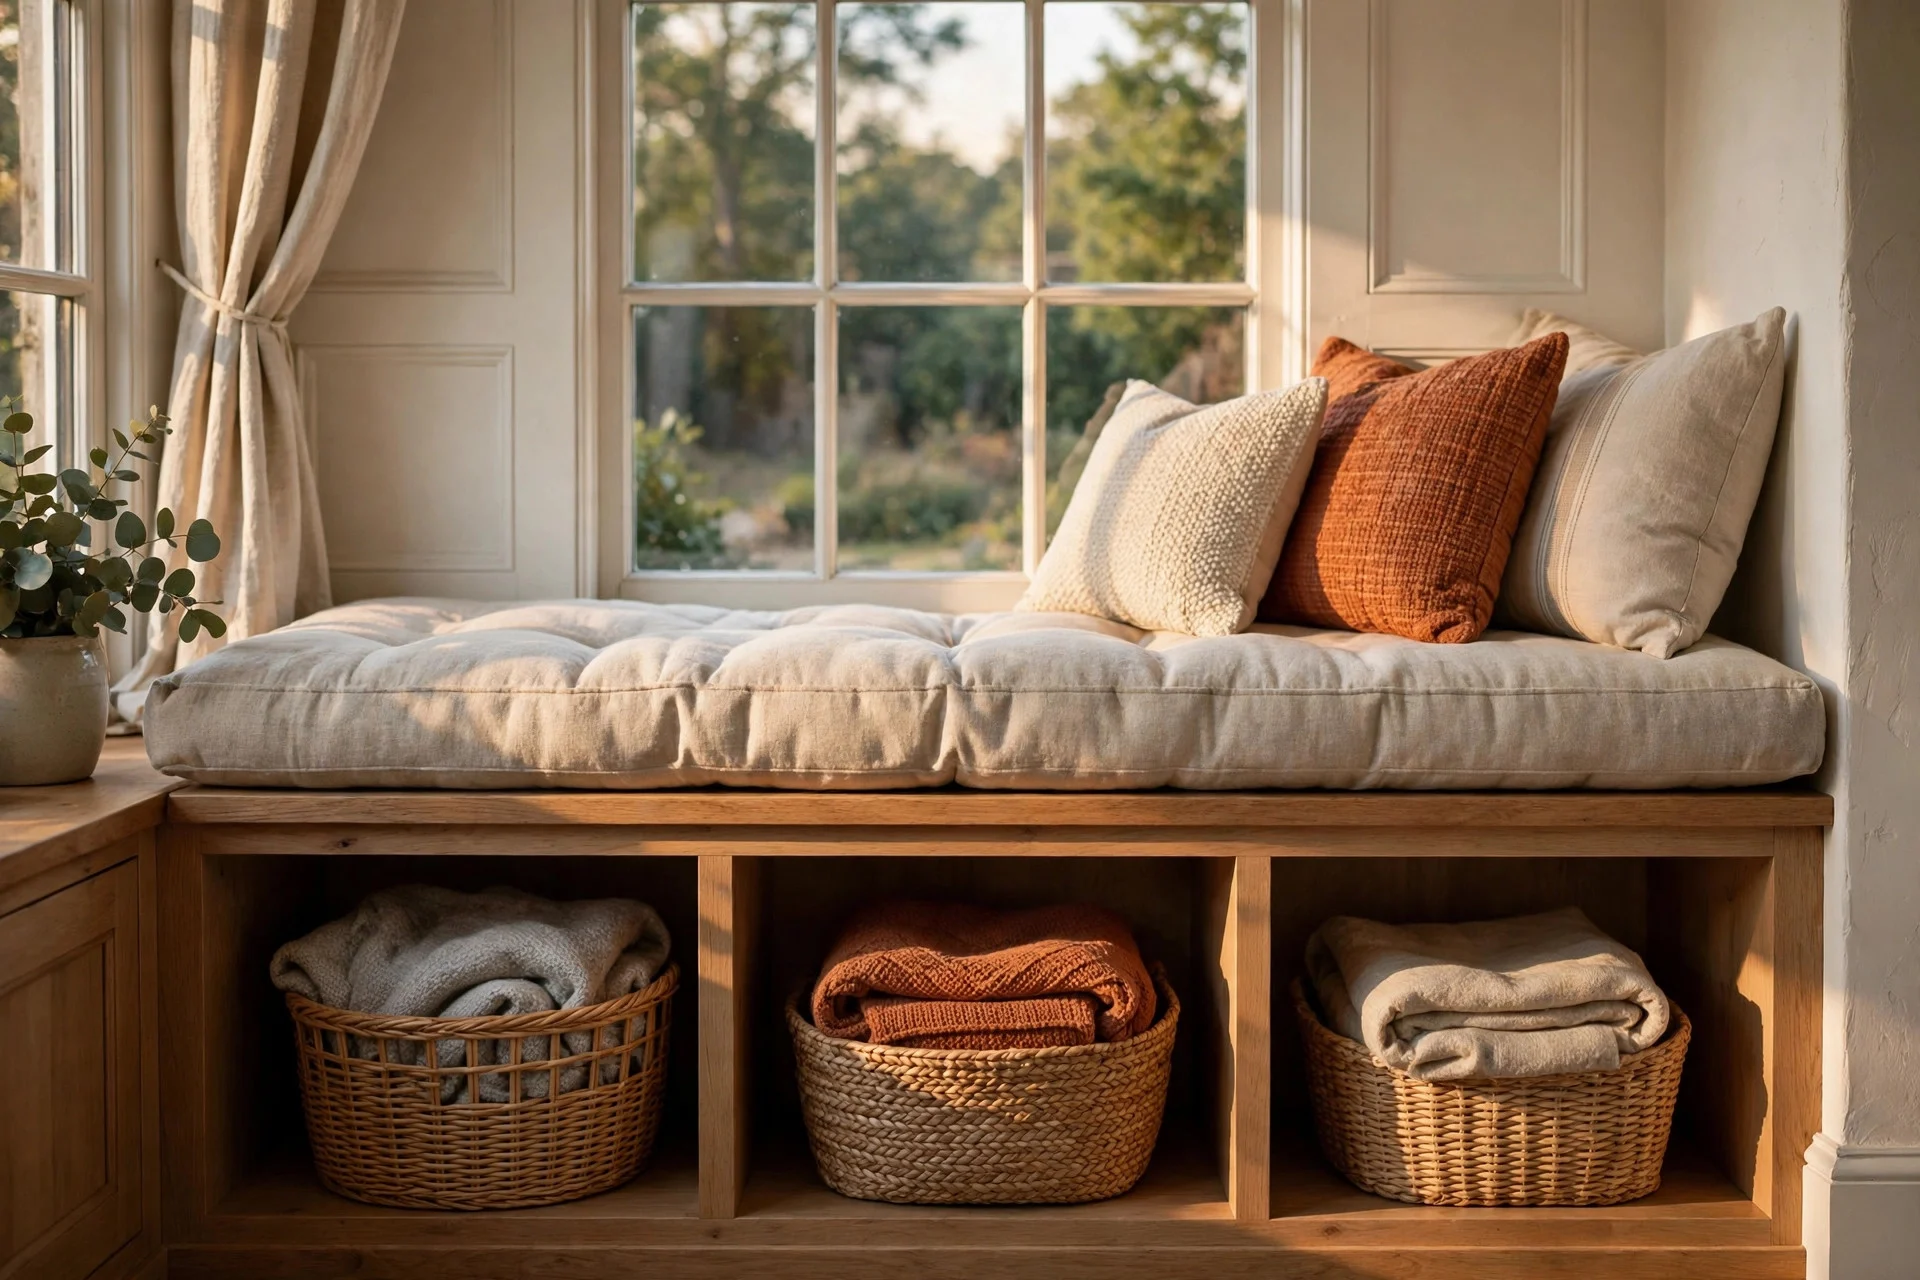
Open cubbies trade hidden storage for easy access: you can see what is inside and grab a throw without opening a drawer. Baskets soften a plain plywood base and hide clutter without extra doors.
Size each cubby to a basket you can actually buy. Standard baskets run about 12 to 15 inches wide, so plan dividers around that, leave a finger gap at the top of each opening, and keep heavier items low.
Cost: $250 to $650, including plywood, baskets, paint, and a cushion.
Difficulty: Easy to moderate; a good first built-in project.
Tip: Label baskets only if it helps you. In most bedrooms, one basket for throws, one for chargers and small items, and one for spare bedding is enough.
7. The Corner L-Shaped Window Seat
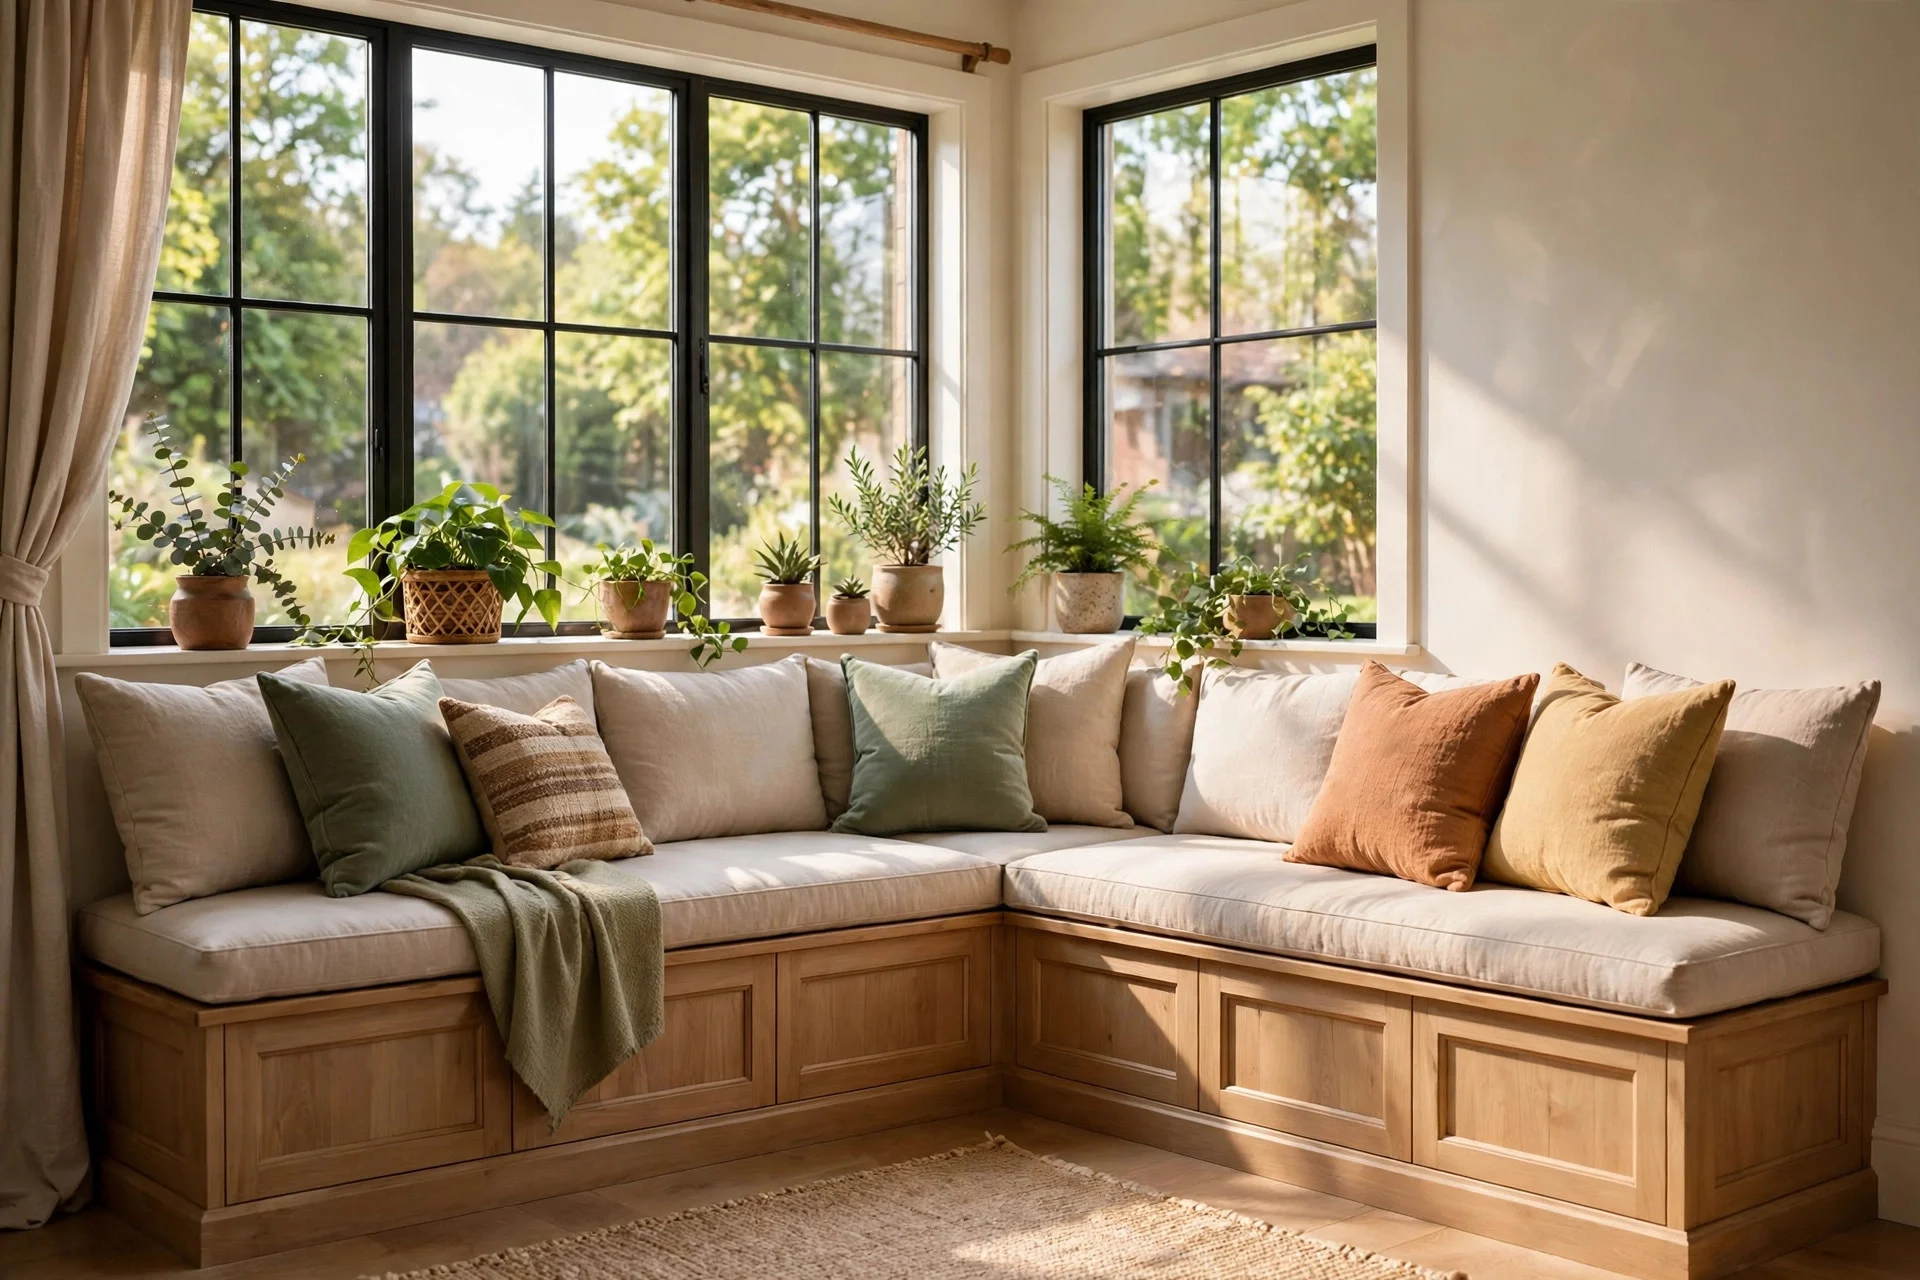
A corner window gives you room for an L-shaped seat that one person can stretch out on or two people can share. It turns an awkward corner into the best seat in the room.
Build the corner as one joined unit rather than two benches pushed together, or the joint will shift. Support the inside corner with a post or diagonal brace, and cut the cushion in two pieces so each section lifts for cleaning.
Cost: $450 to $1,200, depending on length, storage, and cushion fabric.
Difficulty: Moderate; the corner join needs careful measuring, but the rest is standard bench building.
Tip: Put a small side table or a wall-mounted light at the end of the longer leg, so the corner seat works for reading, not just lounging.
8. A Seat Over a Radiator, Done Safely
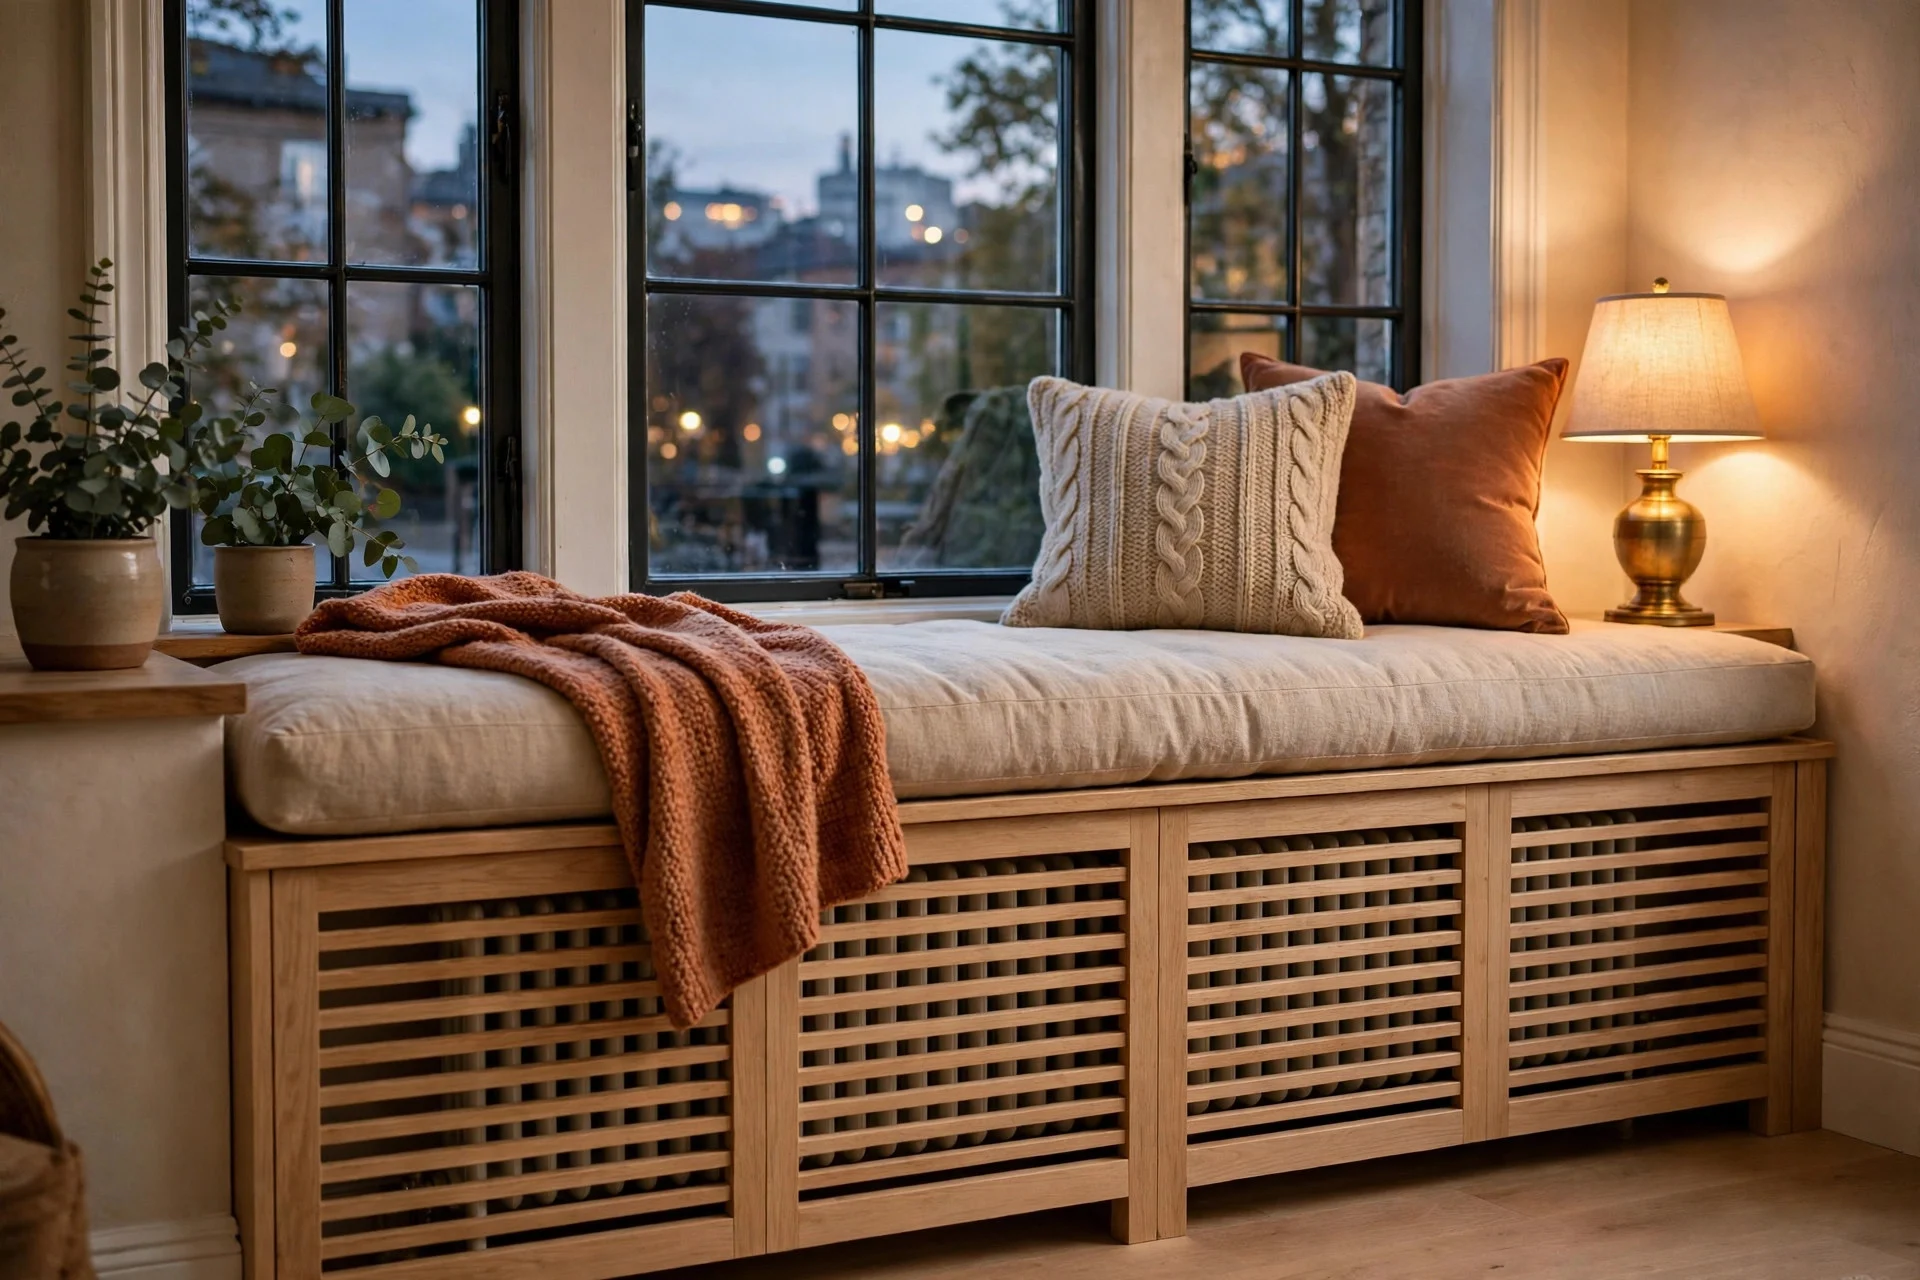
Many older bedrooms have a radiator right under the window, which seems to rule out a seat. It does not, as long as heat can still escape through a vented front and a gap at the top.
Keep at least 2 to 3 inches clear around the radiator, use a slatted front panel, and never box it in fully. Choose heat-tolerant paint, fit a removable cushion cover, and check with a heating engineer first if the radiator runs very hot.
Cost: $300 to $800, including vent panels, heat-tolerant paint, and a cushion.
Difficulty: Moderate; the venting details matter more than the carpentry.
Tip: Test the setup on a cold day with the heating on full before you commit to the final cushion fabric, and feel the underside of the seat after an hour.
Watch out: Never block a radiator valve or bleed point. You will need access to both for maintenance.
9. The Kid-Friendly Play and Homework Seat
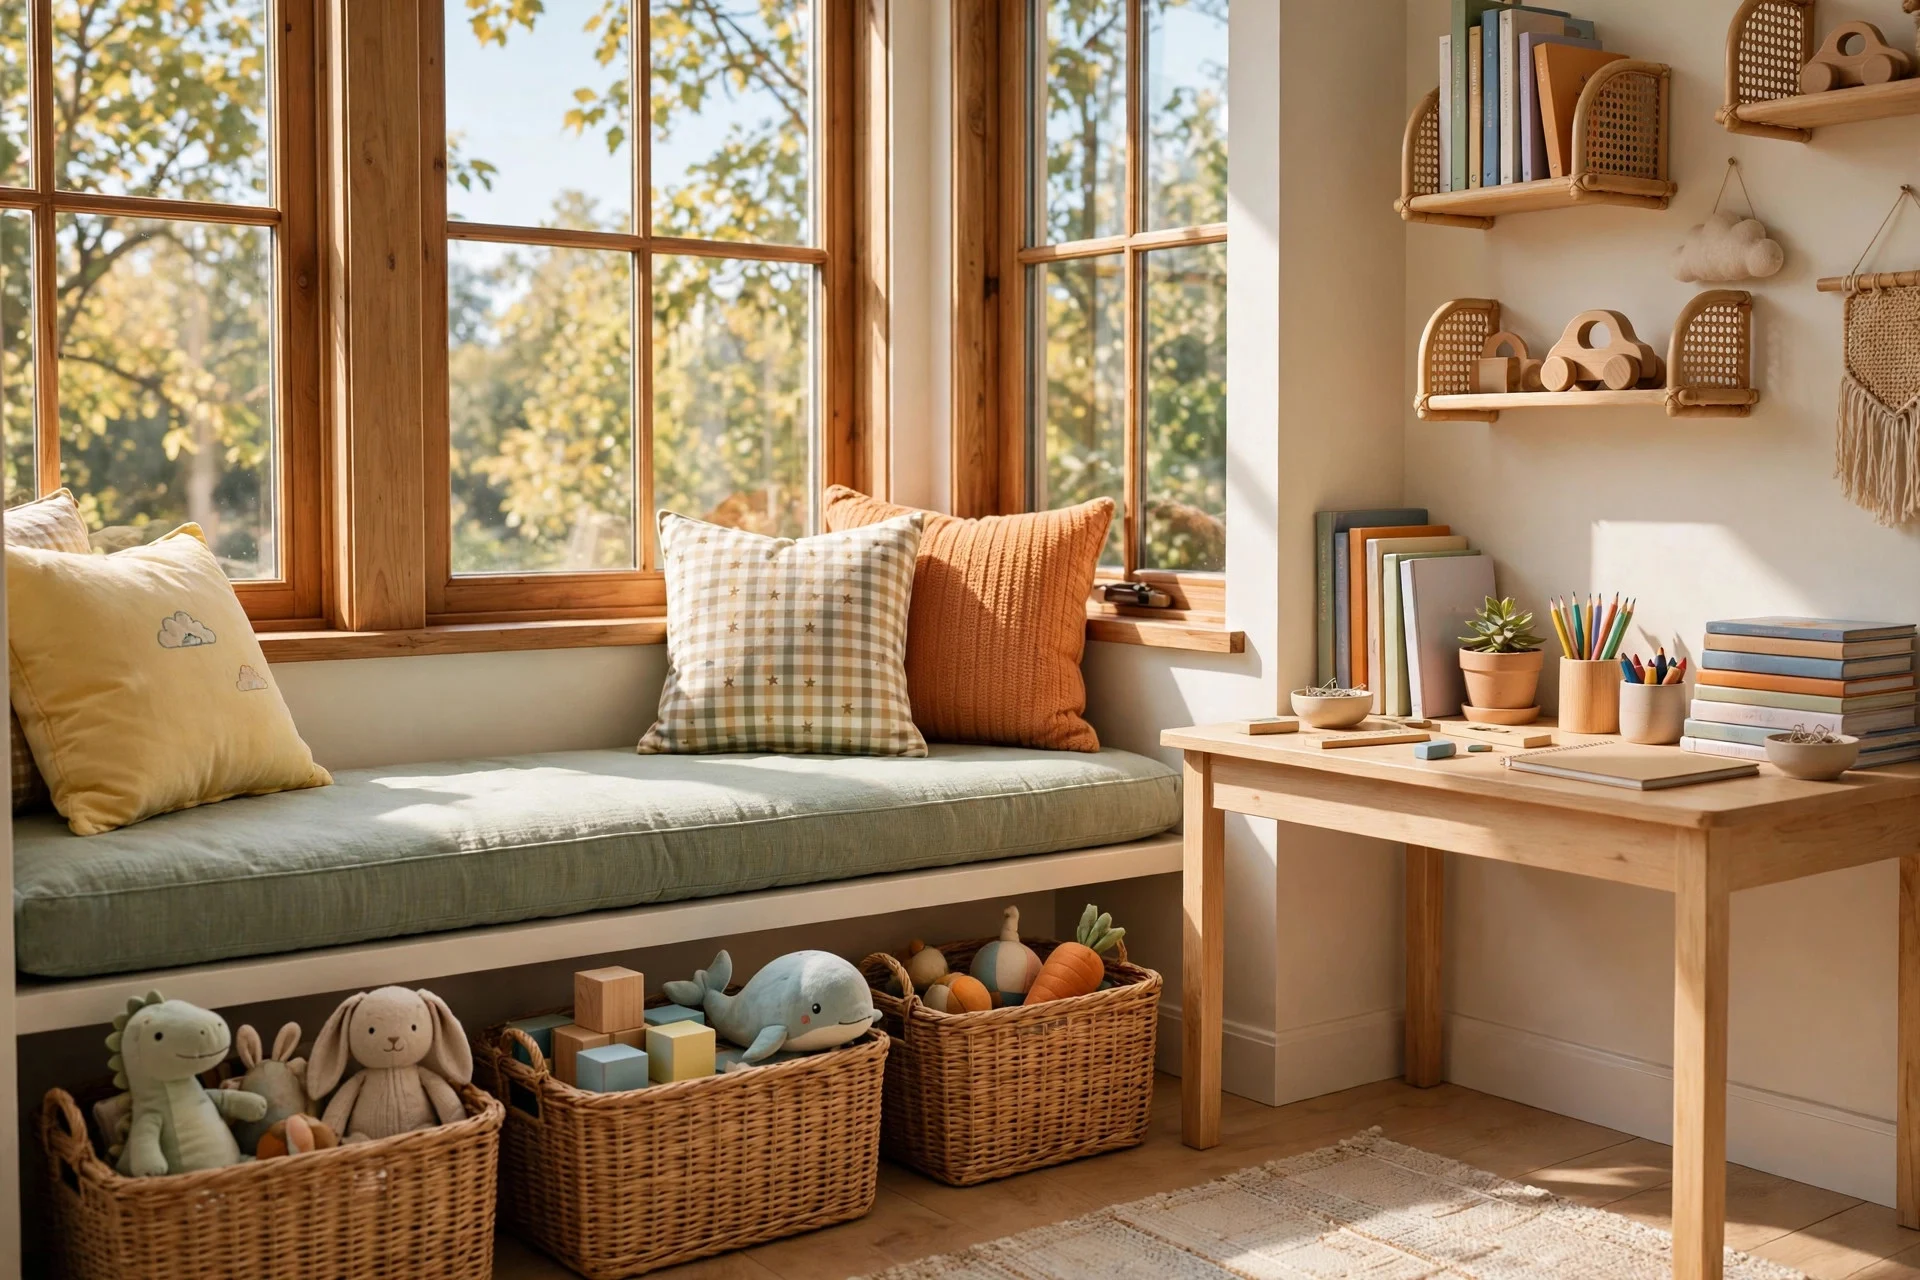
A window seat in a child’s bedroom can hold toys, books, and homework supplies in one spot, plus give kids a defined place to read that is not the bed. Keep it low, rounded, and easy to clean.
Round over all exposed edges, use soft-close hinges on lids, and pick a wipeable cushion fabric. Keep seat height around 15 to 17 inches for younger kids, and anchor the unit to the wall so it cannot tip.
Cost: $250 to $700, including the base, wipeable cushion, and storage baskets.
Difficulty: Easy to moderate; a weekend project for most DIYers.
Tip: Add a removable, washable cover in a darker fabric. Light covers in a kid’s room rarely stay light for long.
10. A Seat With a Lift-Up Lid and Deep Storage
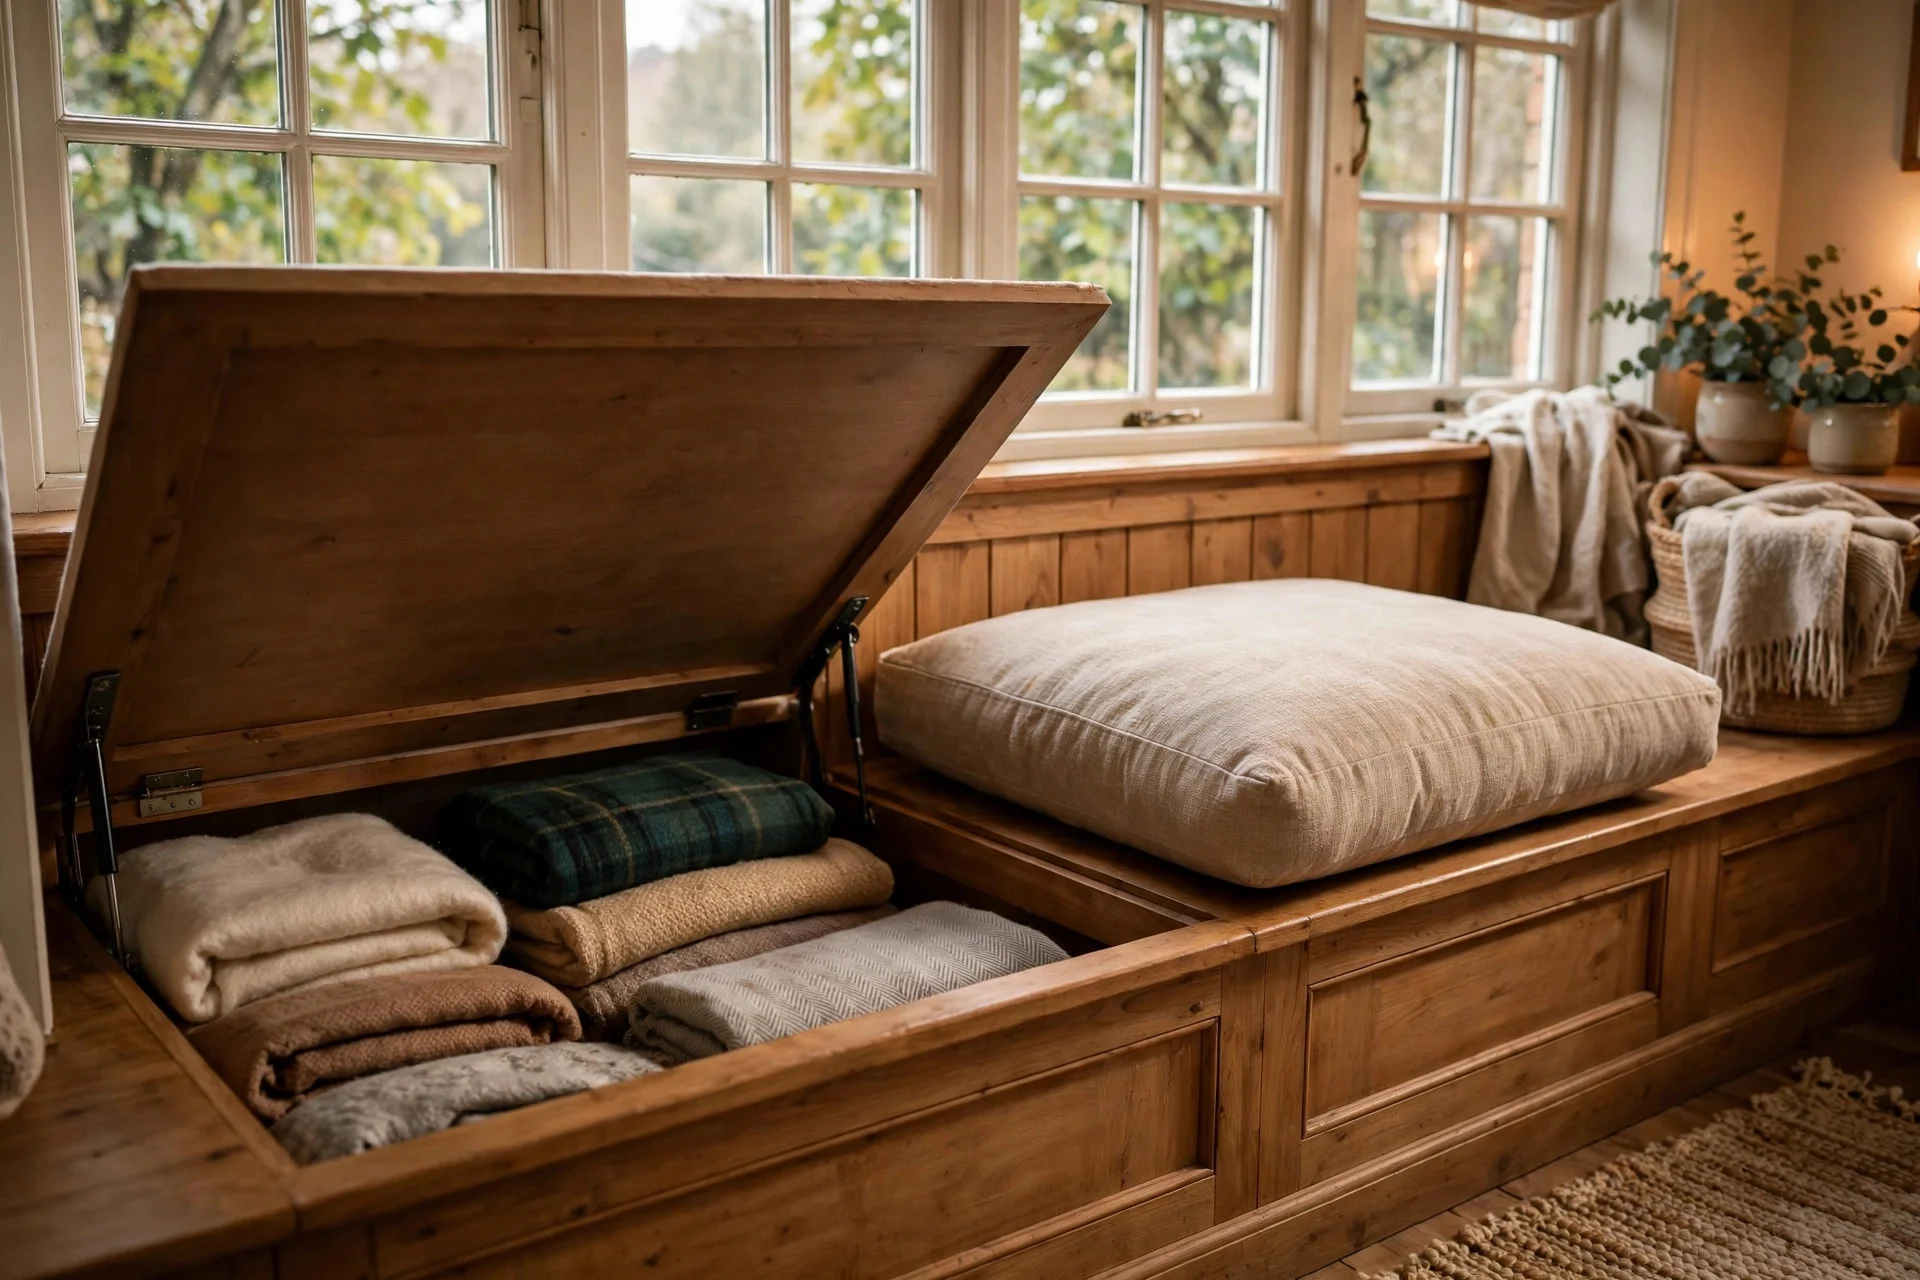
A lift-up lid gives you the deepest storage of any window seat design, since the whole base becomes one big box. It suits bulky items like spare duvets that do not fit in drawers, though you must clear the seat to open it.
Use lid stays that hold the lid open on their own, fit a finger recess so you can lift it without pinching fingers, and add one removable divider so small items do not slide to the far end.
Cost: $300 to $750, including plywood, lid stays, hinges, and a cushion.
Difficulty: Easy to moderate; the hinges and stays are the only fiddly part.
Tip: Put the items you use least at the back and the ones you grab most at the front, and label the inside of the lid if it helps others find things.
11. The Minimal Plywood Seat You Can Build in a Weekend
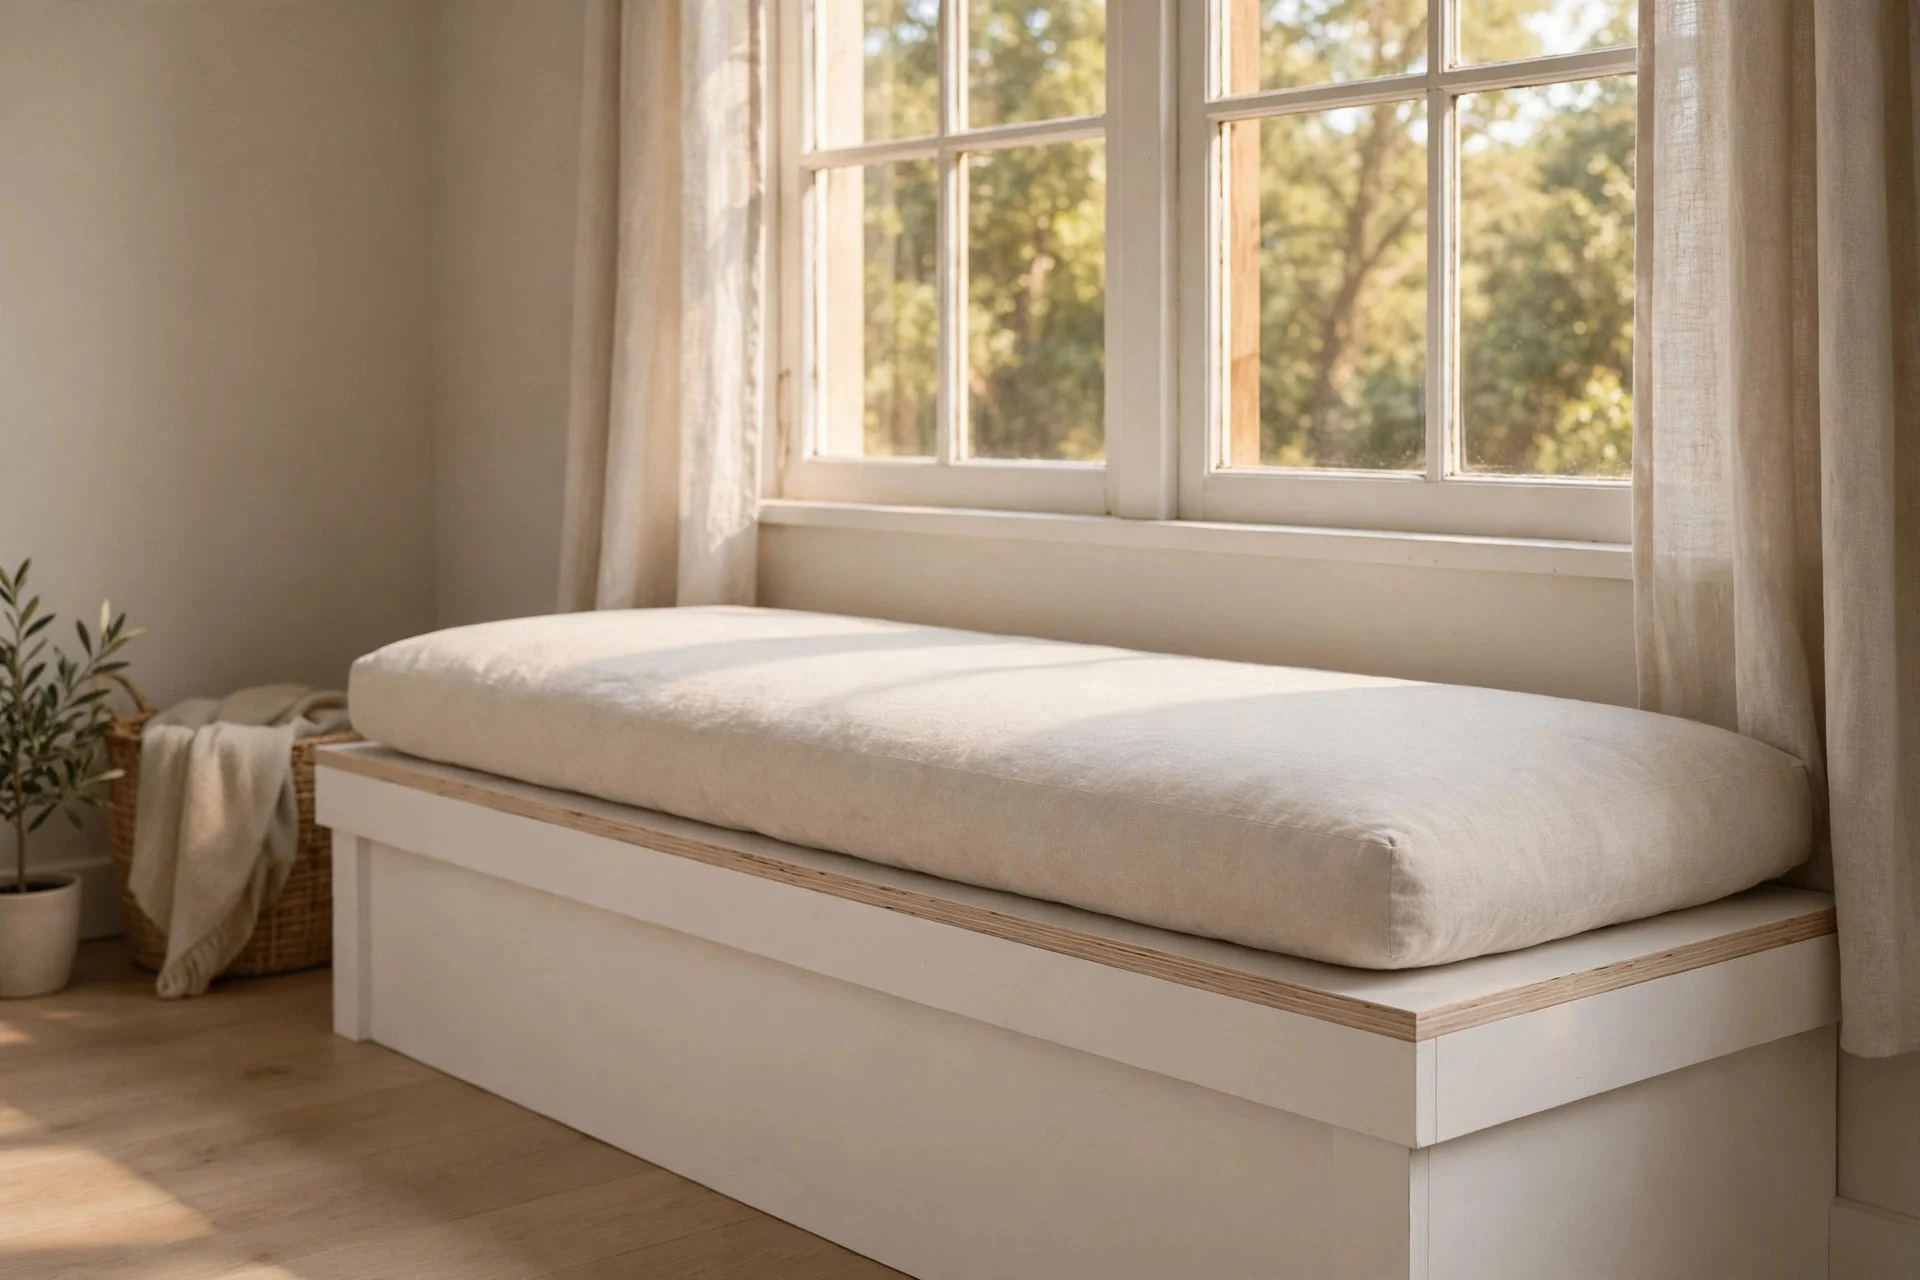
If you want a window seat without a month of weekends, this is the one. A simple plywood box, a painted finish, and a store-bought cushion can look clean and calm, and you can add drawers or doors later.
Cut the base from one sheet of 3/4-inch plywood where possible, screw and glue the joints, and add a solid wood edge strip so the plywood layers do not show. Sand to 120 grit, prime, and use two coats of durable satin paint.
Cost: $180 to $450, one of the lowest-cost builds in this guide.
Difficulty: Easy; most DIYers can finish it in a single weekend.
Tip: Paint the base the same color as your window trim. Matching trim makes a simple box look built-in for very little extra effort.
Watch out: A plain plywood box can look flat if the cushion is too thin, so do not cut corners on foam thickness.
12. A Window Seat With Side Tables and Reading Lights
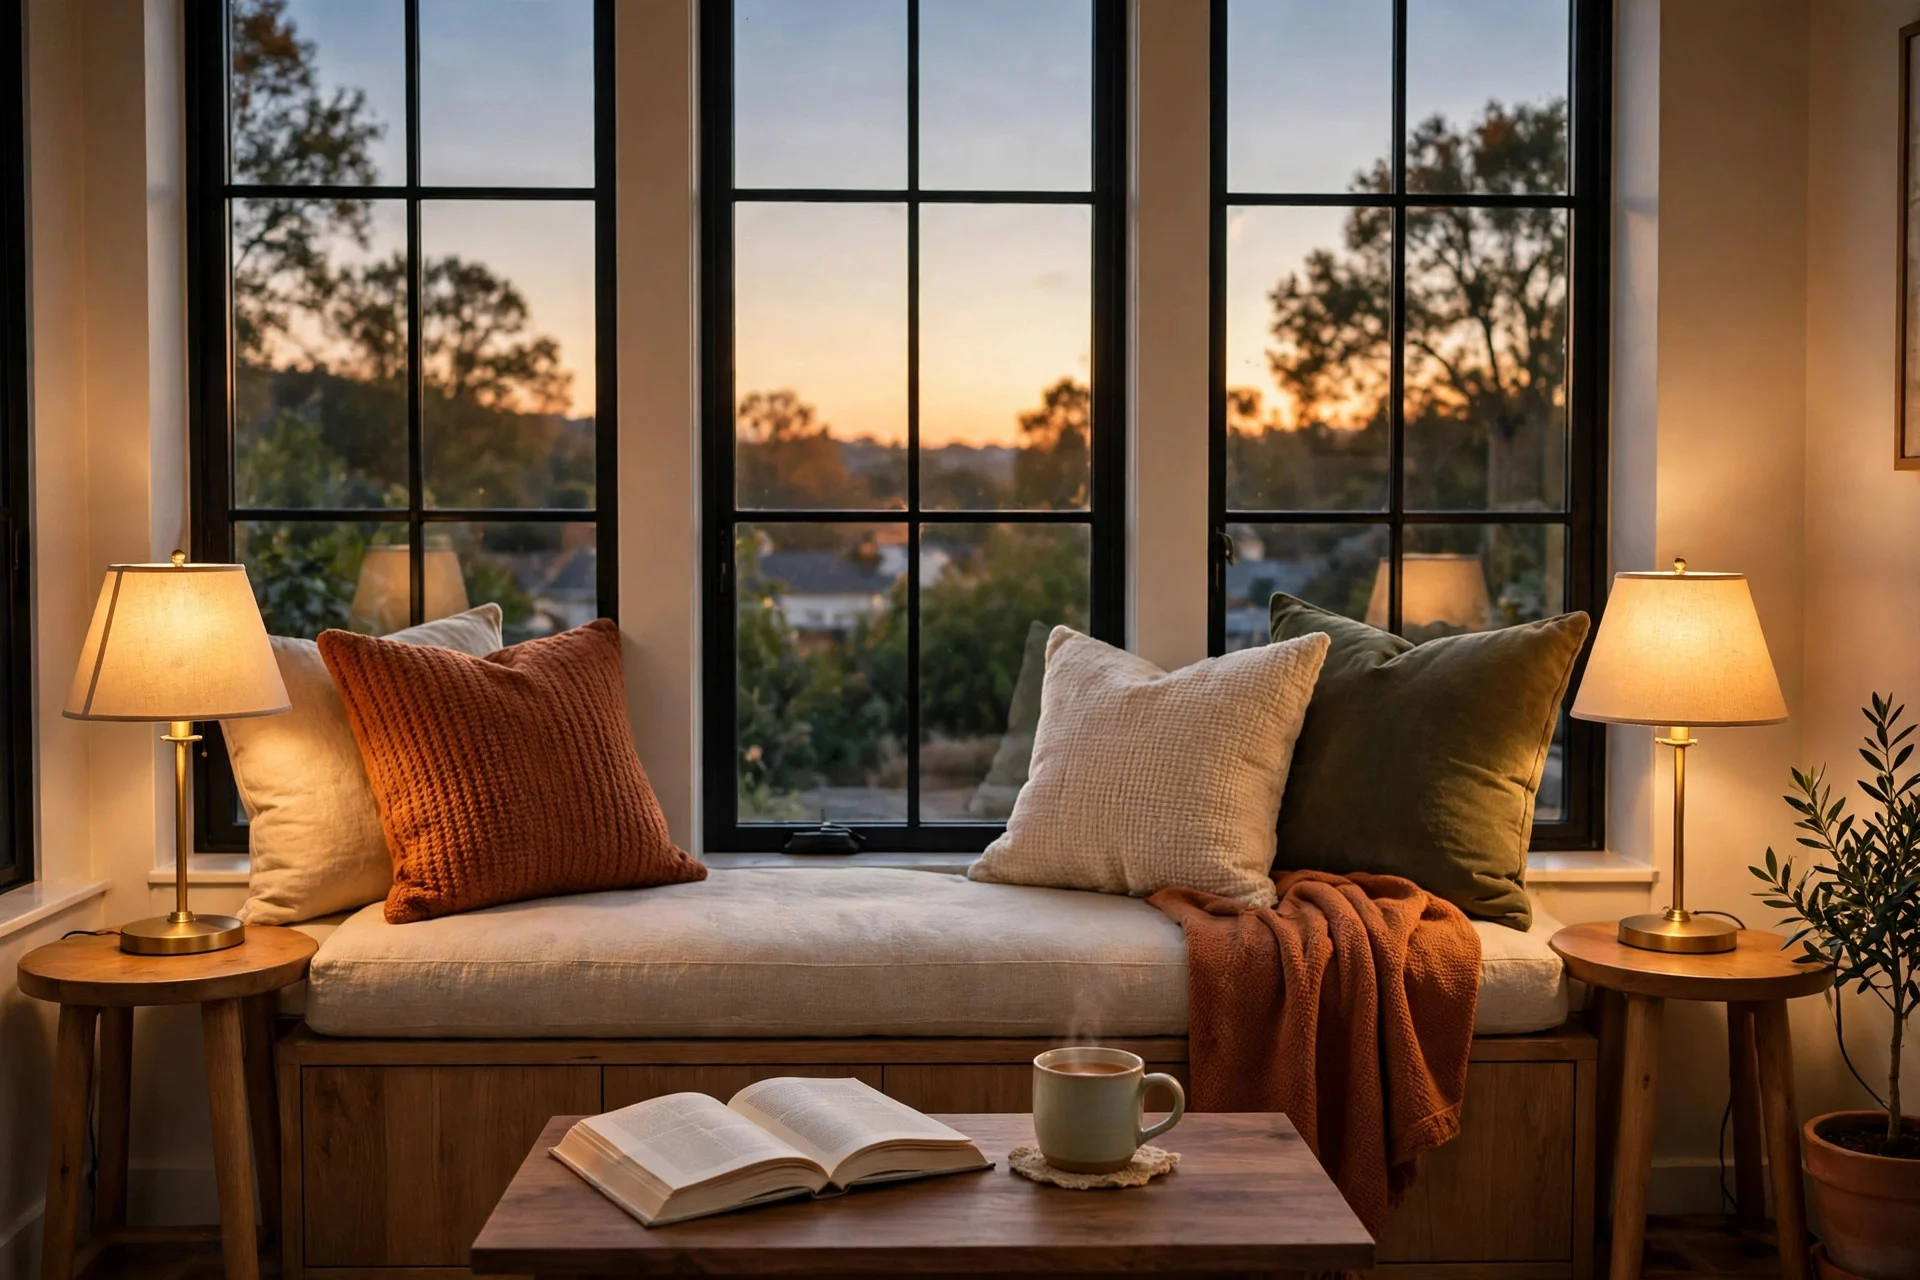
This last idea is less about the bench and more about making it usable every day. A seat with no place for a cup, a book, or a charger tends to sit empty, while a small side table and a good light turn it into a habit.
Add a narrow side table or wall shelf at each end of the seat, at about seat height. Fit a wall or clip light with warm white bulbs, run a cable channel to an outlet, and put the light on your dominant-hand side so your shadow does not fall on the page. For more on setting up a reading spot, see bedroom reading nook ideas and for storage that keeps the seat clear, see small bedroom storage ideas.
Cost: $80 to $350 if the bench already exists; $400 to $1,000 as a full new build with tables and lights.
Difficulty: Easy for the add-on version; moderate as a full build.
Tip: Keep the table surface small, about 12 to 14 inches wide. A big table crowds the seat and collects clutter fast.
The same rules apply to the bench itself: a seat height near 18 inches, a depth you can sit back on, and supports every couple of feet. If you are still choosing, start with the simplest base that fits your window, then add tables and storage once you know how you use the seat. You can also browse bedroom window treatment ideas before picking cushion fabric.
Frequently Asked Questions
How deep should a bedroom window seat be?
For sitting, aim for 18 to 22 inches deep, which lets you sit upright or lean back with a pillow. For lounging or sleeping, go deeper, around 28 to 36 inches, but check that the extra depth does not block a walkway or a door.
What is the best cushion thickness for a window seat?
A 3- to 4-inch high-density foam cushion works for most seats. Thinner cushions can feel hard after 20 minutes, while very thick ones raise the seat height too much. A removable, washable cover is worth the extra cost.
Can I build a window seat without carpentry experience?
Yes, if you pick a simple design like the plywood box in idea 11 or the open-cubby seat in idea 6. Both use straight cuts, screws, and glue, and most home improvement stores will cut plywood to size for you. Ask a carpenter for help with wall fixings if you are unsure about studs.
How much does a DIY window seat cost?
Most DIY window seats in this guide cost $180 to $1,400 in materials, depending on size, storage, and cushion quality. Simple plywood benches sit at the low end, while built-ins with drawers and shelves sit at the high end. Hiring a carpenter adds several hundred dollars, but painting and fitting the cushion yourself still saves money.
Do I need planning permission or a permit for a window seat?
In most homes, a window seat is interior furniture and needs no permit, since it does not change the structure or the outside of the house. Still check local rules if you alter the window, move a radiator, or touch wiring, and ask your landlord first if you rent.
A Quick Checklist Before You Build
Measure the window width and sill height, then tape the footprint on the floor. Decide on storage first, since drawers, cubbies, and lift-up lids change the base design. Check for vents, radiators, outlets, and studs, buy the cushion foam early so the finished height matches your plan, and paint the base before fitting the cushion.