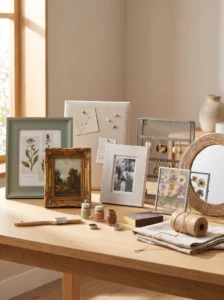
Every household has that box. Maybe it’s in the hall closet, maybe behind the spare-room door: a stack of frames from old photo gifts, thrift-store finds, and the ones that came free with a print and never matched anything. They’re too solid to throw out and too dated to hang, so they sit there year after year.
The trouble is that most people look at an old frame and see the finish. Orange-toned oak, shiny gold plastic, a faded black that’s gone gray at the corners. The finish is the easiest part to change. What you’re really holding is a ready-made border, a flat backing, and (usually) a sheet of glass, which are the three things half of today’s craft projects start with.
That’s the useful way to think about it. A frame can be repainted, rewrapped, or reused for something that has nothing to do with photos at all: a memo board, a tray, a mirror, an earring display. And since most of these ideas need little more than a can of paint and an afternoon, they suit a weekend rather than a month-long project.
Below are 17 ideas, with sizing, materials, and the mistakes that tend to trip people up. After that come a comparison table, a short buying guide, and answers to the questions that come up most often.
1. Give It a Matte Coat of Unexpected Color
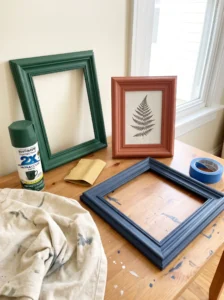
A single can of spray paint can make a tired frame look deliberate. Skip the glossy black and white everyone defaults to, and try deep green, dusty terracotta, or a muted navy. Those shades sit well against painted walls and make the frame part of the room instead of a leftover.
Lightly sand the surface first, then wipe off the dust. Apply thin coats from about 10 inches away, letting each dry before the next. Two thin coats beat one heavy one every time, since heavy coats drip and pool in the corners. A matte or satin finish hides flaws better than gloss, particularly on old plastic frames with shiny seams.
Work outdoors or somewhere well ventilated, and tape off the glass or remove it entirely. Prop the frame on upturned cups so you can reach every edge.
A small trick worth knowing: paint the back edge too. When the frame hangs slightly off the wall, an unpainted edge shows as a pale line and gives the project away.
2. Rub On a Metallic Finish
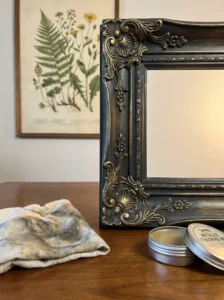
Rub-on metallic wax makes plain wood look like an antique. It comes in small pots, and a fingertip or soft cloth is all you need. Gold, brass, and pewter are the usual choices, with copper for warmer rooms.
The magic is in the base. Paint the frame a dark color first, such as deep brown, black, or charcoal, and let it dry completely. Then dab the wax over the raised edges and corners, where real wear would show. Leave the flat areas mostly dark. The contrast is what gives it age.
This works best on frames with some carved detail or a stepped profile. Flat, smooth frames can look painted-on, so pick a pattern with some dimension. Buff gently with a clean cloth once the wax sets.
The common mistake is covering everything. Too much metallic looks like craft-store gold. Use a lighter touch than you think you need, then step back and add more only where the frame looks flat. Hung in a dim hallway, a frame like this catches the light in an unexpectedly rich way.
3. Whitewash for a Soft, Weathered Look
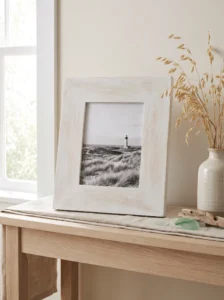
Whitewashing keeps the wood grain visible, which is why it suits frames with nice texture underneath a dull finish. Mix one part white paint with one part water, brush it on, and wipe back with a rag before it dries. What’s left sits in the grain and fades into the rest.
It suits coastal rooms, farmhouse kitchens, and anywhere with natural fibers and pale furniture. Pair it with linen mats and black-and-white photographs for a calm, airy display.
Start with a stripped or lightly sanded frame. A glossy varnish will repel the wash and leave it streaky. If the finish is thick, a quick pass with sandpaper roughens it enough to grab. Test on the back first, because every wood takes the color differently, and pine tends to turn yellowish under white.
Seal with a thin coat of matte clear sealer if the frame will hang in a humid space like a bathroom or kitchen. The effect is gentle, almost like sun-bleached driftwood, and it’s one of the easiest ways to make mismatched frames look related.
4. Turn It Into a Dry-Erase Board
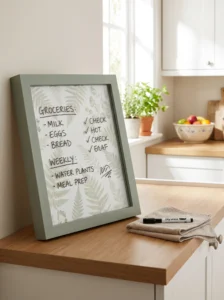
A glass-front frame becomes a dry-erase board with almost no effort. Slide a piece of fabric or patterned paper behind the glass, close it up, and write directly on the glass with a dry-erase marker. A damp cloth wipes it clean, and you can swap the backing whenever you fancy a change.
It suits kitchens, entryways, and home offices, where reminders and weekly plans tend to live. Pick a landscape-orientation frame around 11 by 14 or 16 by 20 inches so there’s room for real lists. Gingham, botanical prints, or a soft stripe look good behind the writing without overwhelming it.
Choose fabric or paper in a mid-light tone. Dark backgrounds make marker lines hard to read, and busy patterns do the same.
Clean the glass thoroughly before the first use, since any residue holds ink. If the markers ghost after a while, a tiny dab of rubbing alcohol on a cloth clears it.
In daily life, the best part is that it doesn’t look like a whiteboard. It looks like art, and it still catches the grocery list before anyone leaves the house.
5. Wrap It in Fabric for a Memo Board
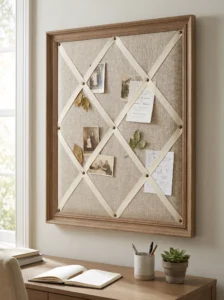
Fabric-covered boards turn frames into places to pin notes, invitations, and photos, and they look softer than corkboard. The basic build is simple: remove the glass, stretch batting and fabric over a piece of foam board or thin plywood, staple at the back, and slot it into the frame.
Linen, velvet, and thick cotton prints each give a different mood. Velvet in forest green or burgundy looks luxe in an office. Linen suits a bedroom or kitchen. Avoid thin or stretchy fabrics, which wrinkle under tension.
For function, run ribbon diagonally across the front in a crisscross pattern and fix it at the intersections with small upholstery tacks. You can slide cards and photos under the ribbon without pinholes.
Keep the batting thin, about a quarter inch, or the frame lip will crowd the surface and make the board feel cramped. Pull the fabric tight and staple from the center outward, working toward the corners, so the weave stays straight.
A frame like this works well near a desk, since the surface takes pins without looking messy, and the ribbon does most of the organizing for you.
6. Swap the Glass for Cork
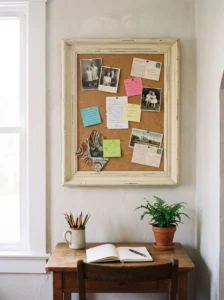
Cork is cheap, forgiving, and easier to work with than fabric. Cut a cork sheet or roll to the size of the frame opening, glue it to the backing board, and reinsert it. A pack of pushpins is the only other thing you need.
This one suits kids’ rooms, craft corners, and study areas, where things change often. A frame with a wide, chunky profile makes a plain cork panel look substantial rather than flimsy. Paint the frame in a solid color that suits the room, and the cork becomes a warm contrast.
Choose cork at least a quarter-inch thick if you want pins to stay in. Thin sheets let go and drop things on the floor.
For a more finished look, paint the cork itself with a thin wash of color, or cover only part of it with fabric so it reads as design instead of a classroom bulletin board.
Because cork takes marks, rotate what you pin there. Leaving things up for months fades the surface, and a fresh rotation keeps the board feeling like part of the room instead of a catch-all for papers.
7. Build a Jewelry Organizer With Mesh
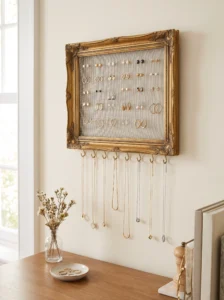
Chicken wire or a metal screen turns a frame into a place to hang earrings and necklaces. Staple or glue the mesh across the opening where the glass was, and the holes hold earring posts and hooks in place.
It suits bedrooms, dressing areas, and the inside of a closet door. A frame around 12 by 16 inches takes a good number of earrings. Larger sizes give room for small hooks along the bottom for necklaces and bracelets.
Pick a wire gauge that’s sturdy enough not to sag. Fine fiberglass screen is fine for light earrings, while stiffer galvanized hardware cloth is better for heavy chain necklaces. File or tape any sharp wire ends.
For style, paint the frame in a soft neutral or a bold accent. Brass or antique gold looks lovely against jewelry, and a black frame with dark mesh turns the pieces into the focal point.
The everyday perk is visibility. When every pair of earrings is on display, you actually wear more of them, and the pairs stop disappearing into drawers.
8. Make It Into a Serving Tray
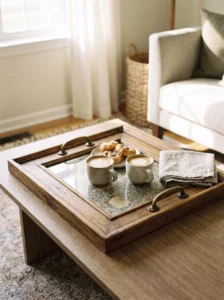
With a few changes, a flat, sturdy frame becomes a good-looking tray. Remove the backing, keep the glass, and put a decorative paper or fabric under it. Screw a pair of drawer handles to the short sides, and you’re done.
It suits breakfast in bed, a coffee table centerpiece, and a bar setup. Pick a frame at least 14 by 18 inches, or the tray feels cramped. A wider profile gives a bit of lip to hold things in place.
Seal the frame well, because spills happen. A coat of polyurethane protects the wood, and a cork or felt pad under each corner stops it from scratching furniture.
Use handles that match the room: brass for warm interiors, black for modern, ceramic knobs for a farmhouse feel. Screw them in from beneath so the screws don’t show on top.
Be careful with the glass. Tempered glass is safer if you can get it, and tape the edges with a strip of washi tape or edge trim so it doesn’t catch fingers. Don’t use it for anything heavy, since glass in a thin frame can crack.
9. Put a Mirror in the Frame
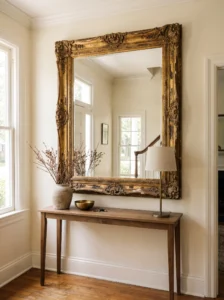
An old frame with a mirror panel behind it costs far less than buying a new decorative mirror. Take the glass and backing out, then have a glass shop cut a mirror to size, or use a precut mirror sheet that fits.
This one suits entryways, bathrooms, and narrow hallways. Frames with a wider, flat profile work especially well, because they mimic the heavy borders on designer mirrors. A frame between 18 by 24 and 24 by 36 inches suits most walls.
For a vintage look, antique the mirror: spritz a mix of vinegar and water on the back, then dab it with a sponge to create soft aging. Do a test piece first.
Hanging a mirror needs sturdier hardware than hanging a print. Use two D-rings or heavy-duty wire, and rate the anchors for the weight. Mirror glass is heavier than most people expect.
Positioned opposite a window, it bounces daylight into a dim corner, and the entry suddenly feels brighter and a little larger without any other change.
10. Frame Pressed Flowers Between Glass
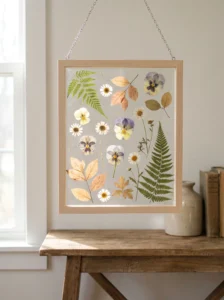
Pressed flowers trapped between two panes look delicate, and they cost almost nothing if you grow your own. Choose a frame with a double-glass construction, or a floating-frame style that holds a pane on each side.
It suits bedrooms, entry tables, and gift-making. Flat flowers like pansies, ferns, and small daisies press well, and leaves in autumn colors look wonderful. Press them between sheets of paper under heavy books for a couple of weeks before arranging.
Lay them out on a clean pane, leaving space around the edges. Resist crowding. A loose arrangement with a lot of negative space looks more modern than a packed bouquet.
Choose a frame in a pale wood or white, which doesn’t compete with the colors. Seal the back well, since moisture is the enemy of pressed plants, and keep the piece away from direct sun, which fades pigments over time.
Hanging near a window shows the shadows through the glass in the afternoon, and the arrangement shifts through the day.
11. Create a Gallery Wall With Mismatched Frames, Painted Alike
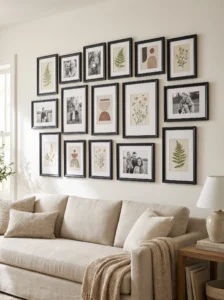
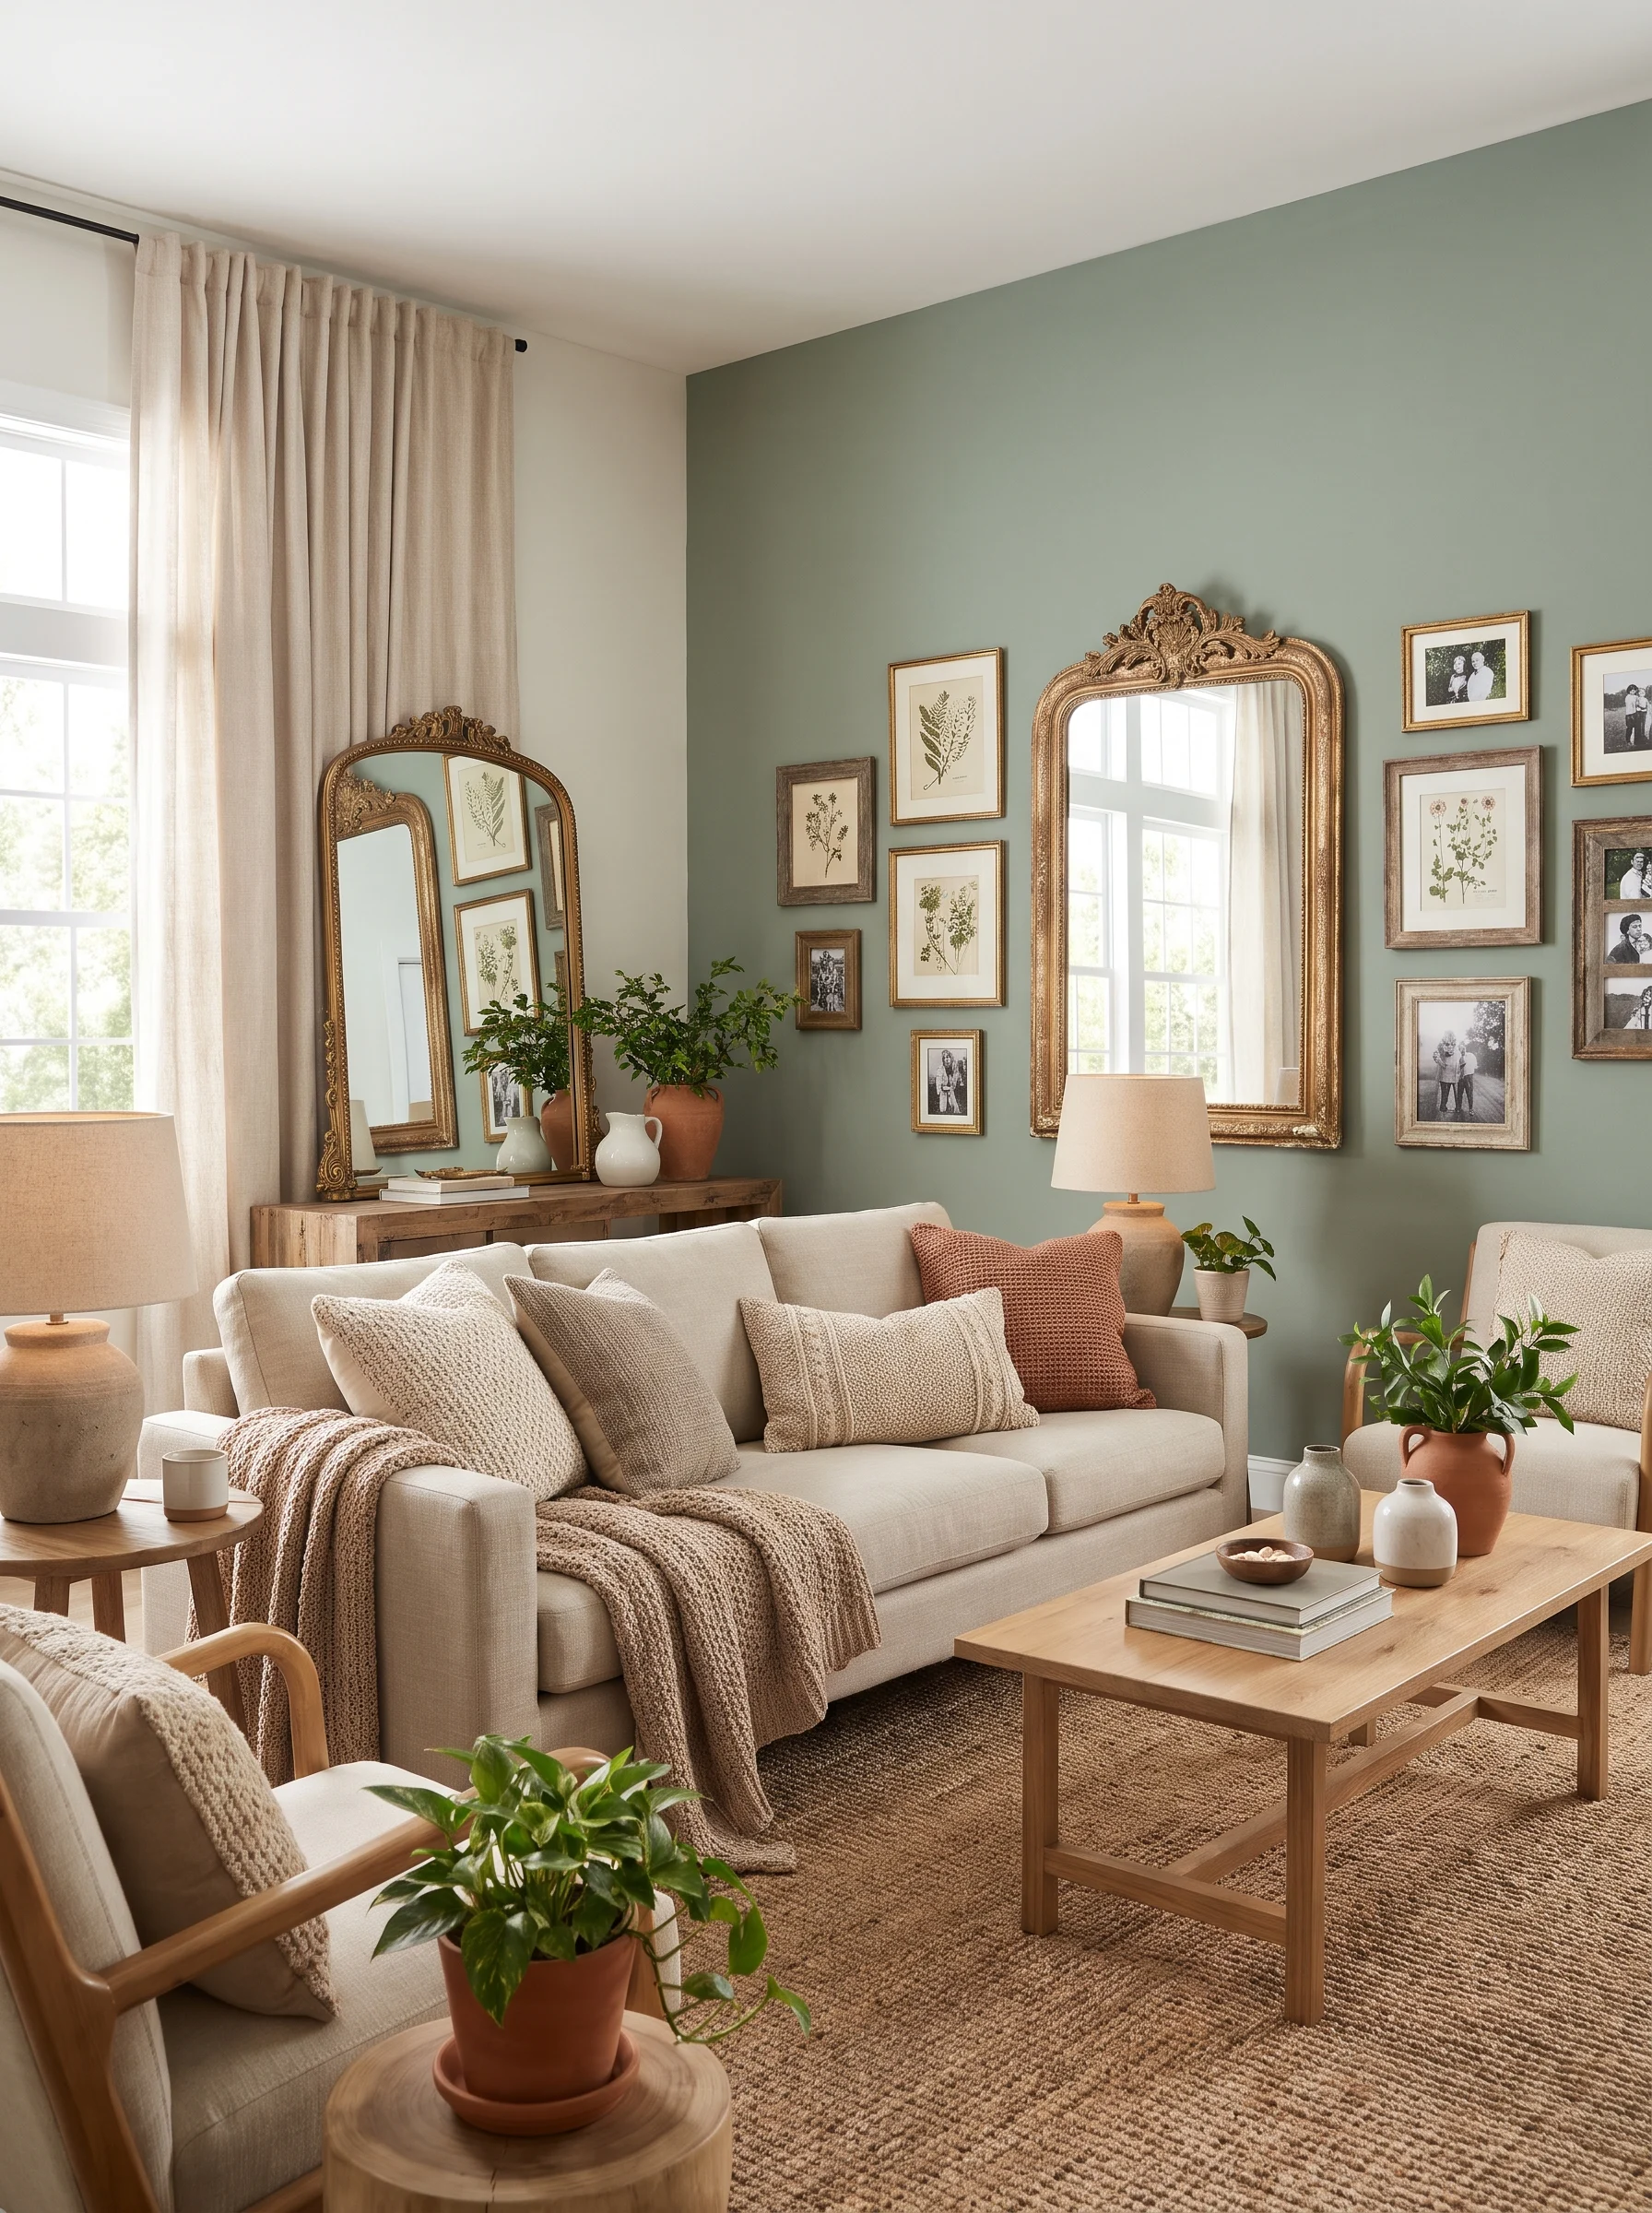
Mismatched frames in different sizes and finishes usually look chaotic. A single coat of the same paint pulls them together. Pick one color, such as matte black, warm white, or soft sage, and the shapes become the variation.
It suits staircases, long hallways, and the wall above a sofa. Mix large and small, tall and wide. Lay the frames out on the floor first and arrange them into a loose rectangle or oval. Photograph the layout, so you can copy it on the wall.
Hang the center of the arrangement at roughly eye level, about 57 to 60 inches from the floor, and keep gaps between frames consistent, around 2 to 3 inches.
Paper templates stuck to the wall with painter’s tape let you test positions before drilling. It’s the best trick for avoiding unnecessary holes.
The common mistake is using too many sizes at once. Group a few large pieces with several medium ones, then fill the gaps with small frames. The wall ends up looking collected rather than cluttered, which is the whole idea.
12. Refresh the Mat and Keep the Frame
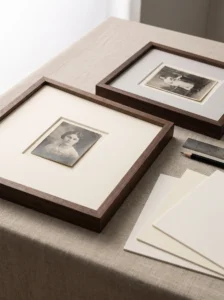
Sometimes the frame is fine and the mat is the problem. A new, oversized mat changes the whole look of a print or photograph, and it’s the cheapest upgrade here. Standard mats come in white, ivory, and black, while specialty options include soft gray, sage, and warm cream.
It suits family photographs, travel prints, and small artwork that gets lost in a big frame. A wide mat makes a small picture look important, and a double mat adds depth.
A good rule is to make the mat border at least 2 to 3 inches wide. Narrow borders look like a mistake, and a wider one gives the image breathing room.
Choose a mat color that echoes a tone in the image, not an exact match. A cream mat suits warm sepia photographs, while a pale gray one flatters black-and-white prints.
If you cut your own, use acid-free board so the image doesn’t yellow. Pre-cut mats are cheaper and easier for beginners, and they save you from crooked corners. The effect is quiet but obvious once it’s done.
13. Wrap It in Rope or Twine
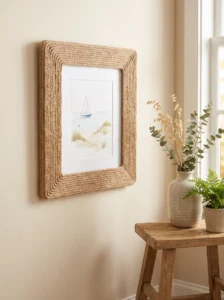
A coil of natural rope turns a plain frame into something coastal and tactile. Glue it around the frame in tight, even rows, starting from the inside edge and working out. Hot glue is quick, while a strong craft adhesive gives more time to adjust.
It suits beach-style bedrooms, sunrooms, and bathrooms, where texture matters. Pair it with a mirror, a seashell print, or a map. Thicker rope looks bolder and takes less time, while thin twine gives a finer, more detailed finish.
Keep the corners clean. Cut the rope at an angle for a tidy joint, and tuck the end behind the frame. Press firmly so no gaps show.
Moisture can discolor natural rope over time, so avoid placing it in direct steam. A light mist of clear sealant helps resist dust, and a quick vacuum with a brush attachment keeps it fresh.
Inside a bathroom with white tile and wood accents, a rope-wrapped mirror frame feels warm and relaxed, and it looks more expensive than the materials suggest.
14. Add Texture With Joint Compound
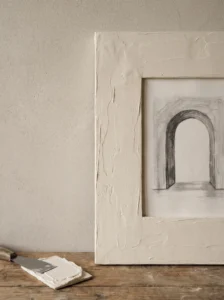
Joint compound, the stuff used for drywall, can give a flat frame a plaster-like surface. Spread it on with a putty knife in uneven strokes, let it dry, then paint. The result looks like a hand-finished Italian frame.
It suits flat or plain frames that need character. Work in sections and vary the thickness, with some areas thin and others piled up. A rough, uneven surface looks more natural than a perfectly smooth one.
Once dry, sand lightly to remove sharp ridges, then paint in warm white, soft taupe, or clay. Matte paint shows off the texture, and a diluted dark wash rubbed into the crevices adds depth.
Keep it off the glass opening. Tape the inside edge before you start, since dried compound is hard to scrape from glass. If the frame will be handled, seal it with a clear matte coat so the surface doesn’t flake.
Mistakes usually involve over-applying. A thin layer is more than enough, and heavy buildup can crack as it dries. In a living room with plain walls, a textured frame becomes a subtle focal point, particularly around a black-and-white photograph.
15. Build a Shadow Box
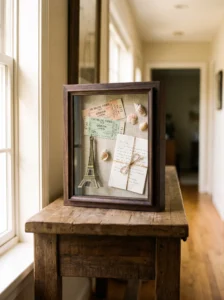
A deep frame makes an excellent shadow box. Remove the glass, add a backing in linen or colored paper, and use small pins or glue dots to hold objects inside. Then replace the glass in front.
It suits keepsakes: ticket stubs, small toys, a baby’s first shoe, travel souvenirs, a collection of seashells. The depth lets objects sit away from the glass, which gives the display a three-dimensional look.
Choose a frame with at least an inch of interior depth. If yours is too shallow, add a spacer strip, which you can make from thin wood trim glued inside the frame edge.
Arrange items on the table first, and leave generous space between pieces. A neutral background, such as oatmeal linen or soft gray, lets objects stand out.
Use acid-free adhesive and mounting materials for anything you care about. Cheap glue yellows and damages paper over time. Hung in a hallway or bedroom, a shadow box makes a quiet, personal display, and visitors tend to stop and look at it for longer than at a standard print.
16. Make a Key and Mail Organizer
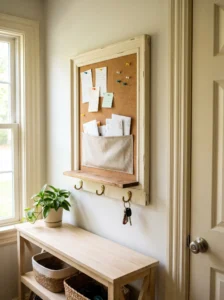
A frame can hold the clutter that normally lands on the entryway table. Build a small shelf at the bottom, attach a row of hooks, and add a cork or fabric panel for notes and mail.
It suits entryways, mudrooms, and the area by the back door. Pick a frame about 16 by 20 inches, which leaves room for three or four hooks, a small shelf, and a note panel.
Use a strip of thin wood for the shelf, glued and screwed from behind into the frame. Brass or black hooks look good against most colors, and a little tray on the shelf catches loose change and earbuds.
Paint the frame to match the door or trim so it reads as built-in. For extra function, add a small mail slot with a piece of wire mesh or a ribbon pocket.
Mount at a comfortable height near the door, around 54 to 60 inches from the floor, and make sure the hooks are strong enough for the heaviest key ring. When the keys and mail have a place to land, mornings feel noticeably less frantic, and the table underneath stays clear.
17. Frame Fabric, Wallpaper, or Wrapping Paper as Cheap Art
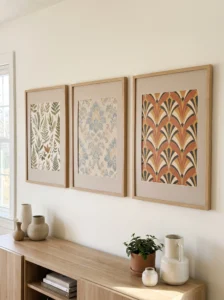
Large art is expensive, but a remnant of beautiful fabric, a wallpaper sample, or a sheet of good wrapping paper makes striking wall decor for almost nothing. Pick a pattern you love, trim it to size, and put it in a frame with a wide mat.
It suits small walls, above-bed spaces, and rental homes where you want color without commitment. Botanical prints, geometric patterns, and bold florals all work. Choose a pattern with a large scale so it reads from a distance.
Iron fabric flat first, and attach it to a piece of stiff backing with spray adhesive so it doesn’t sag. Wallpaper can go straight into the frame, though thin papers may wrinkle, so use a backing board.
Grouping two or three in a row gives the effect of a larger piece. Keep the frames identical for a clean look, and mix up the patterns within one color family.
The satisfying part is the change. When you tire of a pattern, swap it for another in ten minutes. Few decor projects are so easy to refresh, and the cost is closer to a coffee than an art print.
Quick Comparison: Which Frame Makeover Fits You?
| Type | Best Use | Material | Style/Vibe | Difficulty Level |
|---|---|---|---|---|
| Matte color repaint | Mismatched frames, quick updates | Spray or craft paint | Clean, modern | Easy |
| Metallic rub-on finish | Carved or stepped frames | Wax over dark paint | Antique, rich | Moderate |
| Fabric memo board | Home offices, kitchens | Fabric, batting, ribbon | Soft, tailored | Moderate |
| Jewelry organizer | Bedrooms, closets | Metal mesh, paint | Practical, boutique | Easy |
| Mirror frame | Entryways, bathrooms | Cut mirror, wood frame | Classic, bright | Advanced |
| Joint compound texture | Plain, flat frames | Compound and matte paint | Plaster, Mediterranean | Moderate |
How to Choose Frames and Supplies for a Makeover
Start with the frame itself. Solid wood and thick MDF are the easiest to work with, because they sand, paint, and hold hardware well. Thin plastic frames can still be refreshed, but they need a primer that bonds to slick surfaces, and heavy projects like mirrors or trays should be built on something sturdier.
Check the construction before buying or reusing. Corners should be tight, with no wobble. A frame that’s loose will only get worse after you paint it. A dab of wood glue and a clamp for an hour usually fixes small gaps.
For size, match the project to the frame. Memo boards and jewelry organizers need a larger opening, usually 11 by 14 inches or more. Gallery walls tolerate small frames, as long as you vary sizes. Shadow boxes need depth, so measure the interior before you plan anything.
Choose paint by use. Spray paint is fast for frames that won’t be handled. Chalk-style paint gives a matte finish and covers well, and a clear sealer protects anything that will be touched or placed in a humid room. Test colors on the back first.
Budget is simple here. A can of paint, some sandpaper, and a few hooks cover most projects. Thrift stores and yard sales are the cheapest sources of frames, and quality wood frames cost less used than new. Spend extra on the parts that matter: sturdy hardware for mirrors and trays, and acid-free materials for anything you want to keep.
Common regrets include skipping sanding, painting in a cold or humid space, using thin hardware on heavy frames, and buying fancy supplies before testing the idea. Try one project first and see how you like the process before scaling up.
Pulling It All Together
An old frame is rarely a lost cause. A new coat of paint, a different backing, or a completely different job can change it from forgettable to something you’d hang in the middle of the room. The best part is how little each of these needs, whether that’s a can of color, a roll of cork, or a bit of fabric left over from another project.
If you’re short on time, begin with the simplest options: a fresh coat of paint, a new mat, or a dry-erase board. For something more ambitious, a mirror or a shadow box takes longer but rewards the effort. If you have a stack of mismatched frames, painting them all the same color and hanging them together is the fastest way to make a gallery wall feel planned.
Before starting, clear a table, lay down newspaper, and gather everything in one spot. Most frustration comes from stopping halfway to hunt for tape or sandpaper. Test your paint on the back, and give each coat enough time to dry.
Start with one frame. See how it turns out, then decide whether to tackle the rest of the box. By Sunday evening, there’s a decent chance a few pieces that sat in a closet for years will be on the wall, and the rest will have found a job. That’s a good use of a weekend.
FAQs
What is the best paint for picture frames?
Spray paint is quickest and gives an even finish, while chalk-style or acrylic craft paint works well if you prefer brushing. Sand lightly first, use thin coats, and finish with a clear sealer if the frame will be handled often.
Can I paint a plastic picture frame?
Yes, but it needs the right prep. Clean it, scuff it lightly with sandpaper, and use a primer made for plastic. Without it, paint tends to peel or scratch off easily.
How do I remove glass from an old frame safely?
Lay the frame face down on a towel and bend back the small tabs or points holding the backing. Lift the backing out carefully, then slide out the glass, holding it by the edges. Wear gloves if the glass looks cracked.
What size frame works best for a memo board or organizer?
Something between 11 by 14 and 16 by 20 inches suits most projects. Smaller frames feel cramped, and larger ones need stronger hanging hardware, so check the weight before mounting.
How do I hang a heavy frame, such as a mirror?
Use two D-rings screwed into the back and rated picture wire or hooks. Anchor into studs, or use heavy-duty wall anchors if no stud is available. Always check the weight rating of the hardware.
How much does a frame makeover cost?
Most projects cost very little, particularly if you already have paint and tools. Thrifted frames are usually cheap, and the main extras are paint, mat board, or fabric. Mirrors cost more because of the glass cutting.
What are the biggest mistakes in DIY frame projects?
Skipping prep, using thick coats of paint, and choosing hardware that’s too light for the weight. Tape off glass and edges, work in a ventilated space, and let each layer dry before moving on.
Can I reuse old frames for gallery walls?
Yes. Painting all the frames the same color unifies them, and arranging them on the floor first helps you plan the layout. Use paper templates on the wall to avoid extra holes.