There’s a specific kind of disappointment that comes with organizing a pantry on a Saturday and finding it a mess again by the following weekend. It’s not that the effort was wasted exactly, but the system didn’t hold. Bags shifted back to loose piles, cans drifted out of their rows, and the labeled bins ended up holding whatever didn’t fit anywhere else.
The pantries that actually stay organized share something the ones that don’t usually lack: a setup built around how the household actually restocks and uses food, not just how the shelves looked on the day everything got sorted. A pretty pantry photo captures a single moment. A tidy pantry three months later is the result of a system that survives real grocery hauls, rushed weeknights, and the general wear of daily use.
This roundup pulls together 37 setups that hold up past the first week — physical tools like risers, bins, and shelving that create lasting structure, plus a handful of small habits that keep the whole system from sliding backward. Some take an afternoon to put in place. A few take thirty seconds a day, indefinitely. Together, they cover what genuinely keeps a kitchen pantry from drifting back into chaos, rather than what just looks organized in a single before-and-after photo.
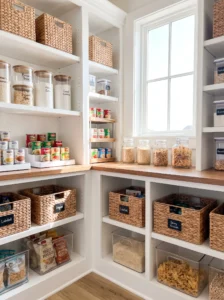
1. The Zone-by-Category Shelf Setup
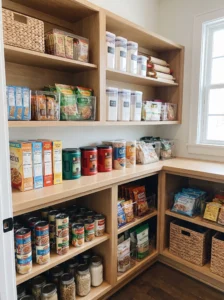
Assigning each shelf or shelf section to a specific category — baking, snacks, canned goods, breakfast — gives every item an obvious home, which is the single biggest factor in whether a pantry stays organized long-term. Without zoning, items get pushed wherever there’s an open gap, and that habit compounds fast.
This setup scales to any pantry size, from a single reach-in closet to a full walk-in room, though the number of zones should match the space available. Keep zone boundaries visible through spacing or a slight shift in bin color, and put heavier canned goods on lower shelves while daily-use items sit at eye level.
A mistake worth avoiding is creating too many micro-zones, which turns a simple system into something only the person who built it can navigate. Once zoning is genuinely in place, restocking after a grocery trip takes a fraction of the time it used to, since every new item already has a shelf waiting for it rather than requiring a decision each time.
2. The Clear Canister Wall
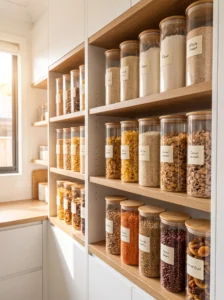
Lining a shelf with matching clear canisters for flour, rice, pasta, cereal, and other dry staples creates one of the most visually stable setups a pantry can have, since uniform containers don’t shift shape or slump the way bags do over time.
This setup earns its place at eye level, where the consistency actually gets noticed daily. Choose canisters with airtight, secure lids, since a loose seal invites both pests and moisture. Glass resists staining better over the years, while BPA-free plastic is lighter and more forgiving if dropped on a tile floor.
Label each canister clearly rather than assuming you’ll remember what’s inside once everything looks the same from across the room. A real mistake to avoid: transferring new stock into a canister without fully washing out old residue first, since leftover bits can spoil the fresh batch. Once this wall is set up, it tends to stay tidy almost on its own, since there’s no loose packaging left to slump or spill.
3. The Tiered Can Riser Setup
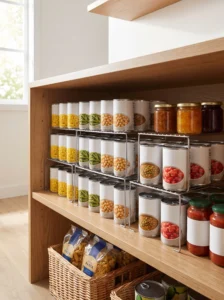
Canned goods stacked flat hide everything behind the front row, which is exactly how forgotten cans end up expiring in the back. Tiered risers solve this by angling each row upward so every can stays visible without digging.
This setup belongs on lower shelves, where cans tend to accumulate fastest. Metal risers hold up better than plastic under sustained weight, and a slightly textured surface keeps cans from sliding forward if the shelf gets bumped during restocking.
Measure shelf depth before buying, since risers sized for deep shelves leave an awkward gap at the front of shallower ones. Group cans by type on each tier so meal planning doesn’t turn into a can-by-can inventory check. One real advantage worth noting: risers make it obvious at a glance when something’s running low, which does more to prevent duplicate purchases than any other single trick on this list, simply because the visual gap is impossible to miss.
4. The Adjustable Track Shelving System
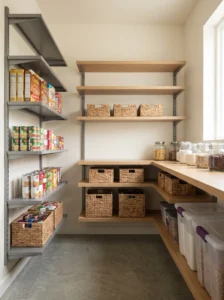
Fixed shelves are one of the quiet reasons pantries stop working over time — a shelf built for cereal boxes wastes space storing canned soup, and vice versa. An adjustable track-and-bracket system solves this by letting shelf height change as grocery habits shift.
This setup matters most in pantries you expect to use for more than a year or two, which describes nearly every pantry. Install vertical tracks on at least two walls, spaced to support shelves at multiple depths, and choose brackets rated for genuine weight rather than decorative ones meant for lighter display.
Keep shelf material neutral — painted MDF, laminate, or coated wire — since flexibility in appearance matters here as much as function. A mistake to avoid: spacing tracks too far apart, which limits how narrow you can make individual shelf gaps later. The real payoff shows up gradually: a bulk-buying phase, a new appliance, or a change in household size all become non-events instead of full pantry overhauls, since the shelves themselves simply move.
5. The Over-the-Door Spice Rack
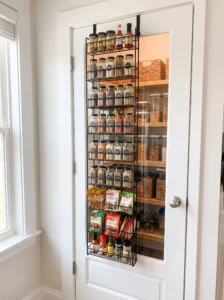
The back of a pantry door sits empty in most homes, which makes it one of the most underused spaces in the entire kitchen. An over-the-door rack with multiple tiers holds spice jars and small packets, freeing shelf space for bulkier items.
This setup works best on a solid pantry door rather than a hollow, flimsy one, since heavier doors handle the added weight without sagging over months of use. Stick to lightweight wire or coated metal racks, and avoid loading them with heavy glass jars — plastic containers hold up better long-term on a swinging surface. Measure door clearance carefully before buying, since some racks stick out far enough to block shelves from closing.
A matte white or black finish tends to disappear visually against most door colors. Label the bins, since items stored at eye level get forgotten just as easily as items buried in a deep shelf. This setup reclaims real capacity without touching a single existing shelf, and it tends to stay tidy on its own, since a door rack has defined slots rather than open surface area that invites clutter.
6. The Corner Lazy Susan Setup
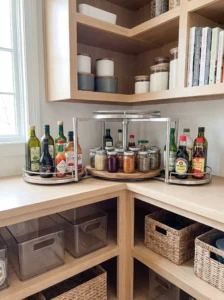
Deep shelves and blind corners are some of the most poorly used spaces in a pantry, since their depth makes reaching the back nearly impossible. A lazy Susan solves this by rotating contents into reach instead of requiring a full-arm search.
This setup suits base cabinets or deep shelving with a genuine blind spot. Choose a two-tier version for taller shelves, and pick wire for cans and jars since it wipes clean of spills more easily than wood or melamine.
Measure the shelf’s interior diameter before buying, since an oversized lazy Susan scrapes shelf walls and eventually sticks or wobbles. Keep taller items like oil bottles near the center rotation point rather than the outer edge, where they’re more likely to tip. Anyone who’s added one after years without it tends to notice the same thing: the corner stops feeling like storage you forget exists and starts feeling like genuinely usable space, which matters because forgotten corners are usually where clutter accumulates fastest.
7. The Wire Basket Snack Shelf
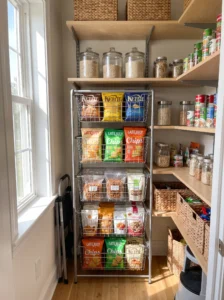
Bagged snacks — chips, pretzels, dried fruit — don’t stand up on their own, and they tend to slump into a shapeless pile the moment they’re stored loosely. A dedicated wire basket keeps this category contained in one predictable spot.
This setup works well at a mid-height shelf reachable without a step stool, especially in households with kids who grab snacks independently. Choose baskets with a pull-forward design so bags in back aren’t hidden behind bags in front, and pick a coated wire finish over raw galvanized wire, which can look unfinished and show rust spots over time.
Rotate snack selection regularly rather than letting the same three items sit untouched while others run out unnoticed. A mistake worth avoiding: overfilling one basket while leaving another mostly empty, which throws off balance and makes items harder to see. This setup tends to hold its shape well over time, mostly because a basket has real boundaries — unlike an open shelf, it physically limits how far the mess can spread.
8. The Labeled Bin Grid
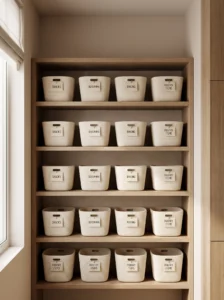
Arranging a matched grid of labeled bins across a shelf — one bin per category, evenly spaced — creates a visual structure that’s hard to disrupt accidentally, since each bin has both a defined space and a defined purpose.
This setup suits pantries with a fairly even mix of smaller, loose items that don’t fit neatly into canisters, like snack packets, seasoning mixes, or baking add-ins. Choose bins in a uniform size and material so the grid reads as one cohesive system rather than a mismatched collection, and leave a small gap between bins so pulling one out doesn’t require nudging its neighbors.
Label each bin on the front, at a consistent height, so the whole grid stays legible even from a few feet away. A mistake to avoid: letting one bin become a catch-all for items that don’t fit its label, since that’s usually the first crack in an otherwise solid system. Once this grid is dialed in, it tends to self-correct — misplaced items stand out immediately against the surrounding order, which nudges people to put things back where they belong.
9. The Turntable Condiment Corner
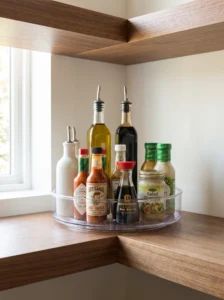
Bottles of oil, vinegar, and other condiments tend to multiply quietly until there’s a cluttered row blocking whatever sits behind them. A turntable keeps this cluster contained and spins the whole group into reach with one motion.
This setup works well on a mid-height shelf or directly on a counter near the stove, wherever bottles get grabbed most during actual cooking. Choose a turntable sized to the shelf depth it sits on, since an oversized one hangs off the edge and an undersized one can’t hold a full bottle collection without stacking awkwardly.
A clear acrylic or stainless finish looks tidier than plastic, which tends to yellow over time, and a slightly raised edge keeps bottles from sliding off mid-rotation. Avoid loading a single turntable with drastically different bottle heights, since tall bottles can tip when the platform spins past an uneven load. This corner tends to stay organized because the rotating motion naturally resets bottle position every time it’s used, rather than letting things settle into a permanent, cluttered arrangement.
10. The Pull-Out Drawer System
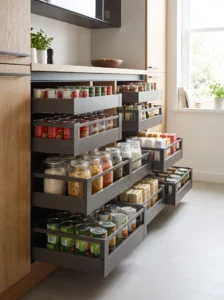
Replacing fixed shelves with pull-out drawers changes how a pantry actually functions, since drawers bring contents forward instead of requiring a reach or a crouch to see what’s stored toward the back.
This setup is worth the investment where budget allows for full-extension slides, since partial-extension hardware still leaves the back third of the drawer out of easy reach. Choose slides rated for at least 100 pounds if you’re storing bulk canned goods or beverage cases, since underrated hardware wears out fast under that kind of daily load.
Keep drawer depth shallower near the top of the pantry and deeper toward the bottom, mirroring how most households naturally store lighter items up high. Soft-close mechanisms are worth the added cost, since pantry drawers get used multiple times a day. The clearest benefit here is also the simplest: nothing gets forgotten in the back of a drawer the way it does on a deep, fixed shelf, since pulling it fully open puts everything in view at once.
11. The Toe-Kick Drawer Setup
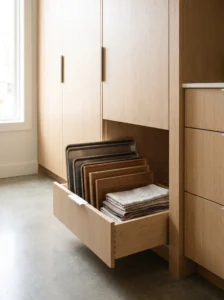
The recessed space at the base of pantry cabinets — the toe kick — is almost always empty air, yet it runs the full width of most cabinet runs. A shallow pull-out drawer installed here holds flat items like baking sheets or table linens without touching existing shelf storage.
This setup is best suited to solid, non-cosmetic toe kicks, since some cabinets have structural elements in that space that block installation. Professional installation is usually worth the cost, since cutting into a toe kick incorrectly can affect cabinet stability. Choose a shallow drawer, typically no more than four inches tall, matched to your cabinet’s actual clearance.
Avoid using this space for heavy items like canned goods, since the drawer mechanism isn’t built for the same load as a standard cabinet drawer. It’s best reserved for lightweight, flat, or rarely used items. This setup takes more effort than most on this list, but for pantries that have exhausted every other option, it unlocks storage most homeowners never even consider exists, and because it’s fully enclosed, it stays tidy with almost no upkeep.
12. The Rolling Cart Overflow Setup
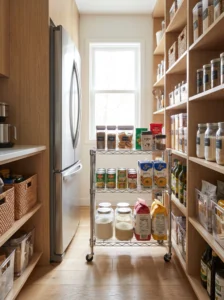
When a pantry runs out of shelf space entirely, a slim rolling cart can absorb the overflow without requiring any construction. Its mobility is the real advantage — it pulls out for full access and tucks back into a tight footprint the rest of the time.
This setup suits kitchens with a narrow gap beside the fridge or a corner near the pantry door. Look for a cart with three to four tiers and locking caster wheels, since carts that roll unexpectedly become a hazard in a busy kitchen. Metal wire carts are more affordable and better ventilated, while wood carts look warmer but hold less airflow.
Keep heavier items on the bottom tier to lower the center of gravity, and reserve the top for daily items. A common mistake is overloading the top shelf, which makes the cart tip-prone on an uneven floor. This setup tends to stay tidier than a fixed overflow shelf simply because its smaller footprint discourages the kind of sprawling clutter that a wide-open shelf invites.
13. The Tension Rod Tray Divider
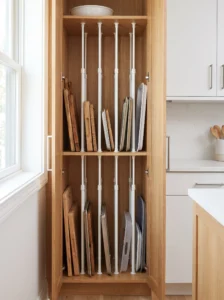
A cheap spring tension rod, wedged vertically inside a narrow cabinet, creates instant slots for baking sheets, cutting boards, and trays. It’s one of the lowest-cost setups here, and it solves the leaning-stack problem without any hardware installation.
This works best in a narrow cabinet that’s otherwise too shallow for regular shelving to be useful. Measure the interior width before buying a rod, and choose one rated to stay taut under light pressure, since a rod that slips lets trays lean and clatter against each other.
Position two or three rods with roughly two inches between each, adjusting based on how thick the trays and boards actually are. Rubber-gripped rods hold tension better over time than smooth metal ones. A minor caution: don’t rely on this for heavy cast iron, since tension rods aren’t built for serious weight. For lightweight items, this stays remarkably tidy on its own, since each tray has a fixed slot rather than open space to slide and lean into disorder.
14. The Magnetic Spice Strip
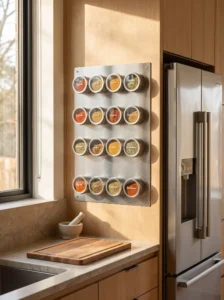
Spice storage eats up a disproportionate amount of shelf space for how little it actually holds. A magnetic spice strip solves this by moving spices off the shelf entirely and onto the side of a fridge, cabinet, or metal panel near the stove.
This setup works best when the fridge sits close to the cooking area, keeping spices within arm’s reach mid-recipe. Choose tins with strong, secure magnets — cheaper ones slide down or fall off once fully packed. Stainless steel or matte-painted tins look more intentional than mismatched jars, and clear tops let you identify contents without lifting the lid.
Avoid placing tins near direct stove heat, since prolonged exposure degrades flavor faster than typical shelf storage. Label the tops rather than the sides, since side labels disappear once tins sit close together. This setup stays tidy almost by design, since each tin is fixed in place magnetically — there’s no loose surface for spices to scatter across the way a crowded shelf allows.
15. The Chalkboard Jar Label System
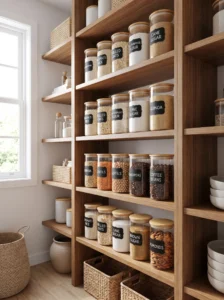
Reusable glass jars are popular for pantry staples, but permanent labels become a problem the moment contents change — a jar labeled “rice” that later holds oats creates confusion fast. Chalkboard-style labels solve this by letting you wipe and rewrite as contents shift.
This setup works especially well for households that refill jars with different bulk items over time, rather than restocking the exact same product every time. Choose labels with a smooth writing surface and a chalk marker rather than actual chalk, since markers resist smudging far better during normal handling.
Keep handwriting neat and consistent in size, since a chalkboard label that’s hard to read defeats its own purpose. Wipe and rewrite labels immediately when contents change rather than leaving an outdated one in place “for now.” This setup stays tidy over the long run because it removes the temptation to mislabel a jar out of convenience — updating the label takes seconds, so there’s no real excuse to skip it.
16. The Velcro Reseal Station
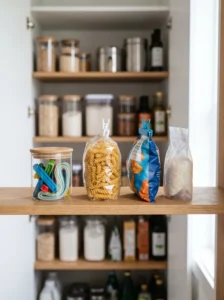
Half-used bags of chips, pasta, or shredded coconut lose freshness fast and tend to spill the moment they’re jostled if left loosely folded. A small set of reusable Velcro strips or clips, kept in one accessible spot, makes resealing an opened bag part of the natural process of putting groceries away.
This setup applies to nearly every dry good in a typical pantry, but matters most for anything with a texture that clumps or stales quickly once exposed to air. Keep a small container of clips within reach on a nearby shelf rather than tucked in a separate kitchen drawer, so resealing doesn’t require an extra trip.
Choose clips sized appropriately for bag width, since an undersized clip won’t create a proper seal. A mistake worth avoiding: relying on a rough fold-and-tuck method instead, since it loosens with handling far faster than expected. This small station meaningfully cuts down on stale, spilled snacks, and it tends to stay tidy since resealing takes less effort than leaving a bag open.
17. The Under-Shelf Hanging Basket Setup
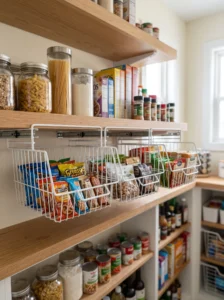
Tall gaps between shelves often sit completely empty, wasting vertical space that a hanging wire basket can put to immediate use. These baskets hook underneath an existing shelf, creating a second storage layer without giving up any current shelf space.
This setup works particularly well for bagged items that don’t stand up on their own. Choose baskets with a slide-out or pull-forward design so bags in back aren’t hidden behind bags up front. Coated wire in black or bronze finishes looks more intentional than raw galvanized wire.
Check shelf thickness before buying, since some hook-style baskets only fit within a specific range. Avoid overfilling one basket while leaving another nearly empty, since an unbalanced load can cause tilting when items are removed. This setup delivers one of the fastest visible wins on this list for households with kids, since snack access becomes obvious and self-serve almost immediately, and the defined basket shape naturally resists sprawling clutter.
18. The Appliance Garage Shelf
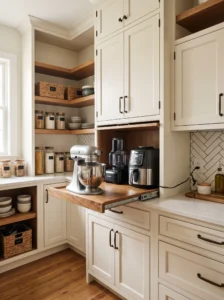
Dedicating a section of pantry shelving specifically for countertop appliances — a stand mixer, food processor, air fryer — keeps kitchen counters clear while keeping those appliances close enough to actually use rather than buried in deep storage.
This setup suits a section of countertop-height shelving, ideally near an outlet, since running an extension cord defeats the purpose. Include a pull-out shelf for heavier appliances like a stand mixer, so it can slide forward rather than being lifted in and out repeatedly.
A tambour or roll-up door works well if you want the option to conceal appliances without giving up countertop-height access. Add a dedicated outlet inside the garage rather than routing power from elsewhere, and ensure ventilation is adequate for anything that generates heat during use. Appliances that were previously avoided because of retrieval hassle tend to get used far more once they’re genuinely within reach, which is really the whole point of this setup.
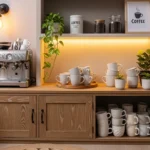
19. The Coffee and Tea Nook
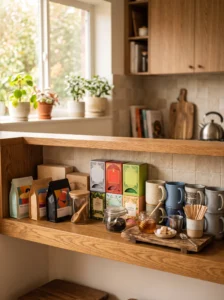
Grouping coffee, tea, filters, and related accessories into one dedicated pantry zone streamlines a routine most households repeat daily, sometimes more than once. It works by clustering everything by function instead of scattering supplies between a cabinet, a drawer, and a counter corner.
This setup suits a shelf near the pantry entrance or close to wherever the coffee maker or kettle actually lives, since minimizing extra steps is the entire point. Keep mugs nearby if there’s room, and store sweeteners or creamers in the same zone if they’re shelf-stable.
A small tray or bin contains loose tea bags, sugar packets, or stirrers that would otherwise scatter. A mistake to avoid: letting this zone become a catch-all for anything vaguely breakfast-related, which dilutes its usefulness fast. This nook tends to stay organized because it gets used and reset daily, almost as a byproduct of the morning routine itself.
20. The Breakfast Grab Shelf
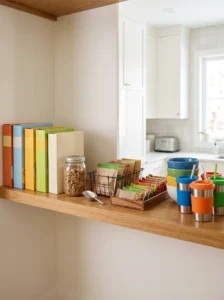
Mornings move fast, and a dedicated breakfast zone — cereal, oatmeal packets, granola bars, bowls — cuts down on the scattered search that slows an already rushed part of the day. It works because it clusters everything by function rather than by category alone.
This setup suits a shelf near the entrance, reachable without a step stool, since speed is the whole point. Include bowls or travel cups on the same shelf if space allows, so the entire routine happens in one stop.
Keep the station simple — three or four go-to options rather than every breakfast item in the house, since an overloaded shelf slows decision-making just as much as a disorganized one. A small bin helps contain loose wrappers and packets that would otherwise scatter. Mornings genuinely get calmer once breakfast decisions stop requiring a full pantry search, and this shelf tends to stay tidy simply because it’s touched and reset every single day.
21. The Baking Supply Zone
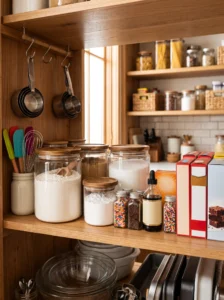
Flour, sugar, baking soda, vanilla extract, and cake mixes scattered across multiple shelves turn a simple baking project into a scavenger hunt. Grouping everything baking-related into one zone puts the entire process within reach of a single spot.
This setup works best on a mid-height shelf near any pantry countertop or workspace, since baking involves gathering several ingredients at once. Use uniform containers for staples like flour and sugar, and keep smaller items like sprinkles in a bin within the same zone so nothing rolls to the back.
Keep measuring cups and spoons nearby if there’s room, since baking almost always requires them. A mistake to avoid: mixing baking supplies with everyday cooking ingredients just because shelf space is tight, since that undoes the entire point of zoning by category. This zone tends to stay tidy because baking sessions naturally involve putting things back in the same spot they came from, rather than scattering them across the kitchen.
22. The Bulk Bin Wall
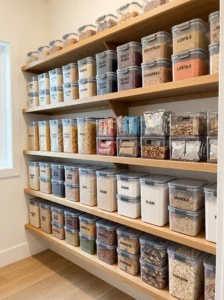
Bulk-bought items — rice, beans, snack packs, pasta — often arrive in bags or boxes that don’t stack well and take up more shelf space than necessary. Stackable, uniform bins solve this by creating a tidy vertical footprint instead of a loose spread.
This setup earns its place in pantries where bulk shopping is a regular habit, particularly on lower or mid-level shelves that can support the combined weight. Choose bins with secure, stackable lids rated for the weight of what you’re storing, since flimsy bins crack or warp under sustained pressure.
Label each bin clearly, since stacked, identical containers make it easy to lose track of contents without a visual cue. Leave a slight gap between the top of a stack and the shelf above, since bins wedged too tightly become difficult to lift without knocking the whole stack over. This wall pays off most visibly on bulk grocery days, when unloading a large haul takes minutes instead of becoming its own small project.
23. The Freezer-Paper Labeling Habit
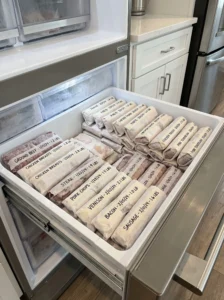
Bulk meat purchases save money but create a real organization problem once everything gets wrapped in plain freezer paper that looks identical from the outside. Labeling each package with the cut, date, and weight solves this instantly, and a disorganized freezer often becomes an extension of pantry chaos.
This habit matters most for households that buy meat in bulk, whether from a butcher, a wholesale club, or a larger pack broken down at home. Use a permanent marker directly on the paper, or a freezer-safe label if the surface doesn’t hold ink well. Include the date front and center, since that’s the detail most often needed months later.
Group similar cuts together rather than stacking everything randomly, and rotate older packages to the front the same way you would with pantry cans. A mistake worth avoiding: skipping the weight or portion size, since guessing what’s inside leads to either thawing too much or too little for a given meal. This habit turns a chest freezer into a genuinely usable extension of pantry storage.
24. The Emergency Stock Shelf
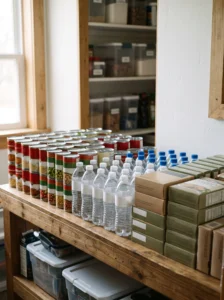
Setting aside one shelf specifically for backup supplies — extra canned goods, bottled water, shelf-stable meals — keeps essential items from getting mixed into everyday rotation and accidentally used up during a normal week.
This setup suits a lower or less-trafficked shelf, since emergency supplies don’t need daily access. Choose genuinely long shelf-life items, and check expiration dates during regular pantry checks, swapping anything approaching its date into regular meal rotation before it expires unused.
Keep a written or mental note of what’s on this shelf and roughly how long it should last your household, since an emergency shelf only works if you know what’s there when needed. A mistake to avoid: treating this shelf as a catch-all for anything extra, which dilutes its purpose. Households that maintain this shelf consistently mention a real sense of calm during unexpected situations, since basic backup supplies are already in place without a last-minute scramble.
25. The Kid-Height Snack Bin
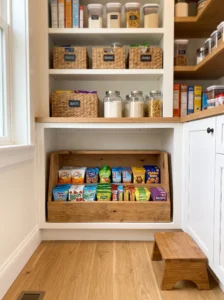
A designated, reachable bin just for kid-friendly snacks solves two problems at once — it keeps children from rifling through the entire pantry, and it gives parents one spot to monitor and restock.
This setup works best on a lower shelf, positioned specifically at a child’s eye and arm height. Use bins rather than loose bags, since bagged snacks slump into shapeless piles that are hard for small hands to sort through. Choose durable, washable bins in a bright color if you want the zone instantly recognizable, or neutral if you’d rather it blend in.
Rotate snack selection regularly rather than letting the same three items sit untouched. A mistake worth avoiding: placing anything choking-hazard sized on this shelf just because it’s convenient. This bin tends to stay tidy because kids interact with it daily, and a well-defined bin naturally resists the sprawl that an open shelf invites.
26. The Cleaning Supply Divide
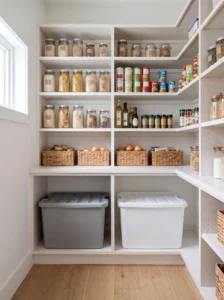
Cleaning products stored on the same shelf as food create both a safety concern and a general sense of clutter, since spray bottles and food packaging don’t share the same shape or handling needs. A separate shelf or bin specifically for cleaning supplies keeps the two categories cleanly divided.
This setup matters in any pantry that doubles as general household storage, which is more common than expected in smaller homes. Choose a lower shelf or closed bin for easy access during cleaning tasks and to keep chemical smells away from food.
Group cleaning supplies by task — kitchen cleaners together, bathroom products together — the same zoning logic applied to food elsewhere. A real safety note: keep this zone out of reach of young children if stored at a lower height, using a childproof latch if needed. Separating these categories doesn’t just look tidier; it genuinely reduces the risk of a cleaning product ending up too close to something edible during a rushed unpacking session.
27. The Pet Food Bin Station
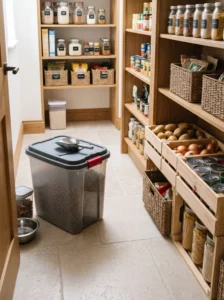
Pet food often ends up stored in its original bag, propped awkwardly in a corner where it doesn’t quite fit and tends to spill. A dedicated, sealed bin solves this by containing both the mess and the smell, while keeping it clearly separate from human food storage.
This setup works best on a lower shelf or the pantry floor, since pet food bins tend to be bulkier than typical dry goods containers. Choose a bin with a tight-sealing lid, both to keep pests out and contain any lingering odor.
Keep a scoop stored inside or attached to the bin itself, since a wandering scoop is a common small annoyance in a shared pantry space. A mistake worth avoiding: storing pet food directly next to human snacks at a similar height, since it increases the odds of a mix-up. Once pet food has its own contained, labeled spot, it stops being the one messy corner that undercuts an otherwise organized pantry.
28. The Paper Goods Shelf
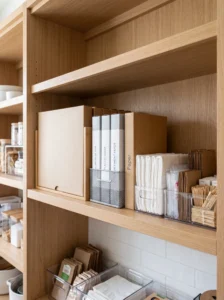
Napkins, paper towels, foil, and plastic wrap are awkward shapes that rarely sit neatly wherever they land, and they tend to scatter across multiple shelves without a consistent spot. Grouping all paper and wrap goods into one area solves this.
This setup works well on a higher shelf, since paper goods are lightweight and don’t need daily reach the way food staples do. Choose a bin or divided shelf section sized to hold boxes upright rather than stacked flat, since upright storage makes it easier to see what’s running low.
Keep backup rolls in this same zone rather than a separate closet, so restocking the kitchen dispenser doesn’t require a hunt through the house. A mistake to avoid: letting this category creep across multiple shelves over time just because a new box didn’t quite fit — that slow spread is exactly how a pantry becomes disorganized again after a cleanup. Keeping this category contained noticeably reduces general visual clutter.
29. The Nightly Reset Habit
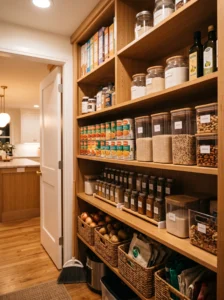
The single habit that keeps every physical setup on this list actually working long-term is a thirty-second nightly reset — straightening bins, pushing stray items back into their zone, and wiping up any small spill before it sits overnight.
This habit doesn’t require any tools, just a consistent moment built into an existing routine, like right after dinner cleanup. Keep it genuinely brief — this isn’t a deep clean, just a quick scan and a few small adjustments — since treating it as a bigger task makes it far more likely to get skipped.
A mistake worth avoiding: waiting until the pantry looks fully chaotic before doing any tidying, since by then the reset stops being quick. Households that stick with a nightly reset consistently mention their pantry stays close to its organized state for months, rather than sliding back into disorder within a few weeks the way a one-time organizing project usually does.
30. The Monthly Audit Routine
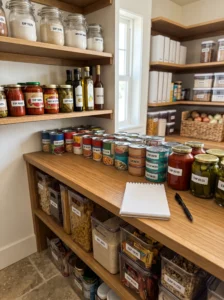
A quick monthly walk-through — checking expiration dates, tossing anything spoiled, noting what’s running low — keeps a pantry from slowly filling up with forgotten, expired items that quietly take up space for months.
This routine takes fifteen to twenty minutes and works best scheduled on a recurring day, like the first Sunday of the month, so it doesn’t get skipped during busy weeks. Check the back of deep shelves specifically, since that’s where expired items hide longest.
Keep a small notepad or your phone handy during the audit to jot down items worth restocking, turning the walk-through into a built-in grocery list. A common mistake is treating this as a deep-clean event rather than a quick check-in, which makes the task feel bigger than necessary. Households that stick with a monthly audit tend to waste noticeably less food, since nothing sits forgotten long enough to actually expire unnoticed.
31. The FIFO Rotation System
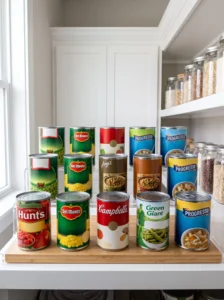
Rotating stock so older items sit in front and newer purchases go toward the back — a method borrowed straight from grocery stores — solves the quiet problem of forgotten cans expiring behind a fresh batch of the same product.
This system matters most for canned goods and boxed staples, since these are the items most likely to get pushed to the back and forgotten. Apply it every time you unload groceries, not just during periodic cleanouts, since it only works if it’s consistent.
No special equipment is required, though shelf risers make the practice easier by keeping older items visibly in front. Teach the rest of the household this rule, since rotation falls apart the moment one person restocks from the front instead of the back. Households that stick with this system report throwing away far less expired food, which quietly saves more money over a year than most organizing purchases ever do.
32. The Inventory Whiteboard
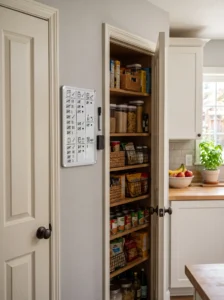
A small whiteboard or magnetic notepad mounted inside the pantry door lets anyone jot down an item the moment it runs low, rather than relying on memory during a rushed grocery trip.
This setup works best when it’s genuinely visible and easy to use — mounted at a height everyone can reach, with a pen or marker attached directly to it. A small magnetic whiteboard works well on a metal door, while a cork or paper pad suits a wood door better.
Make checking and clearing this list part of the grocery routine, transferring items to a shopping list before heading out, rather than letting the same three items sit written down for weeks. A mistake to avoid: only one household member using it, which defeats the purpose in shared households. Once everyone adopts this habit, the awkward “wait, are we out of that?” moment mid-recipe becomes far less common.
33. The Drawer Divider Insert

Seasoning packets, gravy mixes, and oatmeal pouches don’t stand upright and tend to slide into a jumbled pile at the bottom of a drawer without something to contain them. A drawer divider insert with small compartments gives each type its own defined slot.
This setup works well in a pantry drawer or shallow bin, wherever these smaller packets accumulate. Choose an insert with adjustable dividers if possible, since packet sizes vary more than expected between brands.
Sort packets by type or meal use so a quick glance shows exactly what’s available. A mistake to avoid: tossing everything into one large compartment just because it fits, since that recreates the same jumbled pile in a slightly neater container. Once packets have defined slots, a quick weeknight meal decision becomes noticeably faster, and the physical dividers keep the drawer from sliding back into chaos even with regular use.
34. The Non-Slip Shelf Liner Setup
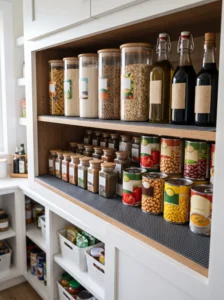
Items sliding around on bare shelves is a small but constant source of pantry disorder — jars tip, cans roll, and a neatly arranged row shifts out of place every time the door opens or closes. A non-slip liner underneath solves this quietly and permanently.
This setup applies to any shelf holding jars, bottles, or lightweight containers prone to sliding. Choose a textured rubber or grip-style liner rather than a smooth decorative one, since the whole function depends on friction. Cut liners to fit each shelf precisely, since loose or overhanging edges catch on containers and cause more disruption than they prevent.
Wipe liners down periodically, since they can trap crumbs and spills more than a bare shelf would. A mistake to avoid: choosing a liner purely for pattern or color without checking its grip quality, since a decorative liner with a smooth finish doesn’t solve the actual problem. This setup is easy to overlook, but it quietly keeps everything else on this list in place rather than sliding into disorder with normal daily use.
35. The Glass Jar Uniform System
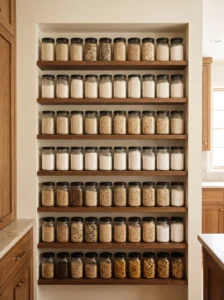
Standardizing on one or two glass jar sizes across the entire pantry — rather than a mismatched collection accumulated over years — creates a setup that’s easier to keep tidy simply because everything fits together predictably.
This works best when introduced gradually, replacing mismatched containers as they empty rather than discarding everything at once. Choose a stackable jar design if your shelves have enough height for two layers, since stacking uniform jars uses vertical space far more efficiently than a single row of mismatched shapes.
Keep lids interchangeable across jar sizes where possible, since a shared lid style reduces the number of loose, mismatched lids floating around a shelf. A mistake worth avoiding: buying jars in too many different shapes just because they were on sale, since inconsistency undercuts the whole benefit of this setup. Once a household commits to one jar system, restocking becomes simpler and the shelves themselves start looking intentional rather than accumulated.
36. The Vertical Baking Sheet Rack
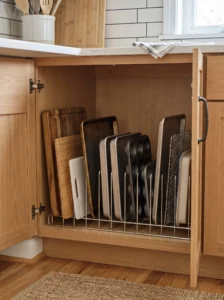
Baking sheets, cutting boards, and trays are some of the most awkward items to store cleanly, since they’re flat, oversized, and don’t stack well with anything else. A vertical rack lets these items stand upright instead of forming a leaning stack that topples every time you reach for the bottom sheet.
This setup suits a base cabinet near the oven or a narrow gap between the pantry and a wall. Wire dividers are cheap and easy to install, while wood or bamboo dividers look more finished if the cabinet is visible.
Space dividers no more than two inches apart for thin sheets, slightly wider for cutting boards or muffin tins. Avoid mixing heavy cast iron into the same slots as lightweight trays, since the imbalance can cause tipping. A rubber or felt strip on the base of each slot prevents metal-on-metal noise. Once trays are stored vertically, grabbing the right one takes seconds instead of a cabinet excavation, and the rack itself stays tidy since each item has a fixed, upright position.
37. The Door-Mounted Foil and Wrap Organizer
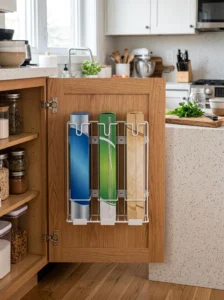
Boxes of foil, plastic wrap, and parchment paper are awkward shapes that rarely sit neatly on a shelf, and they tend to end up sliding around loose or getting crushed under heavier items. A hook-and-bracket organizer mounted inside a cabinet door holds these rolls upright, using door space that would otherwise sit empty.
This setup fits well inside a lower cabinet door near the stove or prep area. Choose an organizer with adjustable-width slots, since box sizes vary more than expected between brands, and a fixed-width rack leaves narrower boxes rattling loose.
Adhesive-backed mounting works fine for lighter setups, but a couple of small screws hold up better over months of a door swinging open and shut daily. Keep the organizer low enough on the door that it doesn’t interfere with shelves inside when the door closes. Once these rolls have a fixed spot, a second box of foil stops getting bought simply because the first one couldn’t be found buried behind a stack of dish towels.
Comparison Table: Pantry Organization Setups at a Glance
| Type | Best Use | Material | Style/Vibe | Difficulty Level |
|---|---|---|---|---|
| Adjustable Track Shelving | Long-term flexibility | Wood, laminate, wire | Adaptable, neutral | Moderate |
| Clear Canister Wall | Decanted dry goods | Glass, acrylic | Clean, uniform | Easy |
| Tiered Shelf Risers | Canned goods visibility | Metal, coated wire | Practical, tidy | Easy |
| Pull-Out Drawer System | Heavy canned and bulk goods | Wood or laminate with metal slides | Modern, organized | Moderate |
| Corner Lazy Susan | Deep shelves and blind corners | Wood, wire, melamine | Functional, smart | Moderate |
| Non-Slip Shelf Liner | Preventing shifting jars and cans | Textured rubber | Subtle, practical | Easy |
How to Choose the Right Pantry Organization Setup
Start with an honest read of your actual pantry, not the version you’d like to have. A household that rarely bakes doesn’t need an elaborate baking zone with a dozen specialty containers, and a household that buys in bulk needs bigger bins than a set of six matching jars sized for a smaller family. Buying based on aesthetics before checking real usage patterns is one of the most common sources of regret in pantry organizing.
Material choice should follow how visible and how heavily used each setup will be. Clear acrylic and glass work well for items you want to see and reach often, since they show contents at a glance and hold up to repeated handling. Wire shelving handles humidity and heavy loads well and costs less upfront, but it doesn’t hide mismatched packaging the way solid bins or cabinetry can. Wood and painted finishes look more polished but need occasional resealing or touch-ups if exposed to spills.
Durability matters most in setups that see daily handling — drawer slides, hinges, and shelf brackets should be rated for real weight rather than just a display load. Maintenance is lighter with wire and acrylic, heavier with wood shelving or anything with fabric components that show stains and wear faster.
On budget, spend where the daily friction is highest. A solid labeling system, a few well-placed bins, and a non-slip liner solve more real problems than an expensive full shelving overhaul in a pantry that’s still poorly zoned underneath. Common buying mistakes include purchasing a full matching organizer set before testing whether the format suits your groceries, and choosing tools based on photos without measuring your actual shelves first. A slower, more deliberate approach — fixing the layout and the habits together, rather than just buying more containers — tends to avoid the expensive regret of a stack of unused organizers that never quite fit the space they were bought for.
Final Thoughts
A pantry that stays tidy isn’t the result of one ambitious weekend — it’s a mix of a few smart physical setups and a handful of small habits repeated consistently. Some of the ideas here, like zoning, labeling, and the nightly reset, cost nothing and take almost no time once they become routine. Others, like adjustable shelving or a pull-out drawer system, take more upfront effort but solve real structural problems that habits alone can’t fix.
The right combination depends on what’s actually breaking down in your current pantry. A household drowning in expired cans probably needs the rotation system and a monthly audit more than another storage bin. A family constantly asking what’s for snack needs a dedicated kid zone more than a fancy labeling system. Picking a handful of setups that solve your specific frustration points works better than trying to implement all thirty-seven at once.
Whatever combination you land on, the real test is whether the pantry still looks organized three months from now, not just on the day you finish setting it up. That’s the difference between a pantry that photographs well once and one that quietly makes daily life easier for years.
Frequently Asked Questions
How long does it take to fully organize a chaotic pantry?
A full reset usually takes two to four hours for an average-sized pantry, depending on how much needs sorting, tossing, or decanting. Breaking it into smaller sessions across a weekend often works better than trying to finish everything in one long sitting, especially in a pantry that hasn’t been touched in a while.
Do I need new containers, or can I reuse what I already have?
Reusing existing jars, bins, and containers works fine as long as they’re clean, sealable, and reasonably uniform. New matching containers create a more polished look, but the underlying setup — zoning, labeling, rotation — matters more than whether every container matches perfectly.
How often should pantry shelves actually be cleaned?
A quick wipe-down every few weeks keeps spills and crumbs from building up, and a deeper clean two to three times a year handles dust and any lingering odors. Wire shelving needs less frequent attention than wood, which shows watermarks and stains more visibly over time.
What’s the most budget-friendly setup on this list?
Zoning, the labeling system, and the nightly reset habit cost nothing beyond a bit of consistency, and they arguably deliver the biggest daily improvement relative to price. Physical tools like bins and risers add real value too, but the habit-based setups are worth establishing first, even before spending on new organizers.
How do I keep a shared household from undoing my pantry setup?
Involve everyone in setting up the zones and labels from the start, rather than presenting a finished system nobody else understands. A setup that’s intuitive and clearly labeled tends to hold up better across a shared household than one that only makes sense to the person who built it.
Is it worth labeling everything, or just the containers that look identical?
Focusing labels on identical or opaque containers covers most of the practical benefit without turning labeling into a chore. Naturally distinct items, like a bag of coffee or a boxed cereal with clear branding, don’t need a separate label added on top.
What’s the biggest mistake people make when reorganizing a pantry?
Buying a full set of matching bins and containers before measuring shelves or auditing actual grocery habits is the most common regret. It’s worth spending an afternoon just observing how the pantry gets used before investing in tools meant to support that use.
How much does a full pantry reorganization typically cost?
A basic refresh using labels, a few risers, and repurposed containers can cost very little, often under the price of one grocery trip. A more involved overhaul with new shelving, matching bins, and drawer systems can run higher, but even a modest budget covers the setups that make the biggest daily difference.