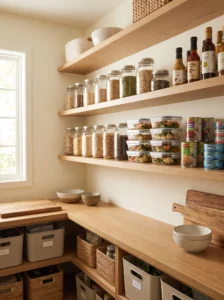
Sunday meal prep sounds simple in theory — a few hours, some containers, and a week of food ready to go. In practice, most of that time gets eaten up hunting for ingredients, digging through a cluttered pantry, and realizing halfway through that the rice is somewhere behind three cans of beans you forgot you owned. The cooking part usually isn’t the bottleneck. The searching is.
Here’s the thing most meal-prep advice skips over: the pantry itself is part of the workflow, not just a place where food happens to live before it gets cooked. A pantry organized around how you actually prep meals — grouped by function, staged for quick assembly, labeled for a busy week — cuts real time off every single prep session, not just the first one. It’s less about having a beautiful pantry and more about building one that works like an extension of your kitchen counter.
This roundup covers 20 pantry setups built specifically around making meal prep faster and less chaotic. Some are about grouping ingredients by how you’ll use them together. Others focus on staging, labeling, and portioning so a Sunday prep session doesn’t turn into an afternoon-long project. From prepping lunches for the week to batch-cooking proteins or just getting dinner on the table faster on a Tuesday, these setups are meant to remove the friction between opening the pantry door and actually getting food on a plate.
1. Build a Grab-and-Go Protein Shelf
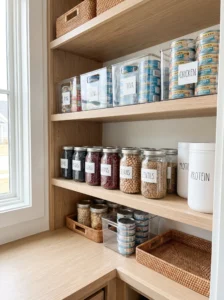
A shelf dedicated entirely to shelf-stable proteins — canned tuna, chicken, beans, lentils, protein powder — gives meal prep a reliable starting point every single time, since protein is usually the anchor of a prepped meal and shouldn’t require hunting through mixed shelves to find.
This setup works best at eye level, close to where you actually assemble meals, since proteins get reached for constantly during a prep session. Use uniform bins or a shallow tray to keep cans upright and visible rather than stacked loosely, and group by type — beans together, canned meats together, protein powders together — so a specific ingredient doesn’t require scanning the entire shelf.
Choose a material that handles the weight of multiple cans without sagging; a solid wood or reinforced wire shelf holds up better here than a thin laminate one. Keep a rotation habit in place, moving older cans to the front each time new ones come in, so nothing sits forgotten behind a newer batch. A mistake worth avoiding: mixing proteins with unrelated pantry items just because there’s open space, since that undoes the whole point of a dedicated zone. Once this shelf is set up, building a meal around a protein source becomes a five-second decision instead of a mental inventory check.
2. Set Up a Grain and Starch Base Station
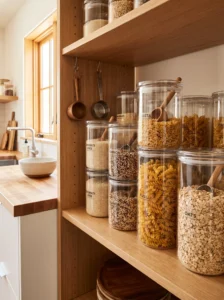
Rice, quinoa, pasta, oats, and other base carbohydrates form the foundation of most prepped meals, and grouping them into one dedicated station saves real time compared to hunting across scattered shelves for whichever grain a recipe calls for.
This setup suits a mid-height shelf close to the stove or prep counter, since grains typically need cooking before they’re portioned into meals. Store each grain in a labeled, airtight container rather than its original bag, both for freshness and so quantities are visible at a glance. Clear containers work especially well here, since eyeballing how much rice is left saves a step compared to opening an opaque bin.
Keep serving-size scoops inside or attached to each container, since guessing portions during a busy prep session slows things down more than people expect. A mistake to avoid: storing grains with wildly different cook times in identical, unlabeled containers, since a mix-up between quinoa and long-grain rice throws off timing for an entire prep session. Once this station is dialed in, deciding on a base for the week’s meals becomes one of the fastest steps in the whole process rather than one of the slowest.
3. Create a Dedicated Meal-Prep Container Zone
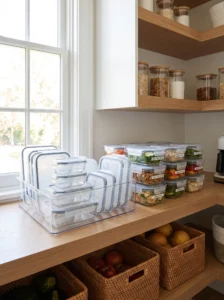
Storing meal-prep containers — the actual boxes food goes into after cooking — in their own designated pantry zone keeps them from getting buried under mixing bowls or scattered across multiple cabinets, and it means they’re ready the moment food comes off the stove.
This setup works best on a lower shelf near the pantry entrance or close to the kitchen, since containers get grabbed right before portioning begins and shouldn’t require a search at that stage. Stack containers by size, nesting smaller ones inside larger ones where lids allow, and store lids separately in a shallow bin rather than mixed in with the containers themselves, since a lid hunt is one of the more common meal-prep slowdowns.
Choose durable, stackable containers in a consistent shape family rather than a random mismatched collection, since uniform shapes stack more efficiently and take up less shelf space overall. A mistake worth flagging: keeping chipped or missing-lid containers in the rotation just because they’re technically still usable, since they quietly clutter the zone without adding real function. Once containers have a fixed, accessible spot, the actual portioning step at the end of a prep session moves noticeably faster.
4. Organize a Sauce and Condiment Station
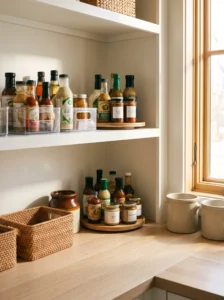
Sauces, dressings, and marinades are what keep prepped meals from tasting the same by Wednesday, and a dedicated station for them makes it easy to grab exactly what a recipe needs without disturbing the rest of the pantry.
This setup works well on a narrow shelf or door-mounted rack near the stove, since sauces get used both during cooking and at the final plating stage. Group by type — soy-based, vinegar-based, oil-based — rather than alphabetically, since meal prep usually involves reaching for a flavor profile rather than a specific brand name.
Store opened bottles upright in a shallow bin to catch any drips, and keep a small turntable in this zone if the collection has grown large enough to make individual bottles hard to spot. A mistake to avoid: letting expired or barely-used sauces accumulate indefinitely, since a station meant to speed up flavor decisions gets slower the more cluttered it becomes. This setup pays off most on weeks when the same base protein and grain get reused across multiple meals, since a rotating set of sauces is often what keeps repetitive meal prep from feeling monotonous.
5. Set Up a Weekly Meal Plan Shelf
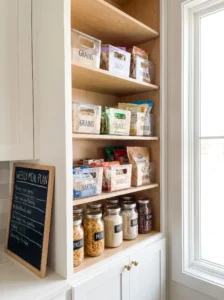
Designating one small shelf specifically for the current week’s planned ingredients — pulled forward from deeper pantry storage — creates a staging area that mirrors your actual meal plan, rather than requiring a full pantry search for each individual recipe.
This setup works best near the kitchen counter or stove, where the week’s ingredients can sit visibly ready rather than mixed back into general storage. Move only what’s needed for the current week onto this shelf after grocery shopping, treating it as an active workspace rather than long-term storage. A small chalkboard label or sticky note listing the meals planned for the week, placed right on the shelf, keeps the whole system connected to an actual plan instead of a vague pile of ingredients.
Clear the shelf and restock it each week rather than letting leftover ingredients pile up alongside new ones, since that mixing is what turns a helpful staging shelf back into general clutter. A mistake worth avoiding: overloading this shelf with backup and bulk items that belong elsewhere, since its value comes from staying focused and current. Households that adopt this setup often say meal prep starts feeling less like a chore and more like following a short, visible checklist.
6. Build a Mason Jar Salad Prep Zone
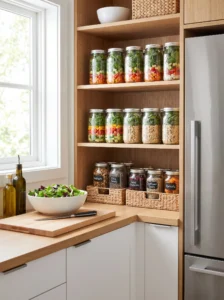
A shelf specifically stocked for layered mason jar salads — dressings on the bottom, sturdy vegetables in the middle, greens on top — turns a slightly fussy prep method into a repeatable weekly system, since every needed component has an obvious, consistent home.
This setup works best on a shelf close to the fridge, since several salad components need refrigeration even before assembly and the pantry-to-fridge handoff should be quick. Store empty mason jars upright in a dedicated bin, and keep shelf-stable salad add-ins — nuts, seeds, dried fruit — in small labeled containers within the same zone.
Choose wide-mouth jars over narrow ones, since layering ingredients through a narrow opening slows down assembly and increases the odds of a messy prep session. A mistake to avoid: storing dressings in bottles too large to control pour amounts precisely, since over-pouring at the bottom layer is one of the most common reasons mason jar salads turn soggy before the week is over. Once this zone is established, prepping five days of salads takes roughly the same amount of time as prepping one, since every component is already staged and ready.
7. Create a Smoothie Ingredient Station
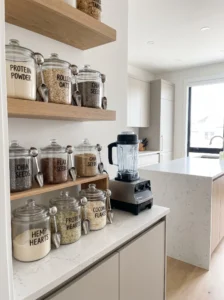
Grouping smoothie ingredients — protein powder, oats, nut butter, shelf-stable add-ins like chia or flax — into one station turns a morning smoothie from a scattered search into a genuinely fast routine, especially paired with pre-portioned freezer bags of fruit.
This setup suits a shelf close to the blender, since the entire point is minimizing steps between deciding on a smoothie and actually making one. Store powders and dry add-ins in clear, labeled containers, and keep a small scoop dedicated to each one so measuring doesn’t require digging through a drawer mid-routine.
Group ingredients loosely by smoothie type if your household makes more than one style regularly — a green smoothie base separate from a protein-focused post-workout base, for instance — so grabbing ingredients for a specific goal doesn’t require sorting through everything. A mistake worth avoiding: letting opened bags of chia seeds or flax sit unsealed for weeks, since these ingredients go rancid faster than people expect once exposed to air repeatedly. This station tends to get the most daily use of anything on this list in households with a genuine smoothie habit, since it turns a five-minute task into closer to ninety seconds.
8. Set Up a Snack Prep Assembly Zone
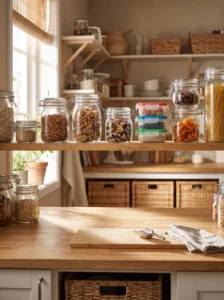
A dedicated zone for assembling grab-and-go snacks — trail mix, portioned nuts, dried fruit, small bags for produce — makes weekly snack prep a quick, repeatable task rather than something that gets skipped when the week gets busy.
This setup works well on a mid-height shelf with enough flat surface nearby to actually portion items into bags or small containers. Keep bulk snack ingredients in larger bins, and store small reusable containers or bags in the same zone so assembly doesn’t require a separate trip elsewhere in the kitchen.
Batch-portion snacks once a week rather than daily, using a set of identical small containers so the whole process becomes an assembly line rather than repeated individual decisions. A mistake to avoid: pre-portioning snacks that don’t hold up well over several days, like anything with fresh fruit that browns quickly, since spoiled pre-portioned snacks waste both the food and the time spent prepping them. Households with kids often find this the single most useful setup on this list, since it removes the daily “what snack should I pack” decision almost entirely.
9. Organize a Spice Blend Prep Station
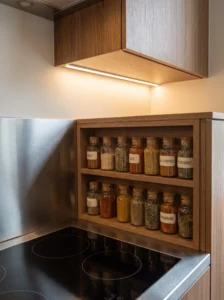
Pre-mixing spice blends used regularly across multiple meals — a go-to taco seasoning, a favorite all-purpose blend, a marinade mix — and storing them together in labeled jars saves time on cooking day, since you’re not measuring out six individual spices every time the same blend gets used.
This setup works best near the stove, on a shelf or in a small drawer within reach of where actual cooking happens. Use small, uniform jars for each pre-mixed blend, and label them clearly with both the blend name and the date it was mixed, since pre-mixed spice combinations lose potency faster than individual whole spices.
Batch-mix blends once a month rather than trying to keep a large stockpile on hand indefinitely, since fresher blends genuinely taste better and a monthly refresh keeps the habit sustainable. A mistake worth avoiding: mixing blends in quantities far larger than you’ll use within a reasonable window, since spices that sit too long lose flavor regardless of how well they’re stored. This setup shines most on busy weeknights, when reaching for one pre-mixed jar instead of six separate spice containers can be the difference between cooking at home and ordering takeout.
10. Build a Batch-Cooking Bulk Ingredient Zone
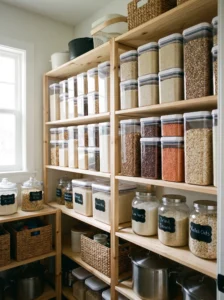
Setting aside a specific zone for bulk ingredients used in batch cooking — large bags of rice, dried beans, bulk oats, family-size protein packs — keeps these larger-format items from disrupting the rest of the pantry’s organization while still keeping them accessible for big cooking sessions.
This setup works best on lower shelves or floor-level storage, since bulk bags and containers tend to be heavier and bulkier than standard pantry items. Use large, stackable bins with secure lids rather than leaving bulk bags open or loosely rolled, both for freshness and to prevent spills during a busy cooking session.
Label bins clearly with contents and purchase date, since bulk ingredients are easy to lose track of freshness-wise compared to smaller packages with visible expiration dates. A mistake to avoid: buying in bulk faster than you actually use ingredients, since bulk-bought goods that go stale before they’re cooked erase any cost savings the bulk purchase was meant to provide. Households that batch-cook regularly tend to say this zone is what makes bulk buying actually worth it, since ingredients stay accessible and fresh rather than getting buried and forgotten.
11. Create a Freezer-to-Pantry Meal Kit Zone
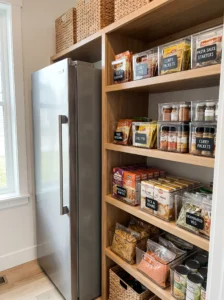
Assembling shelf-stable components of freezer meal kits — spice packets, dry seasoning mixes, canned or dried ingredients — in one pantry zone that pairs with a corresponding freezer section streamlines the process of building freezer meals ahead of time, since the dry components are ready the moment you’re assembling.
This setup works best when it’s physically close to the freezer, minimizing the back-and-forth during an assembly session. Group components by the specific meal they belong to, using small bins or bags labeled with the meal name, so the freezer-meal assembly process becomes a matter of grabbing one bin per meal rather than gathering scattered ingredients from across the pantry.
Keep a running list of which meal kits are currently assembled and ready, either on paper or a phone note, since forgetting what’s already prepped leads to either duplicate cooking or freezer meals that sit forgotten for months. A mistake worth avoiding: prepping more meal kits than your freezer can reasonably hold, since overcrowding leads to both spoilage and the frustration of digging through a packed freezer. This setup rewards households that meal-prep in larger batches, turning what could be a chaotic freezer-stocking day into an organized, repeatable process.
12. Set Up a Day-of-the-Week Labeling System
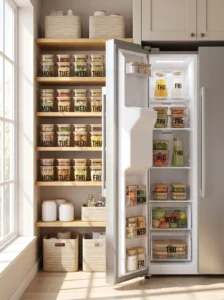
Labeling prepped meal containers by day rather than just by meal type removes the daily decision of what to eat and turns the week into a simple, visible schedule, especially useful for households prepping several different meals across five or more days.
This setup pairs naturally with the meal-prep container zone mentioned earlier, and it works best with reusable, erasable labels rather than permanent ones, since the specific meals assigned to each day will change from week to week. A simple label maker with a tape-based erasable option, or dry-erase labels applied directly to containers, both work well here.
Arrange labeled containers in the fridge or pantry in the actual order of the week, left to right or top to bottom, so grabbing “today’s” meal doesn’t require reading every label individually. A mistake to avoid: labeling containers with only the meal name and no day, which puts the decision-making back on the person grabbing food each morning — exactly the friction this system is meant to remove. Households that adopt day-based labeling often say it’s the single change that made weekday lunches finally consistent instead of a daily improvisation.
13. Organize a Family Assembly-Line Layout
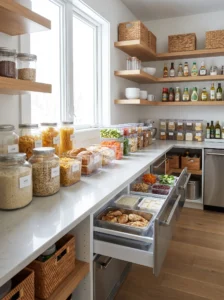
Arranging pantry ingredients in the physical order they get used during a typical meal-prep session — base first, then protein, then toppings, then sauces — turns the pantry itself into an assembly line, which speeds up prep especially in households where more than one person helps with cooking.
This setup works best in a pantry with enough width to walk along a sequence of shelves or bins in order, rather than a tight single-wall layout that forces backtracking. Position the grain and starch station near the entrance, proteins next, then vegetables or toppings, and finish with sauces and condiments closest to the stove or serving area.
Keep the sequence visually intuitive with consistent shelf heights and clear zones, so a new household member or a helping hand can follow the flow without explanation. A mistake worth avoiding: rearranging the order frequently based on whatever feels convenient in the moment, since the entire benefit depends on the sequence staying predictable over time. Families who’ve set this up often mention that meal prep becomes something more than one person can genuinely share, since everyone moves through the same logical order rather than needing direction at each step.
14. Build a Dietary-Restriction Zone
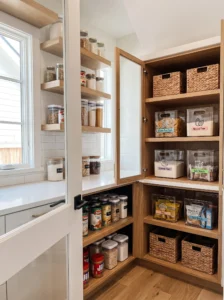
Households managing a specific dietary need — gluten-free, dairy-free, nut-free, low-sodium — benefit from a clearly separated zone for those ingredients, both to avoid cross-contamination concerns and to make finding safe options fast rather than requiring a label check on every single item.
This setup works best as a fully separate section, ideally with its own shelf or bin rather than mixed among general pantry items, particularly in households managing an allergy where mix-ups carry real risk. Use a distinct color of bin or label for this zone so it’s visually unmistakable even to someone unfamiliar with the full system, like a babysitter or visiting family member.
Keep this zone stocked with genuinely safe substitutes for common staples — a dedicated flour, a specific pasta, a marked snack selection — so meal prep for the household member with dietary restrictions doesn’t require constant substitution research. A mistake to avoid: storing restricted and non-restricted versions of the same product too close together, since visually similar packaging is one of the most common sources of dietary mix-ups. This setup matters most for peace of mind, giving households managing a real dietary concern one less thing to double-check during an already busy prep session.
15. Set Up a Prep-Day Checklist Station
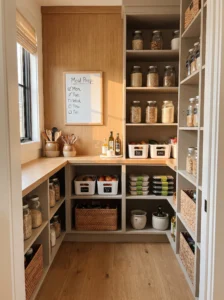
A small whiteboard or clipboard mounted inside the pantry, listing the current week’s prep tasks — proteins to cook, grains to prepare, containers to fill — turns meal prep into a visible checklist rather than a mental list that’s easy to lose track of partway through.
This setup works best right at the pantry entrance, where it’s seen every time someone walks in during a prep session. Write out the plan the night before or morning of prep day, breaking it into the same rough sequence used in the assembly-line layout mentioned earlier, so the checklist and the physical pantry flow reinforce each other.
Check off or erase tasks as they’re completed, since visible progress during a long prep session helps maintain momentum, especially on weeks with more meals planned than usual. A mistake worth avoiding: writing an overly detailed checklist with every micro-step included, which turns a helpful tool into something tedious to maintain. Households that use this setup consistently often say it’s what keeps a two-hour prep session from stretching into three, since there’s no pausing to remember what’s next.
16. Create a Portion-Control Container Zone
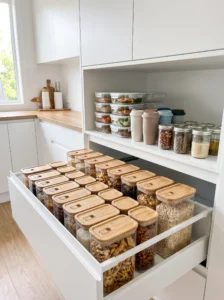
Storing pre-measured portion containers — small cups or containers sized specifically for a serving of nuts, dressing, or a side dish — in their own zone makes portioning during meal prep faster and more consistent than eyeballing amounts each time.
This setup works well as a small bin or drawer near the meal-prep container zone, since portioning typically happens during the same session as filling the larger meal containers. Choose containers in a couple of standard sizes rather than a wide mixed variety, since consistency here speeds up the process more than having options.
Keep a small chart or note nearby listing standard portion sizes for commonly prepped items, especially useful for anyone tracking specific nutritional goals as part of their meal prep routine. A mistake to avoid: buying an excessive variety of container sizes that end up scattered and hard to match with the right lid, since mismatched sets create more clutter than they solve. This setup tends to matter most for households focused on consistent portioning, whether for fitness goals, managing food costs, or simply avoiding the habit of over-serving during a rushed dinner.
17. Organize a Canned Protein and Bean Station
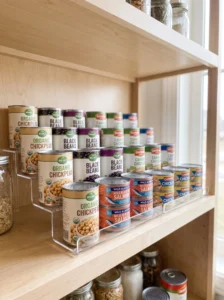
A shelf specifically for canned proteins and beans — chickpeas, black beans, canned salmon, canned chicken — gives meal prep a reliable, shelf-stable backup option, particularly useful on weeks when fresh protein wasn’t part of the grocery haul or ran out mid-week.
This setup works well as its own section within or near the broader protein shelf mentioned earlier, though it’s worth separating specifically because canned goods have different storage and rotation needs than refrigerated or frozen protein sources. Use shelf risers so cans stay visible in rows rather than stacked and hidden, and group by type so a specific bean or canned meat doesn’t require checking every can individually.
Keep a can opener stored in the same general area if possible, since a missing can opener is a surprisingly common small delay during meal prep. A mistake worth avoiding: letting canned goods sit long past their best-by date simply because canned food feels indefinitely shelf-stable, since quality does decline over time even if safety isn’t an immediate concern. This station earns its place especially in households that meal-prep on a budget, since canned proteins are often the most cost-effective way to keep a variety of protein options on hand.
18. Set Up a Baking-Ahead Zone for Snacks
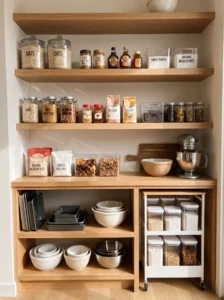
A dedicated area for ingredients used in weekly baking-ahead sessions — granola bars, energy bites, muffins made in batches — keeps these ingredients grouped separately from everyday cooking staples, since baking sessions typically happen on a different schedule and call for a different set of items.
This setup works best on a shelf near the mixing area or countertop where baking actually happens, since the ingredients for a baking session usually all get pulled at once rather than one at a time. Store oats, nut butter, sweeteners, and mix-ins together, and keep baking pans, liners, and storage containers for the finished product within the same general zone if space allows.
Batch-bake on a consistent day each week or every other week, restocking this zone right after grocery shopping so ingredients are ready when baking day arrives rather than requiring a separate trip. A mistake to avoid: letting baking ingredients scatter into general pantry storage between sessions, since that recreates the same searching problem this zone is meant to solve. Households that batch-bake snacks regularly often mention that having ingredients pre-grouped is what actually gets the baking done, rather than it becoming a good intention that keeps getting postponed.
19. Build a Breakfast Prep Station
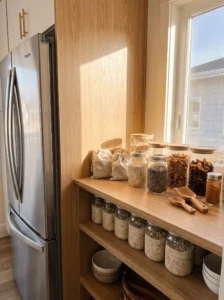
Grouping overnight oats ingredients, egg-based prep supplies, or make-ahead breakfast components into one station turns rushed mornings into a genuinely quick routine, since everything needed for a batch of breakfasts lives in a single, predictable spot.
This setup works best on a shelf close to the fridge, since most make-ahead breakfasts involve at least one refrigerated component alongside shelf-stable ingredients like oats or granola. Store mason jars or small containers specifically reserved for breakfast prep in this zone, along with dry mix-ins like chia seeds, cinnamon, or dried fruit kept in small labeled jars.
Batch-prep five days of breakfasts in one sitting rather than daily, using this station to gather everything needed before starting rather than making repeated trips back to the pantry mid-prep. A mistake worth avoiding: prepping breakfasts with ingredients that don’t hold their texture well over several days, like granola added too early to overnight oats, which turns soggy and loses its intended crunch. This setup tends to have an outsized impact on busy households, since a smooth breakfast routine sets the tone for how rushed or calm the rest of the morning feels.
20. Create a Leftover and Reheat Zone
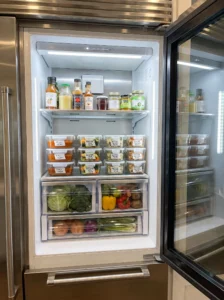
A designated shelf or fridge section specifically for portioned leftovers, paired with clearly labeled reheating instructions, keeps already-cooked food from getting pushed to the back and forgotten, which is one of the more common ways meal-prepped food quietly goes to waste.
This setup works best in the fridge rather than the pantry itself, though it pairs with a pantry-based labeling and container system, so it’s worth planning both together. Store leftovers in clear, stackable containers, positioned at eye level rather than the back of a shelf, since visibility is the entire point of this zone.
Label each container with both the contents and the date it was prepped, and make checking this zone part of the daily “what’s for dinner” decision rather than an afterthought once fresh groceries run low. A mistake to avoid: mixing leftovers in with fresh, unprepped groceries, since that makes it too easy to overlook food that needs to be eaten soon. Households that maintain a clear leftover zone tend to waste noticeably less prepped food, since nothing sits hidden long enough to be forgotten and eventually tossed.
Comparison Table: Meal-Prep Pantry Setups at a Glance
| Type | Best Use | Material | Style/Vibe | Difficulty Level |
|---|---|---|---|---|
| Grain and Starch Station | Base ingredients for meals | Glass, acrylic containers | Clean, functional | Easy |
| Meal-Prep Container Zone | Storing portioning containers | BPA-free plastic, glass | Organized, practical | Easy |
| Sauce and Condiment Station | Flavor variety across meals | Glass bottles, turntable | Efficient, tidy | Easy |
| Weekly Meal Plan Shelf | Staging current week’s ingredients | Mixed, flexible | Active, rotating | Moderate |
| Family Assembly-Line Layout | Shared, multi-person prep | Wood or wire shelving | Structured, intuitive | Moderate |
| Dietary-Restriction Zone | Allergy or diet-specific storage | Labeled bins, color-coded | Distinct, careful | Moderate |
How to Choose the Right Meal-Prep Storage Setup
Start by mapping your actual meal-prep routine before buying anything. A household that batch-cooks once a week needs different storage than one that preps daily in smaller amounts, and building around your real habits avoids the common mistake of copying a setup designed for a completely different prep style.
Material choice should follow how often each zone gets touched. Areas used daily — the protein shelf, the container zone — benefit from durable, easy-to-clean materials like acrylic or coated wire, since they’ll handle frequent use without showing wear quickly. Less-trafficked zones, like bulk storage or the baking-ahead area, can use simpler, lower-cost bins since they don’t need to withstand the same daily handling.
Durability matters most for containers and bins that get stacked, moved, and refilled constantly. Cheap, thin plastic often cracks under repeated use within a year, while a slightly higher upfront cost on quality containers usually pays off over several years of regular meal prep. Maintenance is generally light across most of these setups — a quick wipe-down and occasional deep clean — though anything storing oils or sauces needs more frequent attention to prevent sticky buildup.
On budget, prioritize the zones you’ll use most. A well-organized protein and grain station matters more for daily function than an elaborate dietary-restriction zone in a household without a specific dietary need. Common buying mistakes include purchasing a large matching container set before figuring out your actual portion sizes, and choosing containers based on appearance rather than how well they nest, stack, or fit your fridge and pantry shelves. A little planning around your real weekly routine, rather than an idealized one, tends to prevent the expensive regret of a cabinet full of barely used organizers.
Final Thoughts
A pantry built around meal prep isn’t about owning more containers or having a picture-perfect shelf system — it’s about matching the physical layout to how you actually cook and eat during a normal week. Some of these setups, like the grain station or the sauce zone, take almost no effort to establish and pay off immediately. Others, like a full assembly-line layout or a dedicated dietary zone, take more planning but solve real, recurring friction points.
The right combination depends on your specific prep habits. A household that batch-cooks proteins every Sunday gets the most value from the protein shelf and bulk ingredient zone, while a family managing packed lunches benefits more from the day-of-the-week labeling system and the snack prep zone. Picking a handful of setups that match your actual routine works better than trying to build all twenty at once.
Whatever you choose to start with, the real measure of success is whether meal prep feels less like a scramble three weeks from now. A pantry that supports your routine, rather than working against it, is what actually makes the weekly habit sustainable.
Frequently Asked Questions
How long does it take to set up a meal-prep-focused pantry? A basic version, covering two or three key zones like the protein shelf and container storage, can be set up in an afternoon. A more complete system with all twenty setups takes longer and is worth building gradually, adding zones as specific prep habits solidify rather than all at once.
Do I need special containers, or can I reuse what I already have? Reusing existing containers works fine as long as they’re clean, stackable, and have matching lids. New matching sets look more polished and often stack more efficiently, but the organization itself — grouping, labeling, staging — matters more than whether every container is brand new.
How often should meal-prep zones be cleaned or reorganized? A quick wipe-down after each prep session keeps spills and crumbs from building up, especially in the sauce and grain stations. A deeper reorganization every few months helps catch expired items and adjust zones as your actual meal-prep habits shift over time.
What’s the most budget-friendly setup on this list? The weekly meal plan shelf and the day-of-the-week labeling system cost very little, since both rely more on organization and habit than on new purchases. They’re a strong starting point before investing in containers or bins for the more storage-heavy setups.
How do I keep a shared household from disrupting the system? Involve everyone in understanding the zones from the start, and keep labels clear enough that a system makes sense without explanation. A logical, visible layout tends to hold up better in a shared household than one that only the person who built it fully understands.
Is it worth setting up a dietary-restriction zone if only one household member needs it? Yes, especially in households managing allergies or strict dietary needs, since the safety and time benefits apply even if only one person uses that specific zone regularly. It removes the need for label-checking every item during a rushed prep session.
What’s the biggest mistake people make when setting up a meal-prep pantry? Buying an elaborate container or bin system before mapping actual meal-prep habits is the most common regret. It’s worth spending one or two prep sessions simply observing where the friction happens before investing in a full setup.
How much does a full meal-prep pantry setup typically cost? A basic version using labels, a few bins, and existing containers can cost very little. A more complete setup with new matching containers, shelf risers, and organizational bins across all twenty zones costs more, but even a partial setup covering the most-used zones delivers most of the practical benefit.