Open kitchens promised us togetherness — cooking while the kids do homework, chatting with guests instead of being exiled behind a wall. And they deliver, when they’re done right. When they’re done wrong, you get a kitchen that looks into a living room that looks into chaos: cooking smells everywhere, clutter with nowhere to hide, and a space that feels bigger but somehow works worse.
I’ve cooked in and helped design enough open kitchens to know the difference comes down to a handful of decisions. It’s not about square footage — some of the most spacious-feeling open kitchens I’ve seen are under 200 square feet. It’s about continuity, boundaries, and treating the kitchen as part of the room rather than a workstation bolted onto it. These fourteen ideas are the ones that actually move the needle, from flooring tricks to the island decisions that make or break the whole layout.
1. Run One Flooring Through the Whole Space
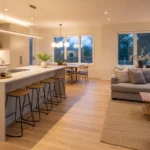
Nothing chops an open plan into pieces faster than a flooring change. That strip where tile meets hardwood is a visual stop sign — your eye reads it as “kitchen ends here,” and the spaciousness evaporates. Running a single floor material from the kitchen straight through the dining and living areas makes the whole footprint read as one room, which is the entire point of open plan.
In practice, that means choosing a floor that can handle kitchen life: luxury vinyl plank, engineered hardwood with a tough finish, or large-format tile. I’ve seen work where people panic about water and default to tile in the kitchen, then spend years regretting the cold, hard, visually chopped-up result. Modern waterproof LVP looks convincingly like wood and shrugs off spills. If you already have two floors and can’t replace them, a large rug in the living zone softens the transition — but a continuous floor is the real fix.
Budget: $$$ ($4–$12/sq ft installed). Difficulty: Medium–Hard.
2. Use the Island as a Soft Divider
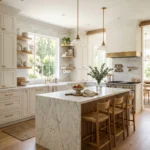
An island in an open kitchen does the job the demolished wall used to do — it defines where the kitchen ends without blocking light or conversation. The trick is placement and proportion: leave at least 42 inches of walkway on the working side (48 is better if two cooks share the space) and treat the living-room-facing side as the “public” face.
That public face is where design happens. Panel it, paint it a contrasting color, or clad it in wood — it should look like furniture, not cabinetry. Seating goes on this side, facing away from the cooking zone, so guests perch with a view of the room rather than staring at your dirty prep bowls. Keep the cooking side clean: no knife blocks, no dish racks on display. The island works as a divider precisely because it hides the working mess behind a beautiful face.
Budget: $$$ ($2,000–$7,000). Difficulty: Medium–Hard.
3. Commit to One Calm Color Palette
Open kitchens fail when the kitchen screams “kitchen” — cherry cabinets, busy granite, and bright walls fighting the calm living room ten feet away. Because you see it all at once, the palette has to be negotiated across the whole space. Pick two or three neutrals and one accent, and carry them through both zones.
Warm whites, soft grays, and natural wood tones are the safest foundation; they recede and let light do the work. Your accent — sage green, deep navy, warm terracotta — can appear in the kitchen (an island color, bar stools) and echo in the living area (throw pillows, art) to tie the rooms together. Avoid high-contrast cabinet colors unless the living room can handle the same energy. The goal is a kitchen that feels like it belongs in the room, not a showroom dropped into it.
Budget: $–$$ (paint and accessories) to $$$ (new cabinets). Difficulty: Easy–Medium.
4. Try a Peninsula When an Island Won’t Fit
Not every open kitchen has room for an island, and a cramped island is worse than none — it creates a bottleneck that ruins the flow you opened the wall to get. A peninsula, attached to the wall or existing cabinetry on one end, gives you nearly all the benefits (extra counter, casual seating, a visual boundary) in less space.
Peninsulas shine in galley-style opens and L-shaped kitchens where an island would choke the walkway. Because one end is anchored, it feels more structural and less like furniture floating in traffic. You can also run plumbing or a cooktop into a peninsula more easily than an island in some layouts. The tradeoff is one fewer approach side, so plan seating on the open side only and keep the anchored end for storage or appliances. Measure honestly: if you can’t get 40 inches of clearance around an island, go peninsula.
Budget: $$–$$$ ($1,500–$5,000). Difficulty: Medium.
5. Hang Statement Pendants Over the Island
Lighting is where open kitchens get their personality, and pendants over the island are the single highest-impact fixture choice you’ll make. They mark the kitchen zone from across the room, they put task light exactly where you chop and read recipes, and they’re the jewelry of the space.
Scale is everything: pendants that are too small look apologetic, too big and they block sightlines. A good rule is that the combined width of your pendants should span about two-thirds of the island’s length, hung 30–36 inches above the countertop. Odd numbers (three over a long island, one dramatic fixture over a small one) look more intentional than pairs. Match the finish to something else in the room — black pendants with black window frames, brass with brass hardware — so the kitchen lighting feels connected to the whole space rather than a separate decision.
Budget: $$ ($150–$800 for a set). Difficulty: Easy–Medium (electrician recommended).
6. Swap Some Uppers for Glass-Front Cabinets
Solid upper cabinets in an open kitchen can feel like a wall of boxes looming over the room — especially when they’re visible from the sofa. Replacing a section with glass-front cabinets (or removing the doors entirely on one stretch) breaks up the mass and lets the kitchen breathe. Displaying a few beautiful things — white dishes, glassware — turns storage into decor.
You don’t need to do the whole kitchen. One bank of glass fronts flanking the range or the sink is enough to change the feeling. Keep what’s behind the glass curated and consistent; a jumble of mismatched mugs defeats the purpose. If full glass feels too exposed, seeded or frosted glass hides the mess while still lightening the look. And the interior gets painted or wallpapered in a soft tone — a small detail visible from across the room that makes the kitchen feel finished.
Budget: $$ ($200–$600 per cabinet for refronting). Difficulty: Medium.
7. Integrate Appliances Behind Panels
The fastest way to make a kitchen feel like part of a living space is to make the appliances disappear. Panel-ready dishwashers and refrigerators take the same cabinet fronts as the rest of the kitchen, so instead of a wall of stainless steel you see continuous cabinetry. In an open plan, where the fridge is visible from the couch, this matters enormously.
Full integration is a bigger commitment — panel-ready appliances cost more and need precise installation — but even partial steps help. A counter-depth fridge (no more sticking out six inches past the cabinets) is the single best appliance upgrade for spaciousness. Hide the microwave in the island or pantry instead of mounting it over the range. And if the budget is tight, start with the dishwasher panel; it’s the cheapest integrated appliance and the one at eye level from the living room.
Budget: $$–$$$ ($500 extra per panel-ready appliance and up). Difficulty: Medium.
8. Paint the Island a Different Color
Two-tone cabinetry is one of those trends that stuck around because it solves a real problem: it lets the island be furniture while the perimeter stays quiet. A deep green, navy, or charcoal island against white or cream perimeter cabinets gives the kitchen a focal point without overwhelming the open room. From the living room, you see a handsome piece of furniture, not a kitchen shouting for attention.
The key is restraint everywhere else. If the island is the color moment, keep the perimeter calm and the countertops consistent across both. Carry the island color into the living space in small doses — a throw, a piece of art — so it feels like a whole-room decision. And choose the color for the long term; repainting an island is easy, but you’ll live with it daily. Test large swatches in morning and evening light before committing, because open-plan light changes dramatically through the day.
Budget: $–$$ ($50–$300 for quality cabinet paint, DIY). Difficulty: Easy–Medium.
9. Add a Proper Breakfast Bar
Casual seating at the counter is what makes an open kitchen feel social rather than merely open. But a breakfast bar only works if the ergonomics are right: 24 inches of width per person, a 12-inch overhang for knees, and counter height (36 inches) or bar height (42 inches) matched to the stools. Get any of these wrong and the seats sit empty.
Backless stools that tuck fully under the overhang keep the sightline clean from the living room — bulky backed stools create a visual barricade. If you have kids, bar height is a mistake; counter height lets them climb up independently and keeps the profile lower. Leave the breakfast bar uncluttered as a rule; it’s the landing strip for mail, keys, and homework, and in an open plan that clutter is visible from everywhere. A simple tray that corrals the daily mess is the difference between lived-in and chaotic.
Budget: $$ ($200–$800 for stools). Difficulty: Easy.
10. Use Open Shelving Sparingly — One Wall Only
Open shelving photographs beautifully and lives messily. In an open kitchen, where the shelves are visible from the sofa, a whole wall of them becomes a dust-collecting display you’re obligated to style forever. The version that actually works: one short run of open shelves — beside the range, flanking a window — holding only the beautiful everyday things.
Limit it to items you use weekly so they stay clean through rotation: everyday dishes, glasses, a few wooden boards. Everything else stays behind closed doors. The shelves themselves should be thick wood or metal that matches the room’s other materials, mounted with hidden brackets for a floating look. And be honest about your tolerance for styling — if curated shelves sound like a chore, skip them entirely. One tidy shelf beats three dusty ones.
Budget: $–$$ ($50–$300). Difficulty: Easy.
11. Soften the Island with Curved Edges
Sharp-cornered islands in open plans create two problems: bruised hips in tight walkways and a hard, blocky presence in a room that’s supposed to feel flowing. Rounded or waterfall ends on the island solve both. A curved corner is friendlier to walk past, safer for kids, and visually lighter — the eye slides around it instead of stopping.
You can get the effect without a full custom island: a butcher-block or stone top with eased, rounded edges over standard cabinetry softens the whole piece. If you’re building new, consider one curved end where traffic passes and square ends elsewhere — you keep the usable counter space while fixing the pinch point. Waterfall ends (countertop material running down the sides) also work beautifully here; they read as sculptural furniture and hide the cabinet boxes entirely from the living room side.
Budget: $$–$$$ (adds $300–$1,000 to island cost). Difficulty: Medium.
12. Anchor the Dining Zone with a Rug
In an open plan, the dining table floats between kitchen and living room belonging to neither. A rug under it claims the territory. This is the cheapest way to create a “dining room” without walls — the rug defines the zone, adds warmth underfoot, and absorbs sound in what can be an echoey space.
Size it so chairs stay on the rug when pulled out — that usually means the rug extends at least 24 inches beyond the table on all sides. Choose a low-pile, washable rug (indoor-outdoor rugs or washable cotton) because dining zones take abuse. Pattern is your friend here; it hides crumbs and stains between cleanings. Keep the rug’s colors in the room’s palette so the zone feels connected rather than fenced off. And use a rug pad — it prevents slipping on hard floors and adds the cushioning that makes the zone feel intentional.
Budget: $–$$ ($100–$400). Difficulty: Easy.
13. Add Sliding or Pocket Doors for Flexible Boundaries
Sometimes you want open, and sometimes you want the cooking mess — and smells — contained. Pocket or sliding barn doors between the kitchen and living zones give you both. Open, they disappear; closed, you get a real barrier for dinner parties, frying fish, or hiding the post-cooking wreckage.
This works best when planned during a remodel, since pocket doors need wall cavity space. Barn-style sliders are the retrofit-friendly option — they mount on a visible track and need only wall space beside the opening. Glass-paneled sliders are ideal for open plans: closed, they block sound and smell while still passing light, so the spacious feeling survives. Whatever style, make sure the track hardware is sturdy and the door actually gets used — a door that’s always open is just wall decor.
Budget: $$ ($400–$1,500). Difficulty: Medium–Hard.
14. Make the Range Hood a Focal Point
In an open kitchen, the range hood is visible from everywhere — it’s often the first thing you see from the living room. A generic stainless box wastes that prominence. A plastered, wood-clad, or stone hood becomes the architectural moment of the whole space, the equivalent of a fireplace in the living room.
Match the hood’s material to the room, not just the kitchen: a white plaster hood suits a bright modern farmhouse open plan; dark wood suits something moodier. Size it generously — undersized hoods look timid and, worse, don’t ventilate properly. And this is the place to spend on the actual fan: open plans punish weak ventilation because there’s no wall to contain cooking odors. A 600+ CFM insert with proper ducting to the exterior is non-negotiable. Beautiful and functional is the whole brief for this piece.
Budget: $$$ ($1,000–$4,000). Difficulty: Medium–Hard.
Quick Comparison: Budget and Difficulty
| Idea | What It Changes | Budget | Difficulty |
|---|---|---|---|
| Continuous flooring | Visual flow | $$$ | Medium–Hard |
| Island as divider | Zoning | $$$ | Medium–Hard |
| One calm palette | Cohesion | $–$$$ | Easy–Medium |
| Peninsula instead of island | Layout fit | $$–$$$ | Medium |
| Statement pendants | Lighting / style | $$ | Easy–Medium |
| Glass-front cabinets | Visual lightness | $$ | Medium |
| Integrated appliances | Seamless look | $$–$$$ | Medium |
| Two-tone island | Focal point | $–$$ | Easy–Medium |
| Breakfast bar | Social seating | $$ | Easy |
| Limited open shelving | Display / airiness | $–$$ | Easy |
| Curved island edges | Flow / softness | $$–$$$ | Medium |
| Dining zone rug | Zone definition | $–$$ | Easy |
| Sliding / pocket doors | Flexible boundary | $$–$$$ | Medium–Hard |
| Statement range hood | Focal point | $$$ | Medium–Hard |
Budget key: $ = under $300 · $$ = $300–$1,500 · $$$ = $1,500+
How to Choose What to Do First
If your open kitchen feels cramped or chaotic, start with the fixes that change perception rather than the ones that require demolition. Paint and lighting come first: unifying the palette across kitchen and living areas and getting pendants at the right height will transform the feeling of the space for a few hundred dollars. These are weekend projects with outsized returns.
Next, address the floor and the island — the two biggest visual anchors. If the flooring changes mid-room, that’s your highest-impact future project; save for it rather than spending the same money on accessories. If the island is wrong (too small, wrong height, ugly public face), fixing or replacing it reorganizes the entire room’s logic. Everything else — shelving, rugs, the hood — is refinement you layer on once the bones are right.
One more thing worth saying plainly: don’t open the wall just because it’s trendy. I’ve seen lovely closed kitchens gutted into mediocre open plans. Open works when your household actually lives communally — if the cook wants company and the family gathers in one space. If someone in the house needs quiet, or the kitchen is genuinely tiny, a well-designed closed kitchen beats a bad open one every time.
Frequently Asked Questions
Do open kitchens make a home feel bigger? They make it feel more connected, which usually reads as bigger — but only if the design is cohesive. An open kitchen with clashing floors, competing colors, and visible clutter can feel more chaotic than a closed one. Continuity of flooring, palette, and sightlines is what creates the spacious feeling.
How do I deal with cooking smells in an open kitchen? Ventilation is everything. Install a properly sized range hood (600+ CFM for serious cooking) ducted to the exterior — recirculating hoods don’t cut it in open plans. Cook with lids on, run the hood before you start cooking, and consider a sliding door if you do a lot of high-heat or aromatic cooking.
Where do I put everything without upper cabinets? You don’t have to eliminate uppers — but if you do, compensate with a full-height pantry wall, deep island drawers, and a well-organized pantry closet. Deep drawers hold more than most people expect and are easier to access than high shelves. Plan storage before you demo anything.
Are open kitchens bad for resale? Generally no — open plans remain popular with buyers, especially families. But the kitchen needs to look intentional from the living room, since buyers see it all at once. A dated or cluttered open kitchen hurts more than a dated closed one, because there’s nowhere to hide it.
How much does it cost to open up a kitchen? Removing a non-load-bearing wall runs $1,000–$3,000; a load-bearing wall with a proper beam runs $5,000–$15,000+ depending on structure and finishes. Get a structural engineer involved before assuming any wall can come down — that’s not a guess you want to get wrong.
What flooring is best for an open kitchen? One continuous material: waterproof luxury vinyl plank or engineered hardwood with a durable finish are the most practical choices. Large-format tile works but feels hard and cold underfoot in the living zone. Whatever you choose, run it wall to wall with no transitions.
How do I keep an open kitchen tidy when guests are over? Design for it: a deep single-bowl sink hides dishes, the dishwasher goes immediately left or right of the sink, and the island’s public face stays clear as a rule. A quick pre-guest routine — everything into the dishwasher, wipe the island, light a candle — takes ten minutes and changes everything.
Conclusion
A spacious-feeling open kitchen isn’t about knocking down every wall — it’s about making the space you have read as one calm, connected room. Continuous floors, a unified palette, an island that divides without blocking, and lighting that ties it together will do more than square footage ever could. Start with the bones, layer in the details, and design for the way your household actually lives. That’s what makes an open kitchen feel generous instead of just… open.