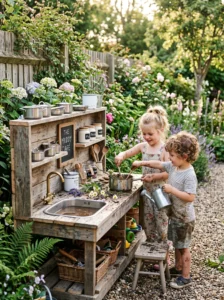
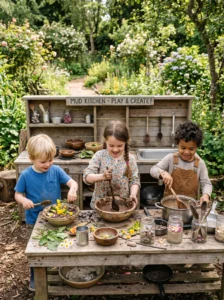
If you’ve ever watched a child spend more time playing with sticks, dirt, and old kitchen utensils than with expensive toys, you’ve already discovered the magic of a mud kitchen.
Many parents want to encourage outdoor play, but finding activities that keep children engaged for long periods can be surprisingly difficult. Screens are everywhere, and even the most exciting toys often lose their appeal after a few days. That’s where a mud kitchen comes in. It combines creativity, sensory play, imagination, and outdoor exploration in one simple setup.
The best part is that building a mud kitchen doesn’t require advanced woodworking skills, expensive materials, or a huge backyard. In fact, some of the most charming mud kitchens are made from repurposed furniture, leftover lumber, and second-hand kitchen accessories.
A well-designed mud kitchen gives children a dedicated space to mix, pour, pretend, create, and explore. It can become a bakery one day, a restaurant the next, and a potion-making laboratory after that. Unlike many toys that have a single purpose, a mud kitchen evolves with a child’s imagination.
In this guide, you’ll learn exactly how to build a practical, durable, and fun mud kitchen at home. We’ll cover planning, materials, design ideas, storage solutions, safety considerations, and finishing touches that make a big difference. Whether you’re working with a small patio or a large backyard, these ideas will help you create a space that children genuinely love using.
1. Choose the Right Location First
The success of a mud kitchen often depends more on its location than its design. Even a beautifully built setup won’t get much use if it’s placed somewhere inconvenient.
A good mud kitchen location should be easy to supervise while still giving children a sense of independence. Areas near patios, decks, or garden spaces tend to work particularly well because they provide easy access to water, soil, and natural materials.
Look for a spot that receives partial shade during the day. Direct sunlight can make surfaces extremely hot during summer months, while full shade may keep the area damp and muddy for too long after rain.
Avoid placing the kitchen directly against delicate garden beds or areas where water runoff could create problems. It’s also helpful to choose relatively level ground to prevent wobbling or instability.
Many families find that placing the mud kitchen near outdoor seating creates a more enjoyable experience. Parents can relax nearby while children stay engaged in creative play.
A carefully chosen location makes the mud kitchen feel like a natural part of the yard rather than an afterthought tucked into a corner.
2. Start With a Simple Design
One common mistake is trying to build a complicated outdoor kitchen with dozens of features right from the beginning.
Children rarely need elaborate designs to enjoy mud play. In fact, simple setups often encourage more creativity because there are fewer distractions and more opportunities for imagination.
A basic mud kitchen typically includes a countertop, a lower shelf, and one or two play stations. That’s enough space for mixing, pouring, and creating pretend meals.
Simple designs also reduce construction costs and make future upgrades easier. You can always add sinks, shelves, hooks, and storage later as your child’s interests evolve.
Focus first on functionality rather than decoration. A sturdy work surface and accessible storage matter far more than fancy details.
Parents who begin with simple designs often discover which features their children actually use before investing additional time and money into upgrades.
The goal isn’t to create a miniature luxury kitchen. It’s to create a space that inspires creativity and withstands daily outdoor use.
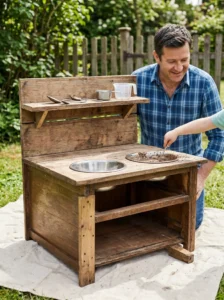
3. Repurpose Old Furniture
One of the easiest ways to build a mud kitchen is by transforming old furniture.
Unused nightstands, small tables, wooden cabinets, benches, or shelving units can become excellent foundations. This approach dramatically reduces construction time and cost.
Look around your garage, basement, or storage area before purchasing new materials. Many pieces that seem outdated indoors can find new life outdoors.
Wooden furniture works especially well because it’s easier to modify. You can remove doors, add shelves, install bowls, or cut openings for play sinks.
Before using repurposed furniture, inspect it for structural damage, loose screws, or sharp edges. Sand rough surfaces and reinforce weak joints if necessary.
A fresh coat of weather-resistant paint or outdoor sealant can significantly improve durability.
Repurposed furniture often gives mud kitchens unique character. Instead of looking like a store-bought toy, the finished project feels customized and personal.
Many of the most charming mud kitchens start as forgotten furniture pieces destined for disposal.
4. Build a Durable Work Surface
The countertop is where most of the action happens, so durability matters.
Children will scoop dirt, pour water, mix mud, stack rocks, and drag utensils across the surface every day. Weak materials tend to deteriorate quickly under this kind of use.
Pressure-treated lumber, exterior-grade plywood, cedar, and reclaimed hardwood are popular choices. These materials handle outdoor conditions better than standard indoor wood.
Keep the surface wide enough for multiple activities. Around 18 to 24 inches of depth typically provides sufficient workspace without making the kitchen feel oversized.
Smooth surfaces are easier to clean and safer for small hands. Sand all edges thoroughly before installation.
Avoid glossy finishes that become slippery when wet. A sealed but slightly textured surface generally works best.
A durable work area allows children to focus on play instead of dealing with wobbling boards or damaged surfaces.
Investing extra effort into the countertop often results in years of reliable use.
5. Add a Play Sink
A sink instantly makes a mud kitchen feel more realistic.
Fortunately, it doesn’t require actual plumbing. Many DIY builders use stainless steel bowls, old mixing bowls, or plastic tubs as simple sink inserts.
Cut an appropriately sized opening into the countertop and place the bowl securely inside. Children can fill it with water, leaves, stones, flowers, or muddy mixtures.
Position the sink where spills won’t cause problems. Having a drainage area nearby is helpful if children frequently use water.
Some families place a bucket underneath to collect excess water. Others allow drainage directly onto grass or gravel.
The sink encourages sensory exploration and supports countless pretend-play scenarios. It becomes a washing station, soup pot, mixing bowl, or science experiment area depending on the day.
This small addition often becomes one of the most frequently used features in the entire setup.
6. Include Open Shelving
Storage is often overlooked during the planning stage.
Without designated storage areas, utensils, pots, and play materials quickly become scattered around the yard. Open shelves solve this problem while keeping everything accessible.
Lower shelves work well for buckets, watering cans, and larger containers. Upper shelves can hold smaller items like measuring cups and mixing bowls.
Open shelving encourages independence because children can easily find and return items without adult assistance.
Avoid overly deep shelves that become cluttered. Shallow shelves help keep materials visible and organized.
Weather-resistant baskets or bins add extra organization while maintaining a tidy appearance.
A well-organized mud kitchen feels more inviting and makes cleanup significantly easier.
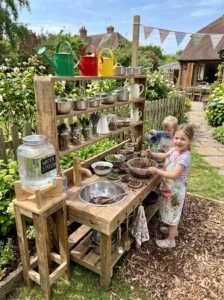
7. Create a Water Station
Water transforms a basic mud kitchen into an engaging sensory experience.
Simple water stations can be created using containers, dispensers, watering cans, or refillable jugs with taps.
Children love controlling water flow independently. It adds realism while helping develop fine motor skills.
Place the water source where refilling is convenient. If carrying water becomes difficult, the feature may be used less often.
Avoid oversized containers that become heavy or difficult to manage.
Providing controlled access to water encourages experimentation while reducing unnecessary mess.
A dedicated water station often keeps children engaged for surprisingly long periods.
8. Use Child-Friendly Heights
A mud kitchen should fit the children using it.
Countertops that are too high can cause frustration, while surfaces that are too low become uncomfortable as children grow.
For younger children, work surfaces around waist height usually feel most natural. Consider the age range of users before finalizing measurements.
If multiple age groups will use the kitchen, slightly taller surfaces often provide longer-term value.
Test heights using temporary setups before construction whenever possible.
Comfortable dimensions make play feel effortless and encourage longer periods of engagement.
Good ergonomics may not seem exciting, but they significantly improve the overall experience.
9. Add Hooks and Hanging Storage
Small accessories can make a mud kitchen feel surprisingly realistic.
Simple hooks provide convenient storage for utensils, measuring cups, strainers, and small buckets.
Mount hooks within easy reach and distribute them across the workspace rather than clustering everything together.
Weather-resistant metal hooks typically last longer outdoors than plastic alternatives.
Hanging storage keeps frequently used items accessible while freeing countertop space.
Children also enjoy arranging and organizing their tools, which helps develop responsibility and independence.
A few strategically placed hooks often deliver more practical value than large decorative features.
10. Incorporate Natural Play Materials
The best mud kitchens don’t rely entirely on purchased accessories.
Natural materials such as stones, leaves, pinecones, flowers, sticks, and sand provide endless opportunities for creative play.
Create designated containers where children can collect and store these treasures.
Rotating natural materials with seasonal changes keeps the kitchen feeling fresh and exciting.
Encouraging children to gather ingredients from the garden adds an exploratory element to playtime.
Nature provides an endless supply of imaginative resources without increasing costs.
11. Install a Chalkboard Back Panel
A chalkboard adds another layer of creativity to the space.
Children can write menus, draw recipes, create signs, or keep score during pretend restaurant games.
A simple plywood panel coated with exterior chalkboard paint works well.
Position it behind the main work area where it’s visible but doesn’t interfere with play.
The chalkboard encourages literacy skills while supporting imaginative storytelling.
It’s a relatively inexpensive upgrade that provides significant entertainment value.
12. Protect the Wood Properly
Outdoor projects face constant exposure to weather.
Without protection, even well-built mud kitchens can deteriorate quickly due to moisture, sunlight, and temperature changes.
Apply outdoor sealants, stains, or weather-resistant paints designed specifically for exterior wood.
Pay particular attention to cut edges and exposed joints.
Regular maintenance extends lifespan and preserves appearance.
Protective finishes may not be the most exciting step, but they’re among the most important.
13. Design for Easy Cleanup
Mess is part of the experience, but cleanup shouldn’t be overwhelming.
Choose surfaces that can be rinsed easily and avoid designs with hard-to-reach crevices.
Gravel, mulch, or grass beneath the kitchen generally handles spills better than concrete.
Provide a small cleanup bucket or storage area for used materials.
Practical cleanup solutions make parents more likely to encourage regular use.
The easier the maintenance, the more enjoyable the mud kitchen becomes for everyone.
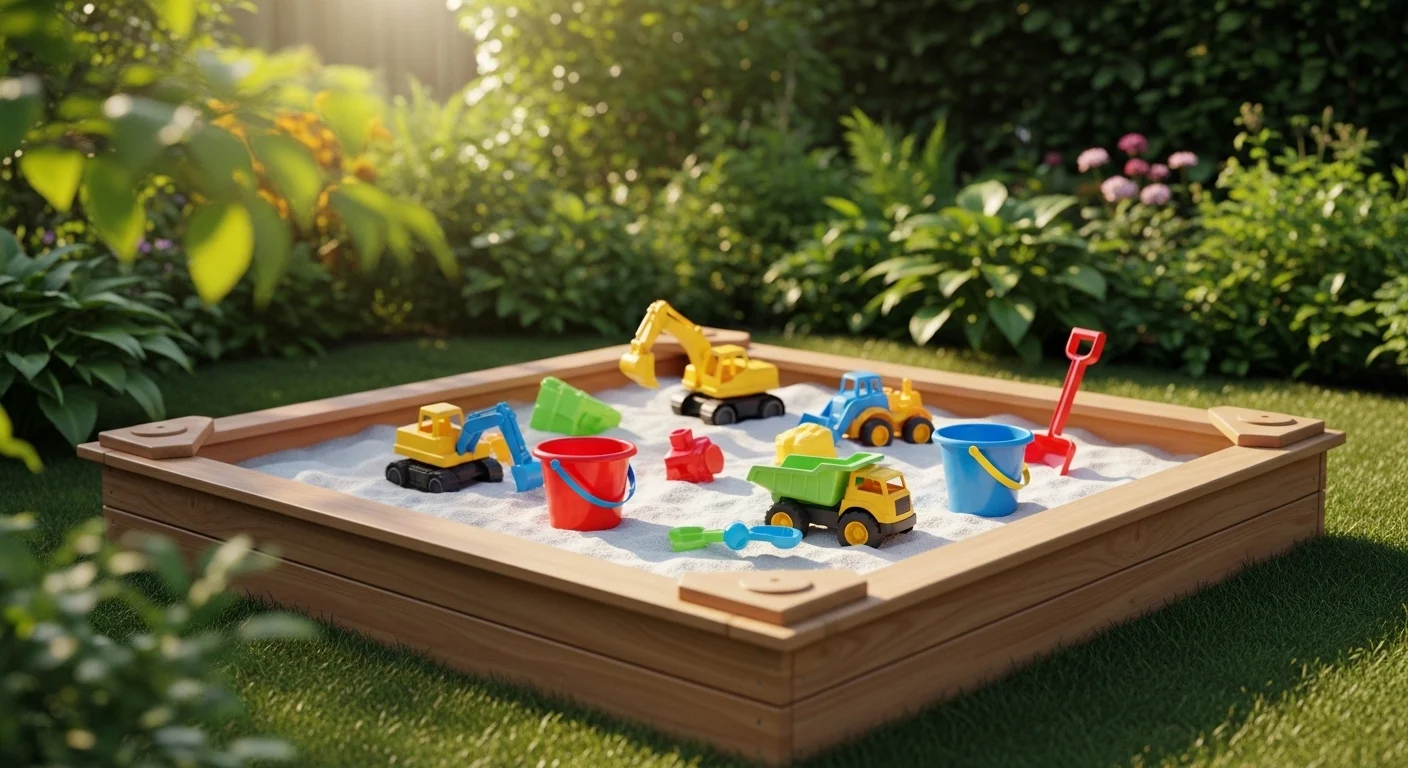
14. Add Pretend Cooking Accessories
Accessories help bring imaginative play to life.
Old pots, pans, measuring cups, baking trays, wooden spoons, and mixing bowls are perfect additions.
Avoid expensive toy sets. Real kitchen items often feel more engaging and durable.
Check regularly for damage or rust and replace worn items when needed.
Children naturally invent recipes, restaurants, and cooking competitions when given realistic tools.
These simple additions often generate countless hours of creative entertainment.
15. Leave Room for Future Upgrades
The best mud kitchens evolve over time.
Instead of trying to include every possible feature immediately, leave space for future additions.
You may later add planters, extra shelving, sensory bins, awnings, or decorative details.
Observing how children actually use the kitchen helps guide smart upgrades.
Flexible designs adapt more easily to changing interests and age groups.
Building with growth in mind ensures the kitchen remains useful for years rather than months.
Comparison Table
| Type | Best Use | Material | Style/Vibe | Difficulty Level |
|---|---|---|---|---|
| Repurposed Furniture Kitchen | Budget DIY projects | Old cabinets or tables | Rustic | Easy |
| Basic Countertop Kitchen | Small spaces | Lumber and plywood | Simple | Easy |
| Sink-Integrated Kitchen | Water play | Wood and metal bowl | Realistic | Medium |
| Chalkboard Kitchen | Creative play | Wood and chalkboard paint | Interactive | Medium |
| Expanded Storage Kitchen | Multiple children | Wood and shelving | Organized | Medium |
| Custom Built Kitchen | Long-term backyard use | Premium lumber | Professional | Advanced |
Buying Guide: How to Choose the Right Mud Kitchen Setup
Choosing the right mud kitchen depends largely on available space, budget, and the age of the children who will use it.
Start by considering size. A compact mud kitchen works well for patios, balconies, and smaller yards, while larger gardens can accommodate wider workstations with multiple activity zones. Avoid building something oversized simply because space is available. Practicality matters more than scale.
Material selection has a major impact on durability. Pressure-treated lumber, cedar, and exterior-grade plywood typically withstand weather better than untreated wood. If using repurposed furniture, inspect it carefully and apply protective finishes before outdoor use.
Maintenance should also influence your decisions. Smooth surfaces, accessible storage, and weather-resistant finishes make cleaning easier. Features that seem appealing initially may become frustrating if they require constant upkeep.
Budget-wise, many excellent mud kitchens can be built primarily from reclaimed materials. Old cabinets, leftover lumber, second-hand bowls, and recycled containers often provide everything needed for a functional setup. Spending more doesn’t automatically create a better play experience.
One common mistake is focusing too heavily on appearance. Children generally care more about opportunities for creativity than decorative details. Another frequent error is neglecting storage, which can lead to clutter and lost accessories.
Finally, think about longevity. Adjustable or slightly larger designs often accommodate growing children better than highly age-specific setups. Building with flexibility in mind helps maximize value over time.
Conclusion
Building a mud kitchen at home is one of those projects that delivers far more value than its cost might suggest. It encourages outdoor play, sparks imagination, supports sensory learning, and creates a dedicated space where children can explore freely.
The most successful mud kitchens aren’t necessarily the biggest or most expensive. They’re thoughtfully designed, durable, easy to maintain, and tailored to the needs of the children using them. Simple features such as a sturdy work surface, accessible storage, a play sink, and natural materials often provide the greatest enjoyment.
Whether you’re repurposing an old cabinet or constructing a custom backyard setup from scratch, focusing on practicality will always pay off. Prioritize safety, durability, and flexibility over decorative extras.
Most importantly, remember that the goal isn’t perfection. A mud kitchen is meant to be used, explored, and occasionally covered in dirt. That’s part of its charm.
With careful planning and a few basic materials, you can create an outdoor play space that remains a favorite for years and encourages countless hours of creative, screen-free fun.
FAQs
1. How much does it cost to build a DIY mud kitchen?
Costs vary widely depending on materials. Using repurposed furniture can keep expenses under $50, while custom-built versions may cost several hundred dollars. Most families can create a functional setup on a modest budget.
2. What is the best wood for an outdoor mud kitchen?
Cedar, pressure-treated lumber, and exterior-grade plywood are popular choices because they resist moisture and weather damage better than untreated wood.
3. Do mud kitchens need running water?
No. Most mud kitchens use simple containers, buckets, watering cans, or refillable dispensers instead of permanent plumbing.
4. What age is suitable for a mud kitchen?
Most children between ages 2 and 10 enjoy mud kitchens. The setup can be adjusted with different accessories and activity levels as children grow.
5. How do I keep a mud kitchen clean?
Regular rinsing, organized storage, and weather-resistant surfaces help simplify maintenance. Removing standing water also prevents unnecessary wear.
6. Can I build a mud kitchen in a small yard?
Absolutely. Compact designs using small tables, shelves, or repurposed furniture can fit comfortably in patios, balconies, or limited outdoor spaces.
7. What accessories work best in a mud kitchen?
Old pots, pans, measuring cups, bowls, watering cans, and wooden spoons are excellent choices. Real kitchen tools often provide better play value than toy versions.
8. How can I make a mud kitchen last longer?
Use weather-resistant materials, apply protective sealants, inspect hardware regularly, and cover the kitchen during extreme weather when possible.