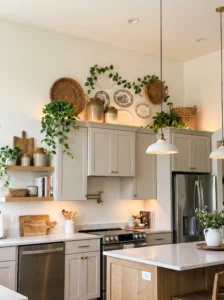
That gap above the kitchen cabinets has a way of becoming the most neglected spot in the whole house. It’s too high to clean easily, too awkward to style without a ladder, and somehow every kitchen renovation guide skips right over it. So it sits there collecting dust, maybe holding a few mismatched baskets someone shoved up there in 2015, or worse, nothing at all — just an empty strip of shadow between the cabinet top and the ceiling.
The thing is, that space isn’t actually a design dead zone. It’s one of the few spots in a kitchen with real height and visibility, which means it can do a lot of visual work if you treat it with any intention at all. A kitchen with styled cabinet tops looks finished in a way that’s hard to pin down until you notice the difference next to one where the space was simply ignored.
This list walks through fifteen practical ways to fill that gap, from classic choices like baskets and greenery to options most people don’t think to try, like lighting or display shelving. Some of these need a few hours and almost no budget. Others are a bit more involved. Either way, by the end you’ll have a clear sense of what actually works for your ceiling height, your cabinet style, and how much maintenance you’re honestly willing to keep up with.
1. A Row of Woven Baskets
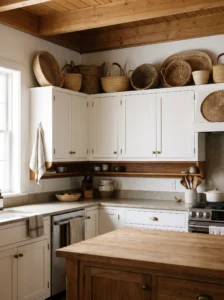
Baskets remain the most popular choice for cabinet tops for a reason — they fill awkward, oddly-shaped space without needing anything fragile or expensive, and the natural texture softens what’s usually a very square, hard-edged part of the kitchen.
This works especially well in kitchens with wood or farmhouse-style cabinetry, where the woven texture echoes materials already present in the room. It also suits kitchens with higher ceilings, since baskets read as substantial enough to fill real vertical space without looking lost.
Choose baskets in varying sizes rather than identical ones, and alternate their orientation — some lying flat, others tipped slightly on their side — to avoid a stiff, uniform row. Stick to a consistent material and tone across all the baskets even if the shapes differ, since mixing too many basket styles at once tends to look cluttered rather than curated. One thing worth knowing before committing to this option: baskets collect kitchen grease and dust faster than you’d expect given their height, so plan on wiping them down every few months rather than assuming they’re maintenance-free just because they’re out of reach.
2. Oversized Decorative Jars or Jugs
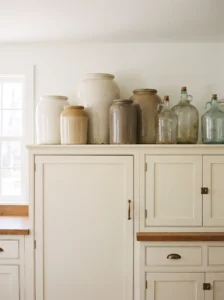
A cluster of large ceramic jars or glass jugs brings genuine visual weight to cabinet tops, which matters because small, delicate objects tend to disappear entirely once they’re six or seven feet up and viewed from below.
This suits kitchens with a more farmhouse or vintage lean, where a collection of stoneware crocks or old glass bottles feels like it belongs rather than looking like staged decor. It also works particularly well above cabinets that end a few inches short of the ceiling, since the height of the jars helps close that visual gap.
Vary the heights within the grouping, placing the tallest piece slightly off-center rather than dead in the middle, and keep the color palette limited to two or three tones so the collection reads as intentional. Avoid filling every jar with something — an empty jug here and there actually helps the grouping breathe rather than looking overstuffed. The detail that surprises people most is how much a few larger pieces can visually anchor an entire kitchen, almost like furniture rather than decoration, especially when viewed from the dining table or living room beyond.
3. Trailing Faux Greenery
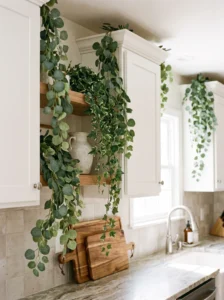
Real plants dry out fast in the heat that rises near kitchen ceilings, which is exactly why faux trailing greenery has become such a popular fix for cabinet tops — it gives you the organic, softening effect of a plant without worrying about watering something you can’t easily reach.
This works especially well in kitchens that otherwise feel heavy on hard surfaces — tile, stone counters, metal appliances — since the greenery introduces a bit of visual relief without adding real upkeep. A long strand of faux eucalyptus or ivy draped from a simple vase or over the cabinet edge does the job better than a potted plant sitting upright.
Choose higher-quality artificial greenery rather than the cheapest option available, since the difference in how convincingly it catches light is noticeable from below, even at a distance. Let the vines fall unevenly rather than symmetrically on both sides, which looks more like something growing naturally than something arranged. A small but real upside here: dusting faux greenery takes a fraction of the effort of caring for live plants at that height, so it’s one of the lowest-maintenance options on this whole list despite looking like it requires a green thumb.
4. A Curated Collection of Vintage Plates
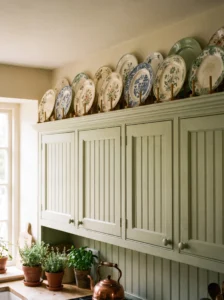
Leaning a handful of decorative plates against the wall above the cabinets brings color and pattern into a part of the kitchen that’s otherwise easy to overlook, and it’s a genuinely good way to use plates you already own but rarely display elsewhere.
This suits kitchens with a cottage, vintage, or eclectic style, where mismatched patterns feel intentional rather than chaotic. It works particularly well if your cabinet color is fairly neutral — white, cream, sage — since the plates become the clear visual focus rather than competing with a bold cabinet color underneath.
Use plate stands or small easels to angle them slightly forward rather than laying them completely flat, which helps the pattern read clearly from below. Keep the color palette loosely coordinated even if the patterns vary, so the collection doesn’t read as a random assortment pulled from a cupboard. Dust accumulates on the plate surfaces faster than most people expect, so a quick wipe every month or two keeps them from looking neglected. What’s nice about this option specifically is how personal it feels compared to store-bought decor — plates with a bit of history, whether inherited or thrifted, add a story to the kitchen that mass-produced decor simply can’t replicate.
5. Floating Shelf for Rotating Display
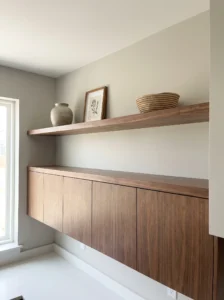
Installing a single floating shelf along the top of the cabinets turns a static, hard-to-reach space into something you can actually update and use, rather than committing permanently to one arrangement.
This option works best in kitchens with at least 12 to 15 inches of clearance between the cabinet top and ceiling, since anything tighter won’t leave room for objects to sit comfortably without looking cramped. It’s also a strong choice for anyone who likes seasonal decorating, since a shelf makes swapping pieces in and out far easier than rearranging items balanced directly on the cabinet top.
Mount the shelf a few inches back from the cabinet’s front edge rather than flush with it, which creates a cleaner sightline and reduces the visual bulk of the addition. Keep the shelf itself a simple, unobtrusive material — matte black metal or a wood tone matching the cabinets — so it doesn’t compete with whatever you place on it. Avoid overloading the shelf with too many small items, which can look cluttered from below; three or four well-chosen pieces generally read better than a dozen tiny ones. This is one of the more functional ideas on the list, genuinely useful for anyone who gets tired of the same static display sitting untouched for years.
6. Crown Molding to Close the Gap Entirely
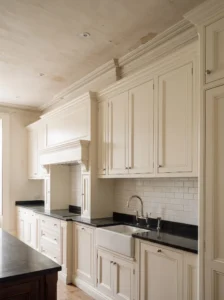
Sometimes the smartest move isn’t decorating the space above the cabinets at all — it’s eliminating it. Adding crown molding that runs from the cabinet top to the ceiling closes that awkward gap permanently, giving the whole kitchen a more finished, built-in look.
This solution suits kitchens where the gap is relatively small, generally under 6 inches, since larger gaps need more substantial millwork to fill convincingly. It’s also the better choice for anyone who’s simply tired of dusting that space regularly and wants a maintenance-free fix rather than another thing to decorate and clean.
Match the molding finish to your cabinet color as closely as possible for a seamless, built-in appearance, or paint it to match the ceiling if you want the cabinets to visually extend upward without drawing extra attention to the transition. This is a job better suited to a professional installer or an experienced DIYer, since getting consistent, tight seams along an uneven ceiling takes more precision than it looks like from photos. The payoff is real, though — kitchens with this detail tend to look like they were built that way from the start, rather than renovated or decorated after the fact, which adds genuine resale value beyond just solving the clutter problem.
7. Wine or Liquor Bottle Display
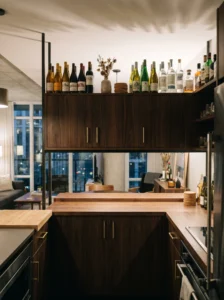
For anyone who already collects wine or enjoys a well-stocked bar cart, displaying a few bottles above the cabinets turns functional storage into a styling opportunity, and it’s a smart way to use vertical space that would otherwise sit empty.
This works particularly well in kitchens with a modern or industrial edge, where sleek bottle shapes and metallic labels complement clean cabinet lines. It also suits open-concept kitchens where the display is visible from a living or dining area, since the bottles read as a deliberate styling choice rather than random storage.
Group bottles by height and color rather than placing them randomly, and mix in a few other objects — a small vase, a stack of cork coasters — to break up what could otherwise look like a liquor store shelf. Keep the bottles you display toward the ones with nicer labels or more interesting shapes, saving everyday bottles for a cabinet instead. One real downside worth mentioning: direct light and heat near the ceiling can degrade wine faster than proper storage conditions, so this works better as decoration for bottles you plan to drink reasonably soon rather than ones meant for long-term aging.
8. Oversized Art or a Single Statement Piece
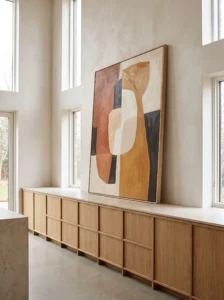
A large piece of art propped above the cabinets, rather than a cluster of small objects, gives the space a completely different feel — more gallery than storage shelf, and genuinely striking in kitchens with the ceiling height to support it.
This suits kitchens with at least 18 inches of clearance above the cabinets, since smaller gaps make a large piece look cramped rather than impactful. It also works particularly well in kitchens that otherwise lean minimal, where a single bold piece can serve as the room’s main visual statement without competing with other decor.
Lean the artwork against the wall rather than hanging it, which makes it easier to swap out later and gives a slightly more relaxed, gallery-wall feel than a rigidly mounted piece. Choose something with enough visual weight — bold color, strong linework — to read clearly from a distance, since delicate or highly detailed pieces lose their impact once viewed from several feet below. Avoid placing anything in front of the art that would block its lower edge, which happens more easily than you’d think once other cabinet-top decor starts accumulating nearby. This approach tends to work best as the sole focus of the space rather than paired with baskets or jars elsewhere along the same run of cabinets.
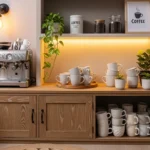
9. Integrated Rope Lighting for Ambient Glow
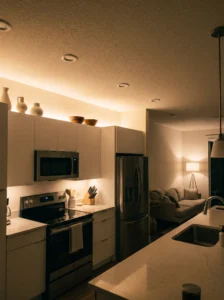
Running a strip of warm LED rope lighting along the top of the cabinets does double duty — it fills the visual gap with a soft glow in the evening and genuinely improves the kitchen’s ambient lighting, which most overhead fixtures alone don’t handle particularly well.
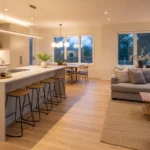
This works in any kitchen but makes the most noticeable difference in ones with higher ceilings, where the light bounces softly off the ceiling and spreads a warm wash across the upper half of the room. It’s also a smart addition for open-concept layouts, since the glow reads well from adjoining living or dining spaces after dark.
Choose warm white LEDs, generally in the 2700K to 3000K range, rather than cool white, which can feel clinical in a kitchen setting. Tuck the strip just behind the cabinet’s front edge so the light source itself stays hidden and only the glow is visible from below. A dimmer switch is worth the small extra cost here, since the right brightness for cooking is rarely the same as the brightness you want for a relaxed evening. The lived-in benefit of this option shows up almost immediately — kitchens with this lighting genuinely feel cozier after dark, and it solves the cabinet-top problem and a lighting gap at the same time, which is more than most single ideas on this list can claim.
10. A Mini Herb or Succulent Garden
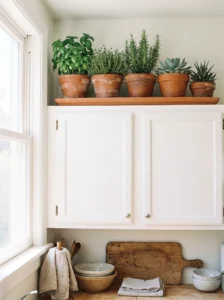
For kitchens with strong natural light reaching the cabinet tops, a small collection of potted herbs or succulents brings in real greenery and a bit of function, assuming you’re willing to keep up with watering something that’s slightly out of easy reach.
This suits kitchens with a window near the cabinet area or strong ambient light throughout the day, since most herbs and succulents need more light than the average cabinet top actually receives. Without decent natural light, this option tends to disappoint within a few months as the plants stretch and fade.
Use a tray or shallow dish underneath each pot to catch water runoff, since drips from above are far more noticeable and annoying in a kitchen than almost anywhere else in the house. Group three or four small pots together rather than spacing them out individually, which makes watering and general upkeep easier to manage in one pass. Be honest with yourself about maintenance before committing to this one — it’s the only idea on this list that genuinely requires ongoing care, and a few dead, droopy plants up high look considerably worse than an empty cabinet top ever would.
11. Decorative Crates or Wooden Boxes
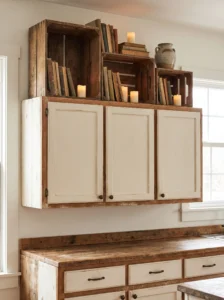
Stacked wooden crates bring rustic texture and a bit of dimension to cabinet tops, working especially well as a backdrop for other smaller decor items rather than as the main feature on their own.
This option suits farmhouse or rustic kitchens, particularly ones with open shelving or exposed wood elements elsewhere in the room, since the crates echo those existing materials rather than introducing something unrelated. It also works well for anyone who wants a slightly more dimensional, layered look than flat baskets alone provide.
Stack two or three crates at varying heights rather than lining them up flat, and use the elevated ones to display smaller items like candles or a few books, which adds depth to the overall arrangement. Choose crates with a worn, slightly distressed finish over anything glossy or new-looking, since the raw wood texture is really the whole appeal here. Keep the stack relatively stable and secure, since crates balanced precariously above head height in a kitchen are a genuine hazard if something gets bumped. This is a particularly good option for anyone redecorating on a tight budget, since reclaimed or secondhand crates cost next to nothing compared to most other cabinet-top solutions on this list.
12. A Cohesive Color-Blocked Display
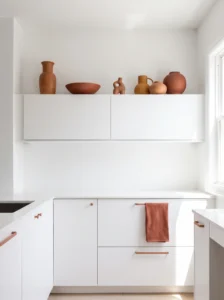
Rather than mixing textures and materials, choosing a handful of objects all in the same color family creates a bold, graphic look above the cabinets that reads clearly even from across the room.
This suits modern or contemporary kitchens where a single strong accent color already appears elsewhere — in the backsplash, the island, or the bar stools — since the cabinet-top display can echo and reinforce that existing color story. It works less well in kitchens with a more eclectic, collected look, where this approach can feel slightly too staged.
Mix object types — a vase, a bowl, a small sculpture — rather than using identical items, while keeping them all within the same tight color range, like varying shades of terracotta or sage green. Leave some negative space between pieces rather than crowding them together, since the color coordination alone provides plenty of visual interest without needing density too. The thing that makes this approach work so well in practice is how much easier it makes future updates — swapping in a new piece within the same color family keeps the display feeling fresh without needing to rethink the whole arrangement from scratch.
13. Antique or Vintage Cookware Display
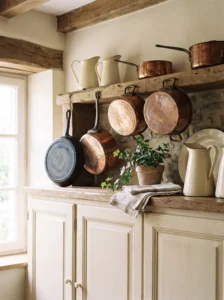
Old copper pots, cast iron pans, or enamelware pitchers displayed above the cabinets turn functional kitchen history into decor, and it’s a genuinely good use for pieces too worn or specialized for everyday cooking but too nice to get rid of.
This suits kitchens with a vintage, French country, or traditional style, where the warm metallic tones of copper or the chipped charm of old enamelware fit naturally into the existing aesthetic. It’s a less convincing choice in a sleek, modern kitchen, where the contrast tends to look accidental rather than intentional.
Angle pieces slightly rather than placing them flat, so details like a copper pot’s hammered texture or an enamelware pitcher’s handle catch the light and read clearly from below. Mix in a plant or a stack of linens between the cookware pieces to soften what could otherwise look like a hardware display. Keep an eye on tarnish if you’re using real copper, since the heat and grease in a kitchen environment speeds up discoloration more than copper stored elsewhere in the house. This option carries a kind of warmth that newer decor struggles to match, mostly because the pieces themselves usually come with some actual history attached, whether inherited from family or picked up at an estate sale.
14. Seasonal Rotating Decor System
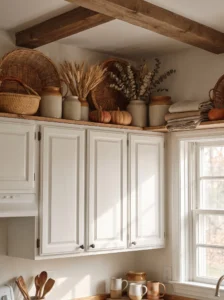
Rather than committing to one permanent look, setting up cabinet tops for easy seasonal swaps keeps the space feeling fresh throughout the year without requiring a full redecorating effort each time.
This works well for anyone who already decorates seasonally elsewhere in the home and wants the kitchen to match that same rhythm — pumpkins and warm tones in fall, greenery and candles in winter, light florals in spring. It’s particularly practical in kitchens with the floating shelf option mentioned earlier, since swapping items on a shelf is considerably easier than rearranging things balanced directly on cabinet tops.
Keep a consistent set of “base” items — a few baskets or jars — that stay in place year-round, then rotate smaller seasonal accents in and out around them, rather than replacing the entire display each time. Store off-season decor in clearly labeled bins so the swap takes minutes rather than becoming a half-day project of digging through the garage. The genuine advantage here is that the kitchen never looks static or forgotten, which matters more than people expect in a room used daily — a cabinet top that changes with the seasons signals an attention to detail that a permanently fixed display simply can’t match.
15. Negative Space as an Intentional Choice
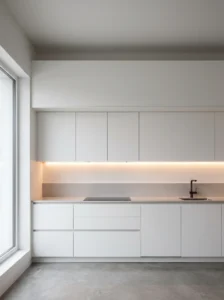
Sometimes the smartest decision is deciding not to fill the space at all, and treating that choice as deliberate rather than an oversight changes how the whole kitchen reads.
This suits minimalist or modern kitchens where clean lines and uncluttered surfaces are already the guiding design principle, since adding decor purely to fill a gap can actually work against that aesthetic. It’s also a sensible choice for anyone who’s tired of dusting an already hard-to-reach spot and would rather skip the upkeep altogether.
If you go this route, make sure the cabinet-to-ceiling gap itself looks clean and finished — painted to match either the cabinets or the ceiling, with no visible gaps or unfinished edges, since empty space only reads as intentional when it looks genuinely considered rather than neglected. A single small design detail, like under-cabinet lighting that draws the eye downward instead of up, can help shift attention away from the empty space entirely. What’s worth remembering here is that a tidy, empty cabinet top in an otherwise well-designed kitchen often looks more sophisticated than a cluttered one trying too hard to fill every inch of available space.
Comparison Table: Cabinet-Top Decor Options at a Glance
| Type | Best Use | Material | Style/Vibe | Difficulty Level |
|---|---|---|---|---|
| Woven Baskets | Farmhouse or traditional kitchens | Natural rattan, seagrass | Warm, textured | Easy |
| Floating Shelf Display | Kitchens wanting flexible, rotating decor | Wood or metal shelving | Modern, functional | Moderate |
| Crown Molding | Kitchens with a small, awkward gap | Wood or MDF trim | Polished, built-in | Difficult |
| Rope Lighting | Any kitchen needing ambient light | LED strip lighting | Cozy, atmospheric | Moderate |
| Vintage Plate Display | Cottage or eclectic kitchens | Ceramic plates, metal stands | Personal, collected | Easy |
| Oversized Jars | Farmhouse or vintage-style kitchens | Ceramic, glass | Rustic, substantial | Easy |
How to Choose the Right Approach for Your Kitchen
Start by actually measuring the gap between your cabinets and ceiling before choosing a direction, since this single measurement rules out several options immediately. Anything under 6 inches works better with crown molding or a very low-profile solution like rope lighting, while 12 inches or more opens up baskets, shelving, and larger display pieces comfortably.
Material choice matters more than people initially assume. Baskets and natural materials suit farmhouse or traditional kitchens, while glass, metal, and clean-lined ceramics fit better in modern spaces. Mismatching material style to the rest of your kitchen is one of the more common reasons a cabinet-top display ends up looking out of place rather than intentional.
Durability is a real consideration up there, more than most people expect. Heat rises, grease travels further than you’d think from the stove, and dust settles steadily on anything left untouched for months. Choose materials that wipe down easily — ceramic, glass, and sealed wood all hold up better over time than unsealed, porous surfaces that absorb kitchen grime.
Maintenance should factor into your decision honestly, not aspirationally. If you know you won’t climb a step stool monthly to dust and water plants, skip the mini herb garden and lean toward lower-maintenance options like faux greenery or a simple jar collection instead.
Budget-wise, this is one of the more forgiving areas of kitchen decor to work with. Thrifted baskets, crates, and vintage plates cost next to nothing compared to a full shelf installation or crown molding project. Save bigger spending for structural changes like molding or built-in lighting, and use inexpensive, easily swapped decor for everything else.
A common regret here is overcommitting to a permanent, built-in solution before living with the space for a while. Try a simple basket or jar arrangement first, give it a few months, and only invest in something more structural like molding or shelving once you’re confident about the direction you actually want.
Final Thoughts
The space above kitchen cabinets doesn’t need a dramatic transformation to stop looking neglected — it mostly just needs a decision. Some of the options here, like baskets or jars, take an afternoon and barely any money. Others, like crown molding or integrated lighting, are bigger projects better suited to a planned renovation rather than a weekend fix.
What matters most is matching the solution to your actual kitchen and your actual habits, not whatever looks best in a single photo. A kitchen with low ceilings and minimal natural light probably shouldn’t bank on live herbs up there, just as a sleek modern kitchen probably doesn’t need a rustic crate stack fighting against its clean lines. Pick what fits, give it a season to settle in, and that forgotten strip above the cabinets finally earns its place in the room instead of quietly working against it.
Frequently Asked Questions
How much clearance do I need above my cabinets to decorate the space?
Most decor options work comfortably with at least 10 to 12 inches of clearance. Smaller gaps are better suited to crown molding or very low-profile solutions like rope lighting rather than baskets or larger display pieces.
Will decorating above my cabinets make the kitchen look cluttered?
It depends entirely on restraint. A few well-chosen, coordinated pieces look intentional, while cramming the space with too many small, mismatched items tends to look messy regardless of how nice the individual pieces are.
How often do I need to clean decor placed above kitchen cabinets?
Plan on dusting every one to two months, since grease and dust settle there faster than in most other parts of the kitchen. Smooth materials like ceramic and glass wipe down far more easily than porous baskets or unsealed wood.
Is it worth hiring someone to install crown molding above cabinets?
For most homeowners, yes. Getting consistent, tight seams along an uneven ceiling is harder than it looks, and a professional installation tends to look noticeably more polished than a DIY attempt, especially in older homes with uneven ceiling lines.
What’s the most budget-friendly way to decorate this space?
Thrifted baskets, jars, or crates cost very little and fill the space effectively. Save higher spending for structural upgrades like built-in lighting or molding, which make a bigger long-term difference but come with a real price tag.
Can I use real plants above my kitchen cabinets?
Only if the spot gets decent natural light throughout the day. Without it, real plants tend to stretch, fade, and generally struggle within a few months, so faux greenery is usually the more reliable choice for that height and light level.
What’s the biggest mistake people make decorating cabinet tops?
Overfilling the space with too many small, unrelated items collected over time without any real plan. A cohesive color palette or material choice across fewer pieces almost always looks more finished than a crowded, mismatched collection.
Should I leave the space empty if I have a modern kitchen?
It’s a completely valid choice, especially in minimalist kitchens where clean lines matter more than filled surfaces. Just make sure the gap itself looks finished and painted neatly, since an empty space only reads as intentional when it looks deliberately clean rather than simply forgotten.