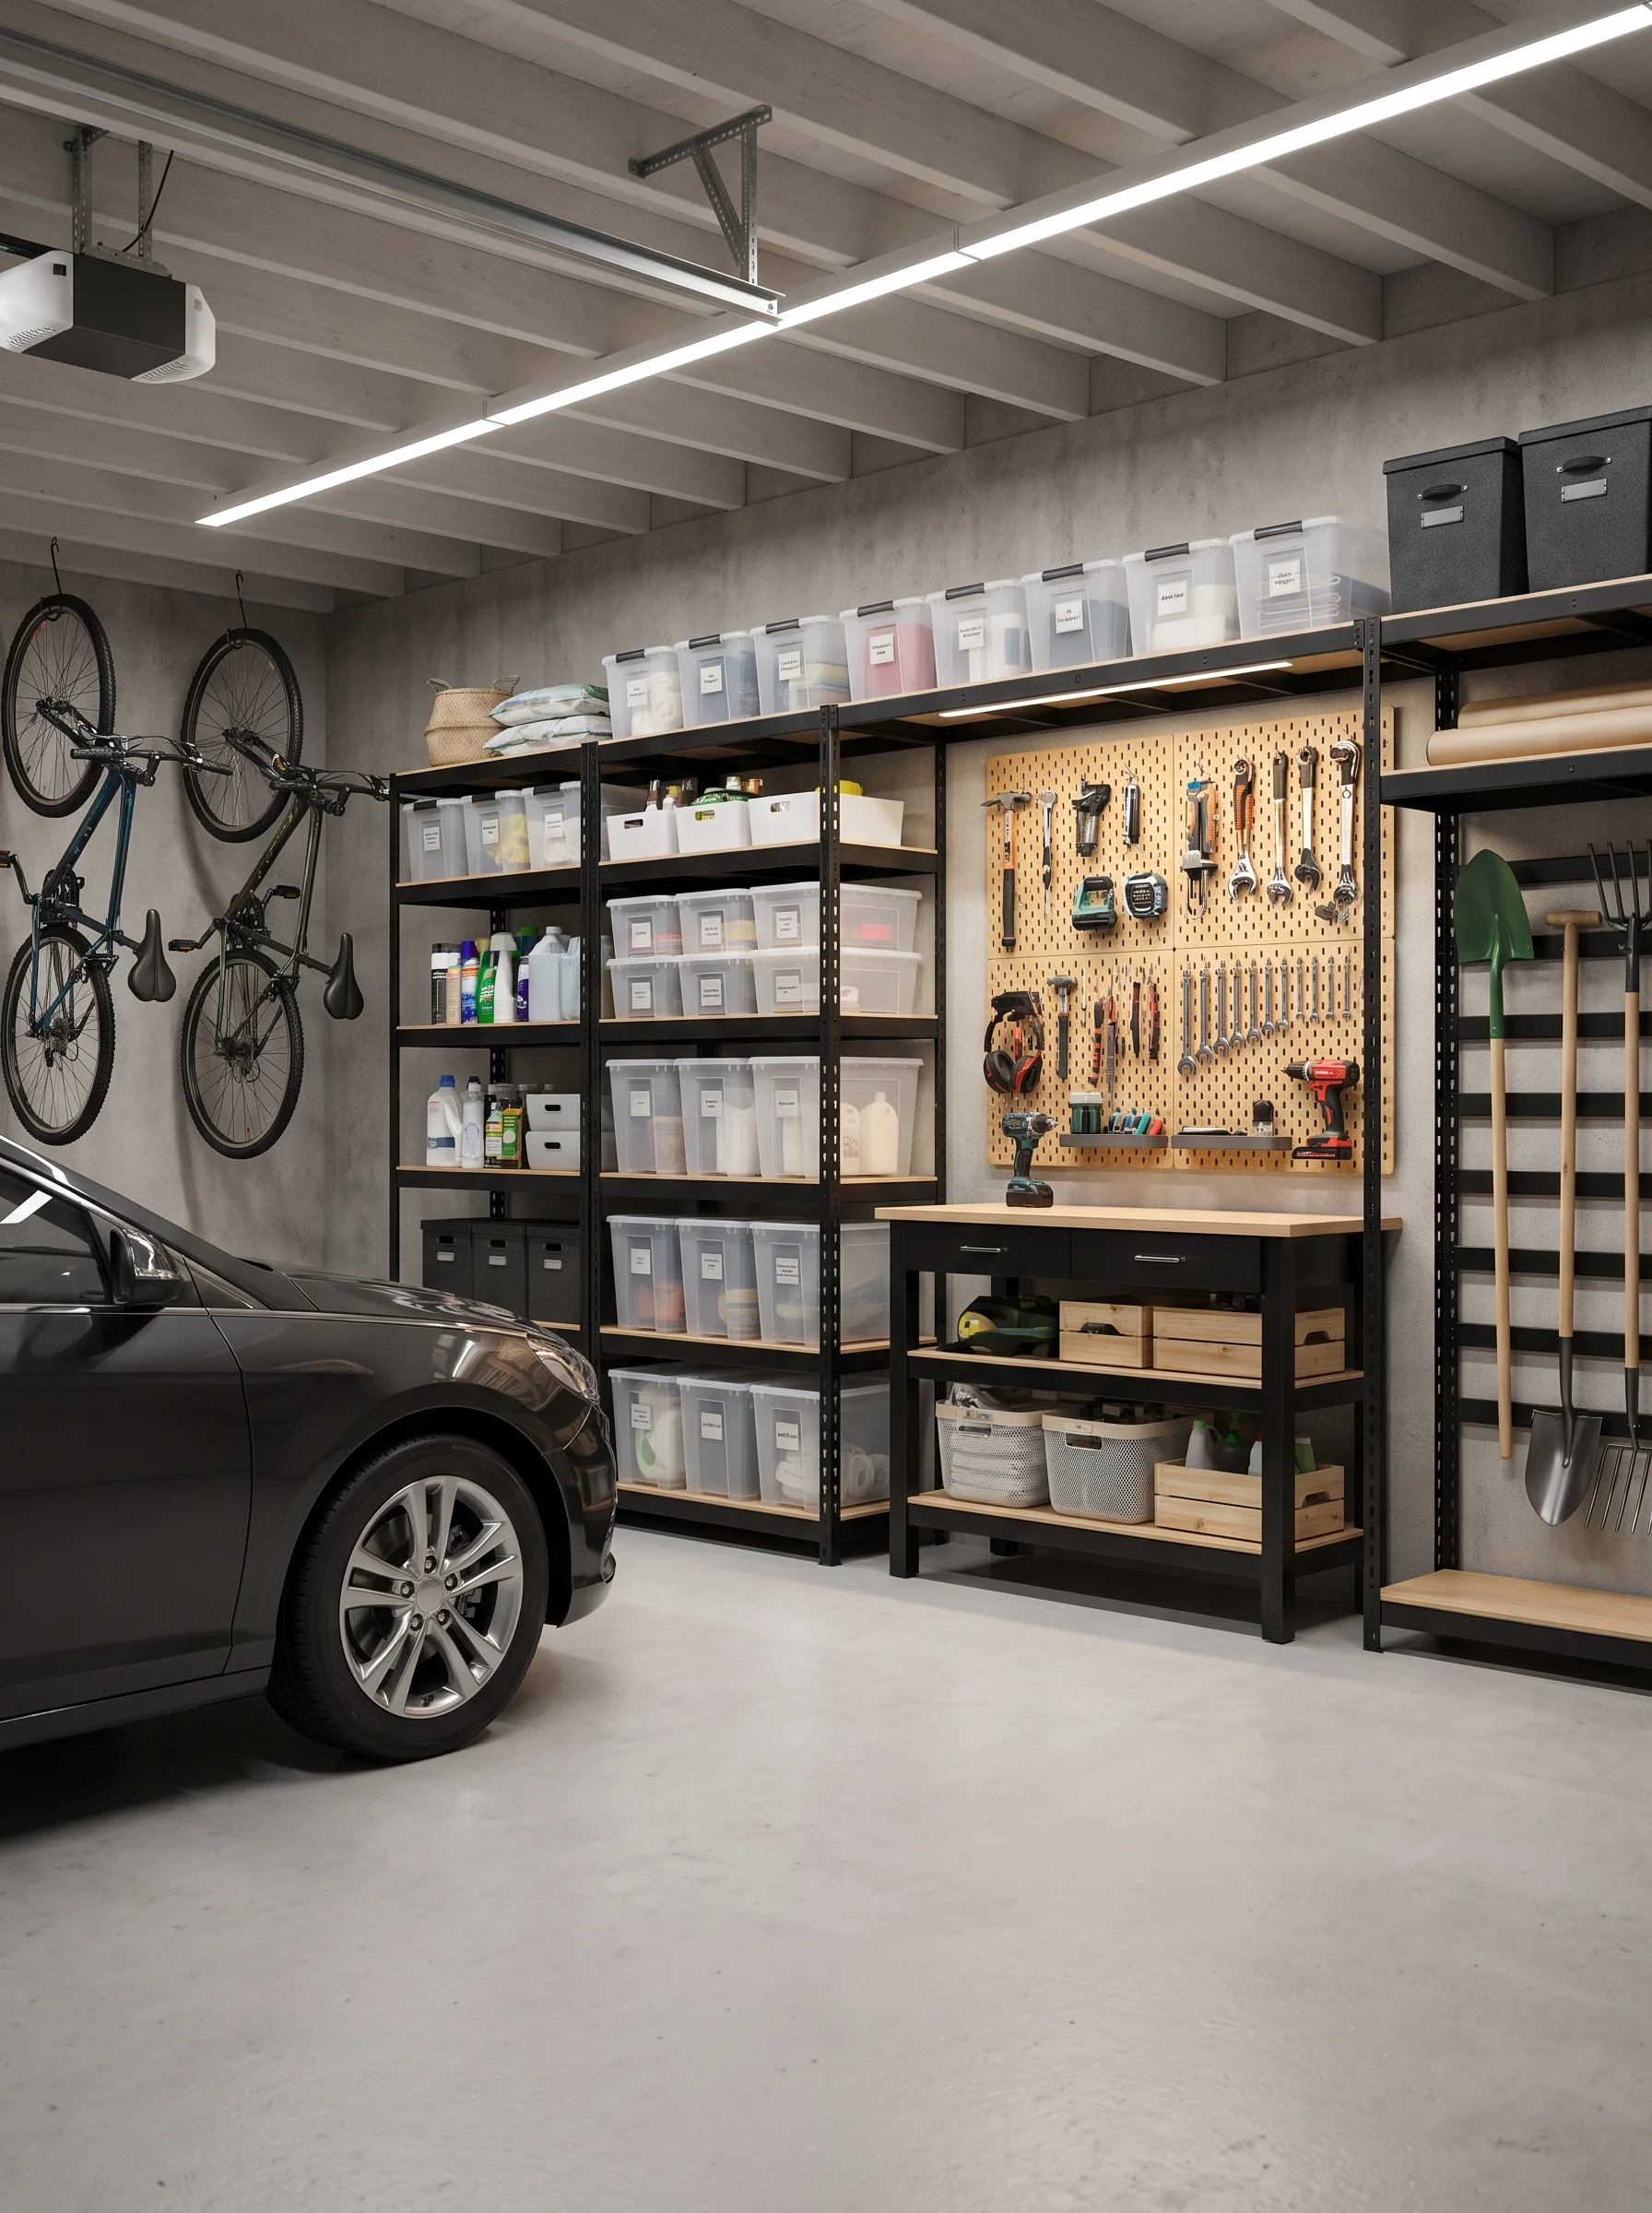
Open the garage door on a Saturday morning and you’ll probably see what most people see. There’s a car that barely fits, a stack of boxes nobody has touched since the last move, and a bike leaning on a rake leaning on a paddling pool. Somewhere behind all of it is the one tool you actually came for.
Garages collect clutter because they’re the only room where nothing has to look good. Everything gets parked there “temporarily.” They’re also the hardest room to organize, since they’re cold, dusty, sometimes damp, and expected to hold everything from lawn chemicals to birthday decorations.
IKEA isn’t the first name most people think of for garage storage, which is why it’s worth a look. A handful of ranges, including BROR, IVAR, SKÅDIS, and KALLAX, are sturdy, modular, and cheap enough to try without a big commitment. Used in the right spots, they turn a dumping ground into a space with clear zones for tools, sports gear, seasonal bins, and the things you grab on the way out the door.
Below are 15 ideas with placement, sizing, and the mistakes worth dodging. After them come a comparison table, a short buying guide, and answers to the questions people ask before they start. One note first: IKEA’s range changes by country and over time, so check current availability before planning around a specific piece.
1. Build the Backbone With BROR Heavy-Duty Shelving
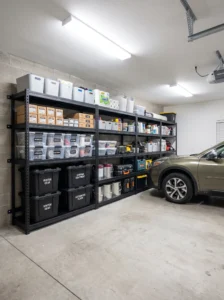
Heavy things need a heavy-duty home, and that’s what BROR is for. IKEA designed this steel shelving line with garages and workshops in mind, so paint cans, power tool cases, and crates of odds and ends sit on it without the sag you’d get from lightweight shelves.
Put it on the longest wall that doesn’t interfere with the car doors, or across the back if the garage runs deep. Read the load rating for your size before stacking anything, and keep the heaviest items on the bottom shelves regardless. Bolt tall units to the wall. A loaded shelf that tips is a real hazard, especially with kids around.
Set the shelf heights around what you actually own. A gap of 16 to 18 inches suits most storage bins, while one taller level can take a wet-dry vac or a toolbox. Resist filling every inch right away. A unit with some breathing room is easier to put things back on, and that’s what keeps the system alive after the first busy month.
2. Hang Hand Tools on a SKÅDIS Pegboard

A pegboard puts every tool in sight, so you stop opening drawers to hunt for a screwdriver. SKÅDIS is IKEA’s perforated board, sold with hooks, little containers, and shelves that clip in anywhere along the grid.
Mount it above the workbench with the middle of the board at about eye level, and fix it into wall studs rather than relying on drywall anchors alone. Keep light and medium tools on it: screwdrivers, pliers, tape, scissors, measuring tapes. Hammers and heavy wrenches belong on a sturdier rail, because the accessories have weight limits.
Trace each tool’s outline with a marker or a strip of masking tape. When something goes missing, the empty silhouette tells you immediately. It sounds fussy, yet it’s what stops a pegboard from turning into a jumble within weeks.
Damp is the one thing to watch. The board is fiberboard, so it prefers a dry garage. A leaky wall or constant condensation can warp it, so check for moisture before you drill.
3. Turn KALLAX Cubes Into a Sports and Kids’ Gear Hub
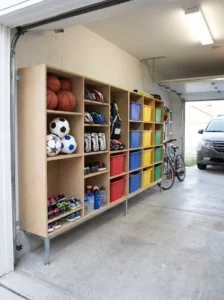
KALLAX cubes suit things that never stack neatly: balls, helmets, shin guards, water bottles. Each opening is roughly 13 inches square, and the cubes take fabric or plastic inserts that hide the mess while keeping everything reachable.
A low, wide unit by the garage door works best. Two rows high keeps it below shoulder height, so children can reach their own gear. Give each person a cube and let colored bins do the labeling. Shoes and cleats go in open cubes so they can air out.
Garages are rougher on particleboard than living rooms are, so lift the unit off bare concrete with feet or a base, and keep it away from water heaters, leaks, and the hose spigot. In a dry, attached garage it does fine. In one that floods every winter, steel is the better call. Anchor it to the wall even though it looks low.
What changes day to day is who does the tidying. Once every kid has a cube at their own height, “put your stuff away” stops being a daily argument.
4. Use Sealed IVAR Pine for Household Overflow
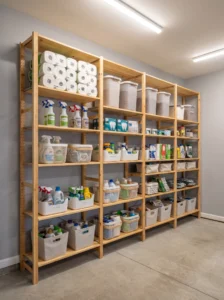
Raw pine looks good, adapts to any layout, and costs little, which is why IVAR is a favorite for people who like to adjust as they go. Shelves slide up or down along the uprights, and the system comes in a few widths and depths.
In a garage, sealing is the key step. Untreated pine soaks up moisture and stains, so brush on a water-based varnish or a couple of coats of paint before assembly, when every piece is easy to reach. Do the cut ends as well, since that’s where damp creeps in.
Use it for the unglamorous overflow: paper towels, cleaning supplies, spare light bulbs, pet food in sealed tubs. Place it near the house door so restocking is a short walk. A matte white or soft gray finish keeps the garage from feeling like a cave.
Don’t push it hard against an exterior wall that sweats in cold weather. A small air gap keeps the back from going musty, and it’s the difference between pine that lasts for years and pine that smells like a basement.
5. Stack Clear SAMLA Bins for Seasonal Decor
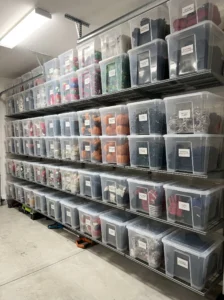
Seasonal stuff is the clutter you need twice a year and trip over the other three hundred and sixty days. Clear SAMLA bins with lids let you see what’s inside without opening each one, and the range comes in several sizes that stack neatly.
Pick two or three sizes and stick with them. A random mix of containers stacks badly and topples. Put the label on the short end that faces you, not only on the lid, since lids vanish once boxes are piled up. “Xmas lights” or “Halloween” is plenty. You don’t need a full inventory.
Keep the current season’s bins at eye level and send the off-season ones to the top shelf of your BROR unit. Wrap string lights around a piece of cardboard before packing them, or they’ll come out as a knot.
The payoff arrives in December, when you find the tree stand in two minutes rather than twenty. Lids also keep dust and spiders out, which matters more in a garage than people expect.
6. Close Off the Clutter With ENHET Wall Cabinets
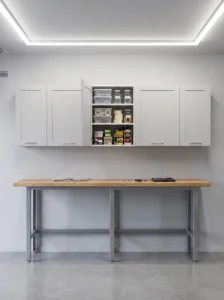
Open shelves show everything. That’s great for tools and terrible for a jumble of half-used paint tins. Closed ENHET wall cabinets hide the visual noise and protect what’s inside from dust.
Mount them at a height that suits the people who’ll use them, keeping the bottom edge well clear of heads and workbench clutter. Chemicals, glues, and paints belong up high or behind a lock, and a child-safety latch costs very little.
A garage isn’t climate controlled, and that matters. Latex paint can be ruined by freezing, and aerosol cans dislike extreme heat. If your winters or summers are harsh, bring those items inside and let the cabinets hold sturdier things: fasteners, tape, spare hardware, car-care products.
Anchor into studs and check the ratings on the mounting hardware. Keeping every cabinet the same color makes the wall look planned rather than accumulated. Wipe the insides now and then, because fine dust finds its way in even behind closed doors.
7. Roll a RÅSKOG Cart to Wherever the Work Happens
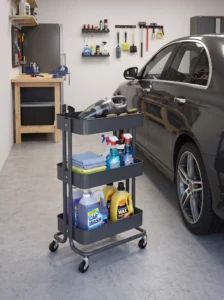
A trolley that travels to the job saves ten trips back and forth. The RÅSKOG utility cart is a slim steel cart with three trays, small enough to tuck into a corner and tidy enough that it doesn’t look like a dumping spot.
Use it as a car-care station with microfiber cloths, wax, glass cleaner, and a handheld vacuum. Or turn it into a mobile craft cart, or a potting station near the garden door. Three levels let you sort by frequency, with everyday items on top.
Park it somewhere that doesn’t eat into door clearance. Check whether the wheels on your version lock. If they don’t, avoid leaving it on a sloped section, because garage slabs often tilt toward the door or a drain.
A common mistake is loading heavy liquids onto the top tray. Put bottles down low and light things up high, and the cart stays steady. The satisfying part is the push: wheel the whole kit to the driveway, wash the car, and roll it back in one go.
8. Build a Workbench From a Solid Countertop

A proper workbench changes how you use the garage, because you stop working on the floor or the hood of a car. A common DIY route is to lay a thick, solid-wood countertop across two sturdy bases, such as steel shelving frames or low cabinet units. You get a surface that handles hammering, clamping, and the odd spilled can.
Height matters more than looks. Somewhere between 34 and 38 inches suits most adults, and the best number is about your elbow height when you stand straight. A depth of 24 to 30 inches gives you room without making you reach over. Leave knee space at one end if you like to sit.
Brace the bench to wall studs. A wobbly top is annoying and unsafe, and it’s the main reason home-built benches get abandoned. Oil or seal the surface so spills wipe off.
Put a power strip along the back edge and hang the pegboard from idea two above it. Once the bench exists, small projects start getting finished instead of left half-done on the kitchen table.
9. Hang Garden Tools and Hoses Beside the Yard Door
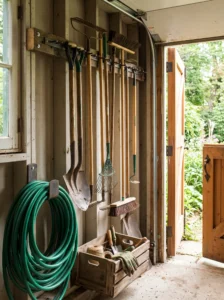
Long-handled tools cause more fall-over chaos than anything else in a garage, and a row of hooks fixes it. Mount a rail or a line of sturdy hooks next to the door that leads outside, so shovels, rakes, and brooms hang by their heads with the handles dangling.
IKEA’s rails and hooks suit lighter items. For ladders, hoses, and anything heavy, pair them with stronger hardware-store brackets, and always fix into studs. Space hooks 6 to 8 inches apart so tool heads don’t tangle.
Hang the heaviest tools lowest and put a wide shelf or bin under the row for gloves, twine, and sprays. Coil hoses loosely over a large hook rather than kinking them in a tub.
Skimping on hook quality is the classic mistake. Cheap hooks bend under a loaded wheelbarrow or a long ladder and drop it all on your foot at the worst moment.
What you notice in spring is the reach. You grab the right tool without untangling anything, and yard work starts earlier.
10. Make a Bike and Scooter Corner
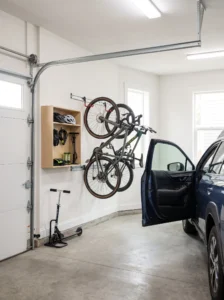
Bikes take more room than anything else in a garage, so they deserve their own corner. IKEA’s range doesn’t focus on bike hardware, so this idea mixes sources: a wall hook or rail from a hardware store, plus an IKEA shelf or small hooks for helmets and accessories.
Hang bikes vertically, front wheel up, or horizontally if the ceiling is low. Leave at least 16 inches between handlebars so they don’t lock together, and fix the hooks into studs. Keep the corner away from car doors, because a swinging door and a pedal don’t mix.
A single shelf above the bikes takes helmets, locks, and a pump. Small hooks hold gloves and lights so they live with the bike instead of in the junk drawer.
Check the hook rating before hanging an adult bike on hardware meant for a child’s. It sounds obvious, but it’s an easy thing to miss when you’re in the middle of installing.
The difference shows up on weekday mornings. With everything in one place, a quick ride before work takes a minute to set up instead of ten spent digging.
11. Set Up a Drop Zone at the House Door
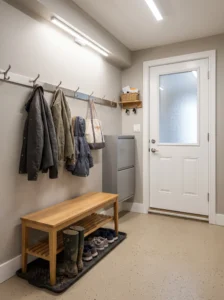
The spot where the garage meets the house is where clutter sneaks inside, so treat it like a mini mudroom: a slim bench, a row of hooks, and somewhere for shoes. IKEA has plenty of narrow benches and shoe cabinets that fit the job, though in a garage you want wipe-clean surfaces and nothing that soaks up moisture.
Leave at least 30 inches of free space in front, so the door can swing and people can sit to pull off boots. Hooks go at two heights, around 48 inches for adults and 36 for children. A boot tray catches mud and snowmelt, and a basket takes mail, keys, and chargers.
Skip fabric-heavy designs. Cushions and upholstery absorb garage smells, so wood or metal is the smarter choice.
You’ll know it’s working when the muddy shoes stay put. Floors inside stay cleaner, and nobody has to call out “shoes!” at the door every evening.
12. Add a Recycling and Bottle Station
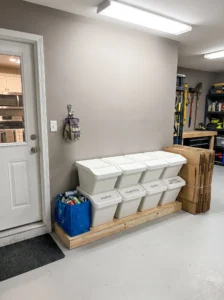
Recycling piles up faster than almost anything else in a garage, and without a system it spreads across the floor. IKEA’s SORTERA sorting bins line up into a compact station, while a big FRAKTA bag handles bulky returnables like bottles and cans.
Set it up beside the door to the kitchen, so there’s one short trip from the house. Group bins by your local pickup categories: paper, plastics, glass, general. Labels on each bin stop guests and kids from guessing.
Choose bins with lids if your garage gets pests or smells, and keep them slightly off the floor if the slab gets wet. Don’t buy sizes too small for a full week, because overflow defeats the purpose.
Hang a small hook nearby for the bag or a pair of gloves, and set aside a corner for flattened cardboard waiting for pickup day. The kitchen bin no longer fills so fast, since everything leaves the house daily, and collection day becomes a single calm haul to the curb.
13. Use HYLLIS Shelving for Bulk Buys and Drinks
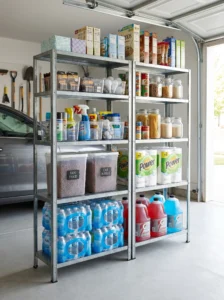
If you shop in bulk, the extra ends up in the garage, and it needs a proper home. HYLLIS is a galvanized steel unit made for indoor and outdoor use, which copes with temperature swings and occasional damp better than painted particleboard.
Put it near the house door and keep groceries on the middle shelves, with drinks lower because they’re heavy. Choose a width that leaves you room to walk between the wall and the car. Use airtight tubs for dry goods, since cardboard invites pests and absorbs humidity. Rotate older items to the front.
Not everything belongs in a garage. Chocolate, canned goods in very hot climates, and anything that spoils in extremes are better kept inside. Bottled water, paper goods, and pet food in sealed containers are safer bets.
After a big shopping trip, the extra goes onto one shelf instead of a dozen bags across the kitchen floor. The open metal design lets air move through, so nothing stays damp for long.
14. Divide the Garage Into Zones Before Buying Anything
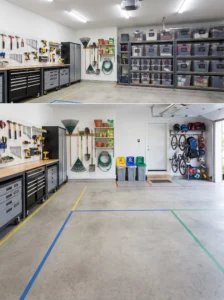
The most useful step in any makeover is free: decide what goes where before the first box arrives. Pull everything out, sort it into keep, donate, and toss, then group the keepers into zones such as car care, tools, garden, sports, seasonal, and household overflow.
Draw the plan on paper. Mark the car’s space first, including a couple of feet beside each door, then fit the zones around it. Frequently used zones go nearest the entrance, and rarely used ones go high or at the back. Floor tape or chalk lines show you the footprints before you commit to anything.
Plenty of people buy shelving first and then discover the layout doesn’t work. Doing it the other way round saves returns and weekends.
Label the shelves and bins, even if you think you’ll remember. A year from now you won’t, and neither will anyone else in the house. A garage with clear zones lets you walk straight to what you need, and putting it back takes no thought.
15. Add Layered LED Lighting Over Work Areas
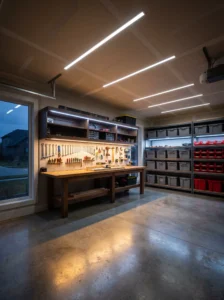
Most garages have a single bare bulb in the middle, which casts shadows right where you’re working. Better light is the fastest way to make the whole room feel finished. IKEA’s lighting range includes plug-in LED strips and bars you can fix under shelves or above the workbench, with no electrician needed.
Use cool-white or daylight tones around the bench, where color and detail matter, and add a brighter overhead light if the ceiling fixture is weak. Place strips along the front edge underneath shelves, so light lands on the surface instead of in your eyes.
Check that any plug-in lights are rated for your conditions. Cold garages can be hard on some electronics, and cords should be tucked well away from the car. A switched power strip saves fumbling for a switch in the dark.
Typical mistakes include mounting lights too far back, which leaves the front of the shelf dim, and choosing warm lamps that make everything look yellow. With decent lighting, finding the right drill bit takes seconds, and the garage becomes a place you don’t mind spending time in.
Quick Comparison: Which IKEA Garage Storage Fits Your Needs?
| Type | Best Use | Material | Style/Vibe | Difficulty Level |
|---|---|---|---|---|
| BROR shelving | Heavy tools, paint, crates | Steel frame | Industrial, tough | Moderate |
| SKÅDIS pegboard | Hand tools, small hardware | Fiberboard with plastic and steel accessories | Neat, workshop-style | Easy |
| KALLAX cubes | Sports gear, kids’ items | Particleboard with bin inserts | Clean, colorful | Easy |
| IVAR shelving | Household overflow, flexible layouts | Solid pine (seal it) | Warm, rustic | Moderate |
| ENHET wall cabinets | Chemicals, hardware, hidden storage | Particleboard with painted fronts | Tidy, closed look | Moderate |
| RÅSKOG cart | Car care, craft or potting station | Steel | Compact, mobile | Easy |
How to Choose the Right Pieces for Your Garage
Start with the car. Park it, open every door, and measure what’s left. Leave a couple of feet of clear space beside each door, then fit shelving into the rest. Most storage units work well at 12 to 20 inches deep. Anything deeper tends to swallow things at the back.
Materials matter more here than in any other room. Steel and solid wood cope with temperature swings and occasional damp. Particleboard and fiberboard are fine in a dry, attached garage but can swell if the space floods, leaks, or sweats in winter. If your garage is damp, lean toward steel, or seal and lift whatever you buy off the floor.
Think about durability and anchoring together. Check the weight rating on every shelf, put heavy items low, and bolt tall units to the wall. A cheap shelf that tips is more expensive than a good one.
Maintenance is light but real. Wipe shelves a couple of times a year, vacuum cobwebs, and keep an eye out for moisture. Pine needs sealing, pegboard dislikes damp, and open shelves collect dust.
On budget, spend where failure is costly: shelving, anchors, and lighting. Save on bins, hooks, and labels, which are easy to replace. IKEA suits most households, though if you’re storing very heavy items like engine parts, a commercial-grade steel rack may be the safer buy.
Common regrets include buying before decluttering, ignoring door clearance, putting chemicals on open shelves, and trusting cardboard to survive a garage. Tape out the footprint, build one zone first, and keep your receipts in case a piece doesn’t fit.
Before You Start Hauling Boxes
A better-organized garage comes down to a few simple moves: heavy-duty shelving for the weight, a pegboard for tools, cubes for gear, labeled bins for seasonal stuff, and good light over the places where you actually work. None of it requires a total overhaul, and most of it can be done over a couple of weekends.
If space is tight, start with the vertical options: BROR shelving, a SKÅDIS wall, and hooks for tools and bikes. If you have more room, add a workbench and a drop zone by the house door, which makes everyday life noticeably smoother. In a damp or unheated garage, lean on steel and sealed wood, and keep paint and aerosols inside where temperatures stay stable.
Before spending anything, declutter. You’ll likely find that a third of what’s out there is donation material, which means you need less storage than you thought. Zone the space on paper, measure twice, and buy the shelving last.
Work in stages. Finish one zone, live with it for a week, and adjust before starting the next. A garage that’s easy to keep tidy tends to stay that way, and the best sign it’s working is when you walk in, find what you need in under a minute, and put it back without thinking.
FAQs
Is IKEA furniture good for a garage?
Some of it is. Steel and solid-wood pieces like BROR, HYLLIS, and sealed IVAR handle garage conditions well. Particleboard units suit dry, attached garages but can swell in damp ones, so check your space first.
What is the best IKEA shelving for heavy items?
BROR is the strongest choice for tools, paint, and crates. Check the weight rating for your size, load heavy items on the lowest shelves, and anchor the unit to the wall.
Do I need to anchor garage shelving to the wall?
Yes, especially for tall units and anything loaded with heavy items. Anchoring into studs stops tipping, which matters most with children or pets around.
Can I use KALLAX in an unheated garage?
It’s risky. Temperature swings and humidity can damage particleboard over time. A dry, attached garage is fine, and in a cold or damp one, steel shelving is a safer pick.
How deep should garage shelves be?
Between 12 and 20 inches suits most households. Shallow shelves let you see everything, while deeper ones hide items at the back and waste space around the car.
How do I keep pests out of garage storage?
Use lidded plastic bins, keep food in airtight tubs, and avoid cardboard. Lift shelving slightly off the floor so air can move, and clear out old boxes that make perfect nests.
How much does an IKEA garage makeover cost?
It depends on size and how much you buy. Start with shelving, a pegboard, and a few bins, then add pieces over time. Prices vary by country, so check current listings before planning a budget.
What’s the first step in organizing a garage?
Empty it, sort everything into keep, donate, and toss, then group what’s left into zones. Measure the space and the car, and buy storage last.