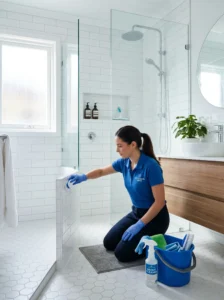
Few things make a bathroom look older and dirtier than stained grout. You can have sparkling faucets, a spotless mirror, and freshly cleaned tiles, but if the grout lines are dark, moldy, or discolored, the entire room can feel neglected. It’s one of those cleaning tasks many homeowners avoid because it seems difficult, time-consuming, and sometimes impossible to restore.
The truth is that grout acts like a sponge. Because it is porous, it absorbs dirt, soap scum, body oils, moisture, and even mold spores over time. Regular bathroom cleaning often focuses on tile surfaces, while grout lines get overlooked. Eventually, those narrow spaces become the most noticeable part of the floor or shower.
Many people assume stained grout means it needs replacement. In reality, most grout can be cleaned and refreshed with the right approach. The key is understanding what type of dirt you’re dealing with, choosing suitable cleaning methods, and using techniques that won’t damage the grout itself.
This guide walks through the entire process step by step. You’ll learn how to assess grout condition, gather the right tools, use effective cleaning solutions, tackle stubborn stains, remove mold, protect grout after cleaning, and avoid common mistakes. Whether you’re cleaning a shower wall, bathroom floor, or tiled backsplash, these practical methods can help restore your grout and make your bathroom feel cleaner, brighter, and better maintained.
1. Inspect the Grout Before You Start Cleaning
The biggest mistake people make is jumping straight into scrubbing without understanding what they’re cleaning.
Before grabbing a brush, carefully inspect the grout throughout your bathroom. Some grout lines may simply be dirty, while others could have mold growth, mildew staining, or physical damage. Each situation requires a slightly different approach.
Check shower corners, floor edges, and areas near tubs where moisture tends to collect. If grout is crumbling, cracking, or missing in places, cleaning alone won’t solve the problem. Those areas may need repair or regrouting.
Inspection also helps determine how aggressive your cleaning method should be. Light discoloration often responds well to mild cleaners, while heavily stained grout may require stronger solutions and more scrubbing effort.
A few minutes of inspection can save hours of unnecessary work. It prevents using harsh chemicals where they’re not needed and helps you focus on the areas that require extra attention.
Think of it as creating a cleaning game plan. Once you know what you’re dealing with, the entire process becomes faster, safer, and more effective.
2. Gather the Right Cleaning Supplies
Good grout cleaning starts with having the right tools within reach.
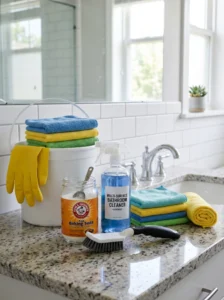
Many people rely on old toothbrushes and random cleaning sprays, but specialized tools make the job significantly easier. Essential supplies include a grout brush, microfiber cloths, a spray bottle, rubber gloves, and a bucket of warm water.
A stiff grout brush works better than a regular sponge because it reaches deep into the narrow grout lines. Microfiber cloths are ideal for wiping away loosened dirt without spreading residue across tiles.
You’ll also need your chosen cleaning solution. This might be a baking soda paste, vinegar solution, oxygen bleach, or a commercial grout cleaner. Different bathrooms require different products depending on stain severity.
Having everything ready before you start prevents constant interruptions. It also allows cleaning solutions to remain on grout surfaces for the recommended amount of time.
When supplies are organized beforehand, the entire process feels less overwhelming and more manageable, especially in larger bathrooms with extensive tile coverage.
3. Ventilate the Bathroom Properly
Fresh air may not sound like a cleaning tool, but it’s incredibly important.
Bathrooms are often enclosed spaces where moisture and cleaning fumes can quickly accumulate. Proper ventilation improves safety and helps cleaning products work more effectively.
Open windows whenever possible. Turn on exhaust fans and leave the bathroom door open during cleaning. Increased airflow helps reduce chemical odors and accelerates drying afterward.
Ventilation becomes especially important when using commercial grout cleaners or mold-removal products. Even products labeled as safe can become unpleasant in confined spaces.
Drying speed is another benefit. Moisture trapped in grout encourages future mold growth. Good airflow allows grout to dry faster after cleaning, reducing the likelihood of mildew returning.
Many homeowners focus entirely on scrubbing and forget about environmental conditions. Yet proper ventilation can improve both cleaning results and long-term grout health.
A well-ventilated bathroom simply creates a better working environment from start to finish.
4. Start with Warm Water and Basic Cleaning
Sometimes the simplest approach works surprisingly well.
Before using stronger cleaners, wash the grout with warm water and a brush. This removes surface dirt, dust, soap residue, and loose debris that may be hiding the true condition of the grout.
Warm water softens grime and prepares grout for deeper cleaning treatments. It also helps cleaning solutions penetrate more effectively later.
Focus on small sections rather than cleaning the entire bathroom at once. This allows you to see immediate progress and prevents surfaces from drying too quickly.
Basic cleaning often reveals that discoloration is not as severe as it initially appeared. In some cases, grout may brighten considerably with nothing more than warm water and scrubbing.
This step also prevents stronger cleaning products from being wasted on surface dirt. Instead, those products can target the deeper stains that truly need attention.
Starting gently is always a smart strategy when cleaning grout.
5. Use a Baking Soda Paste for Everyday Stains
Baking soda remains one of the most reliable grout-cleaning solutions available.
Mix baking soda with a small amount of water until it forms a thick paste. Apply it directly onto grout lines and let it sit for about ten minutes before scrubbing.
The mild abrasive nature of baking soda helps lift dirt without damaging grout surfaces. It is particularly effective on soap scum and light discoloration commonly found in bathrooms.
This method works well on shower walls, bathroom floors, and backsplashes. Because it is gentle, it can be used regularly as part of routine maintenance.
One advantage is affordability. Most households already have baking soda available, making it a budget-friendly option compared to specialized cleaners.
Many homeowners are surprised by how much brighter grout appears after a simple baking soda treatment. It often removes months of buildup without requiring harsh chemicals.
For routine bathroom maintenance, baking soda is difficult to beat.
6. Try Vinegar Carefully on Suitable Grout
Vinegar is a popular cleaning solution, but it must be used correctly.
White vinegar can help dissolve mineral deposits, soap scum, and light staining. Mix equal parts vinegar and water in a spray bottle and apply it to dirty grout.
Allow the solution to sit briefly before scrubbing with a grout brush. The acidic properties help loosen stubborn residue that warm water alone may not remove.
However, vinegar should not be used on natural stone surfaces such as marble, travertine, or limestone. The acid can damage those materials over time.
For ceramic and porcelain tile installations, vinegar often works extremely well when used occasionally. It’s especially useful in bathrooms with hard-water buildup.
Always test a small area first to ensure compatibility. What works beautifully in one bathroom may not be suitable in another.
When used appropriately, vinegar can become a powerful addition to your grout-cleaning routine.
7. Use Oxygen Bleach for Deep Cleaning
Some grout stains need a stronger solution.
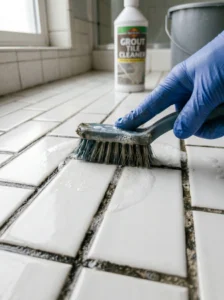
Oxygen bleach is often recommended because it cleans effectively without the harshness associated with chlorine bleach. It helps break down deep stains while remaining relatively safe for most tile surfaces.
Mix the product according to package instructions and apply it generously to grout lines. Let it sit long enough to penetrate discoloration before scrubbing.
This method works particularly well for older grout that has accumulated years of dirt and moisture exposure. It can significantly improve appearance without requiring grout replacement.
Unlike some stronger chemicals, oxygen bleach tends to have less odor and lower risk of discoloring nearby surfaces.
Many professional cleaners rely on oxygen bleach when basic methods aren’t producing desired results. It’s often the next logical step before considering more aggressive treatments.
For heavily used family bathrooms, oxygen bleach can deliver impressive restoration results.
8. Scrub with the Correct Technique
Technique matters as much as the cleaning product itself.
Many people scrub randomly, which wastes effort and creates inconsistent results. Instead, work systematically along grout lines using firm, controlled motions.
Apply enough pressure to loosen dirt without damaging grout. Excessive force can wear down grout over time, creating rough surfaces that attract even more dirt.
Focus on one section at a time. Rushing through large areas often leads to missed spots and uneven cleaning.
A dedicated grout brush is usually more effective than large scrubbing pads because it concentrates cleaning power exactly where it’s needed.
Consistent technique improves efficiency and reduces fatigue. You’ll achieve better results with less effort.
The goal isn’t aggressive scrubbing. It’s targeted cleaning that removes buildup while preserving grout integrity.
9. Tackle Mold and Mildew Quickly
Mold should never be ignored in a bathroom.
Dark spots in grout lines are often signs of mildew or mold growth caused by persistent moisture. Left untreated, these stains can spread and become increasingly difficult to remove.
Use a mold-removal product designed for bathroom surfaces or an appropriate disinfecting cleaner. Follow product instructions carefully and ensure proper ventilation.
Pay special attention to shower corners, tub surrounds, and poorly ventilated areas. These locations tend to remain damp longer than other parts of the bathroom.
Removing mold improves more than appearance. It also contributes to a cleaner and healthier environment overall.
After treatment, focus on preventing future growth through better ventilation and regular maintenance.
Addressing mold early is always easier than dealing with widespread infestation later.
10. Rinse Thoroughly After Cleaning
A surprisingly common mistake is leaving cleaner residue behind.
After scrubbing, rinse grout thoroughly with clean water. Residual cleaning products can attract dirt, create dull surfaces, or interfere with future sealers.
Use a damp microfiber cloth or sponge to remove loosened debris and cleaning solution. Repeat until surfaces feel clean and residue-free.
Proper rinsing also helps reveal your actual cleaning results. Sometimes grout appears dirty when it’s simply coated with leftover cleaner.
This step may seem minor, but it significantly affects the final appearance of the bathroom.
A thorough rinse leaves grout looking cleaner, brighter, and more natural.
11. Dry the Area Completely
Cleaning doesn’t end when the scrubbing stops.
Drying is crucial because lingering moisture encourages mold and mildew growth. Use clean towels or microfiber cloths to remove excess water from tile and grout surfaces.
Open windows and run exhaust fans to speed up drying. In humid climates, consider using a portable fan for additional airflow.
Completely dry grout is easier to evaluate. You can clearly see whether additional cleaning is necessary or if stains remain.
Drying also prepares grout for sealing if you plan to apply a protective sealer afterward.
Many bathroom maintenance issues stem from persistent moisture. Proper drying helps break that cycle.
12. Apply a Grout Sealer for Protection
Clean grout deserves protection.
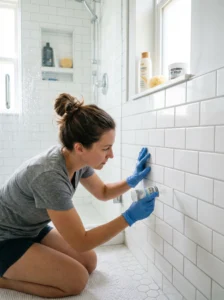
Because grout is porous, it naturally absorbs moisture and stains. A quality grout sealer creates a protective barrier that reduces future absorption.
Apply sealer according to manufacturer instructions after grout is fully dry. Most products require careful application along grout lines and adequate curing time.
Sealing is especially beneficial in showers and high-moisture environments where grout faces constant exposure to water.
While sealers don’t make grout maintenance-free, they make routine cleaning significantly easier.
Many homeowners notice that dirt wipes away more easily after sealing, reducing long-term maintenance effort.
13. Create a Weekly Maintenance Routine
The easiest grout to clean is grout that never gets extremely dirty.
A simple weekly routine prevents major buildup from developing. Wipe down shower walls, remove excess moisture, and address stains while they’re still fresh.
Even five minutes of maintenance can dramatically reduce the need for deep-cleaning sessions later.
Regular attention keeps grout looking brighter and extends the life of both grout and tile installations.
Small habits often deliver better results than occasional intensive cleaning marathons.
Consistency is the real secret to attractive grout.
14. Avoid Common Grout Cleaning Mistakes
Many grout problems are caused by cleaning errors rather than dirt itself.
One common mistake is using metal brushes, which can scratch tile surfaces and damage grout. Another is overusing harsh chemicals that weaken grout over time.
Mixing cleaning products is also risky and should be avoided. Different chemicals can react unpredictably and create safety concerns.
Skipping rinsing and drying steps often leads to recurring problems. Likewise, ignoring ventilation encourages future mold growth.
Understanding these mistakes helps protect your bathroom investment and improves cleaning outcomes.
Good technique matters just as much as good products.
15. Know When Regrouting Is Necessary
Cleaning can accomplish a lot, but it isn’t a miracle cure.
If grout is crumbling, missing, deeply cracked, or permanently stained despite repeated cleaning, replacement may be necessary.
Regrouting restores both appearance and functionality. It prevents water penetration and gives tiled surfaces a refreshed look.
While regrouting requires more effort than cleaning, recognizing when it’s needed prevents ongoing frustration.
Sometimes the smartest maintenance decision is accepting that old grout has reached the end of its lifespan.
Knowing the difference between dirty grout and failing grout saves time, money, and effort.