A kitchen can look “clean enough” on the surface while quietly collecting grease, crumbs, stains, and mystery spills in places nobody checks regularly. Most people wipe counters, load the dishwasher, and maybe mop once a week, but deep cleaning is a completely different task. It’s the difference between a kitchen that simply looks tidy and one that actually feels fresh, organized, and easier to use every day.
The problem is that kitchen deep cleaning often feels overwhelming. You start with good intentions, open one cluttered cabinet, and suddenly you’re sitting on the floor sorting expired sauces from 2022. That’s usually when motivation disappears.
The smarter approach is treating kitchen cleaning like a room-by-room checklist instead of one giant project. Breaking it into zones makes the work manageable and helps you clean more thoroughly without rushing through important areas. It also prevents the common mistake of cleaning visible surfaces while ignoring the spots that collect the most bacteria, grease, and dust.
In this guide, you’ll learn exactly how to deep clean a kitchen step by step, including appliances, cabinets, countertops, pantry zones, sink areas, and floors. You’ll also get practical tips for choosing cleaning tools, avoiding common mistakes, and keeping the kitchen cleaner for longer afterward. Nothing fancy or unrealistic — just practical methods that actually work in real homes.
1. Start by Decluttering the Entire Kitchen
Deep cleaning becomes twice as difficult when the kitchen is full of random items, unopened mail, reusable bags, and appliances you barely use. The first step is always removing clutter before touching any cleaning product.
This works because clutter hides dirt. Crumbs collect behind countertop appliances, grease builds under spice bottles, and cabinets become impossible to wipe properly when they’re overstuffed. Clearing surfaces gives you space to clean correctly instead of just cleaning around things.
Start with visible areas first: countertops, kitchen island surfaces, open shelves, and dining corners. Then move into drawers and cabinets one section at a time. Toss expired food, broken utensils, duplicate containers without lids, and anything you haven’t used in a year.
Use baskets or bins to separate items into “keep,” “donate,” and “trash.” In smaller kitchens, this step matters even more because overcrowding makes the room feel dirtier than it actually is.
One practical mistake people make is pulling everything out at once. That usually creates chaos. Instead, finish one cabinet before starting another.
A decluttered kitchen immediately feels calmer. Even before the actual scrubbing begins, the room starts looking brighter, larger, and easier to maintain.
2. Deep Clean the Refrigerator Inside and Out
The refrigerator is one of the most used appliances in the kitchen, yet it’s often cleaned only when something spills badly enough to demand attention.
A proper deep clean works because refrigerators quietly collect sticky residue, hidden leaks, and lingering food odors that regular wiping misses. Cleaning it thoroughly also improves organization and helps reduce food waste because you can actually see what you have.
Start by emptying everything out. Check expiration dates honestly — not emotionally. Remove shelves and drawers and wash them with warm soapy water. Let cold glass shelves warm slightly before rinsing them to avoid cracking.
For the inside walls, use a mix of warm water and mild dish soap or vinegar solution. Pay extra attention to drawer corners and rubber seals around the door because crumbs and mold love those spots.
Outside surfaces matter too. Wipe handles, top surfaces, and the sides where grease and dust often stick together. If your fridge has coils underneath or behind it, vacuuming them can improve efficiency.
Avoid strong bleach smells inside refrigerators because food absorbs odors quickly.
A freshly cleaned refrigerator changes how the whole kitchen feels. Opening the fridge becomes less stressful and meal prep feels easier because everything is visible and organized.
3. Scrub the Oven Instead of Ignoring It
Most people postpone oven cleaning until smoke appears during preheating. Unfortunately, by that stage, grease buildup becomes much harder to remove.
Deep cleaning the oven works because baked-on grease affects both cleanliness and cooking performance. Old spills create burnt smells, uneven heating, and stubborn smoke that spreads through the kitchen.
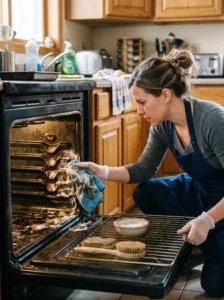
Start by removing oven racks and soaking them in hot water mixed with dish soap. For stubborn buildup, baking soda paste works surprisingly well without harsh fumes.
Inside the oven, apply a paste made from baking soda and water, then let it sit for several hours or overnight. This softens grease naturally. Wipe it away with a damp cloth and spray vinegar over remaining residue for extra cleaning power.
Pay attention to the oven door glass too. That cloudy layer isn’t permanent — it’s usually grease buildup.
If you use the self-cleaning feature, avoid doing it on extremely hot days because it can heat the kitchen significantly and sometimes create unpleasant smells.
One overlooked area is the drawer beneath the oven. Crumbs and grease often collect there quietly for months.
A clean oven makes cooking feel less messy overall. It also removes that slightly burnt smell many kitchens carry without homeowners realizing it.
4. Give Cabinets a Proper Grease Removal Treatment
Kitchen cabinets collect more grease than most people expect, especially the ones near the stove. Even if they look clean, touching them often reveals a sticky film.
Cleaning cabinets thoroughly works because grease attracts dust. Over time, cabinet surfaces become dull, grimy, and harder to maintain if ignored.
Start with upper cabinets first so dust and grime fall downward instead of onto already-clean surfaces. Use warm water mixed with dish soap for painted cabinets, while wood cabinets benefit from gentler cleaners designed for wood finishes.
Focus carefully around handles and edges because hands transfer oils there constantly.
Inside cabinets, vacuum crumbs before wiping shelves. Shelf liners can help protect surfaces in the future, especially in spice or snack cabinets.
Avoid soaking wooden cabinets with excessive water because moisture can damage finishes over time.
If your kitchen is small, lighter cabinet interiors can also help the space feel cleaner and brighter after organizing.
One surprisingly satisfying part of this step is seeing cabinet colors return to normal after removing grease buildup. Kitchens instantly look newer without any renovation.
5. Clean Countertops Based on Their Material
Not every countertop should be cleaned the same way, and using the wrong cleaner can slowly damage surfaces.
This step matters because countertops handle constant food prep, spills, heat exposure, and bacteria throughout the day. A true deep clean removes buildup hiding in corners, seams, and around appliances.
For laminate counters, mild dish soap usually works perfectly. Granite and marble need non-acidic cleaners to avoid dulling the surface. Quartz is more forgiving but still benefits from gentle products.
Move everything off the counters completely before cleaning. That includes coffee machines, knife blocks, and decorative items. Wipe underneath appliances carefully because grease and crumbs collect there fast.
Pay attention to backsplash corners and seams where grime quietly builds up over time.
Avoid abrasive scrubbers on glossy surfaces because tiny scratches trap dirt later.
One practical upgrade after deep cleaning is simplifying what stays on the counters permanently. Less countertop clutter makes daily wipe-downs much easier.
Freshly cleaned counters make the kitchen feel functional again. Meal prep becomes smoother, and the whole room instantly looks more maintained.
6. Sanitize the Kitchen Sink and Faucet Area
People often assume the sink is clean because soap and water pass through it all day. In reality, kitchen sinks can hold a surprising amount of bacteria and odor buildup.
Deep cleaning the sink works because food particles, grease, and moisture constantly collect around drains, faucets, and edges.
Start by scrubbing the basin with baking soda or gentle cleaner. Stainless steel sinks benefit from soft cloths instead of abrasive pads that leave scratches.
Next, clean around the faucet base carefully. Mineral buildup and hidden grime love to collect there.
Pour baking soda followed by vinegar into the drain to reduce odors naturally. Flush with hot water afterward.
Don’t forget the garbage disposal if you have one. Ice cubes and citrus peels can help freshen it naturally.
One commonly ignored area is the sponge holder or soap tray. These often become dirtier than the sink itself.
A deeply cleaned sink changes the kitchen’s overall freshness. Since the sink sits at the center of daily kitchen use, keeping it spotless makes the whole room feel cleaner automatically.
7. Wash Walls, Backsplashes, and Light Switches
Kitchen walls quietly collect grease, especially near cooking areas. You may not notice it until you wipe one section and suddenly see the color difference.
Cleaning walls and backsplashes works because grease particles float through the air while cooking and settle onto nearby surfaces.
Use warm water with mild soap for painted walls and tile-safe cleaners for backsplashes. Microfiber cloths work especially well because they grab grease without damaging finishes.
Pay extra attention near the stove, microwave, and trash area.
Light switches and outlet covers are often overlooked but touched constantly with messy hands. Wipe them carefully with a lightly damp cloth.
Avoid soaking painted walls because too much moisture can damage certain paint finishes.
In smaller kitchens, clean walls make a huge visual difference because every surface is more noticeable.
This step often surprises people most because kitchens suddenly look brighter afterward. Grease buildup dulls surfaces slowly, so the improvement feels dramatic once removed.
8. Deep Clean Small Appliances
Small appliances are usually cleaned externally while hidden crumbs and grease continue building inside.
This matters because appliances like toasters, air fryers, coffee makers, and microwaves directly affect both hygiene and performance.
Start by unplugging everything. Empty crumb trays, wipe cords, and clean underneath appliances before returning them to the counter.
Microwaves clean easily with steam. Heat water and lemon slices inside for a few minutes, then wipe softened residue away.
Coffee makers benefit from vinegar cleaning cycles to remove mineral buildup. Blenders should have blades cleaned carefully because trapped food odors linger there.
Air fryers and toaster ovens need special attention around heating elements where grease hardens over time.
Avoid spraying cleaners directly into electrical areas.
One smart habit after deep cleaning is choosing a dedicated storage place for rarely used appliances instead of keeping everything on the counter.
Cleaner appliances not only work better but also make the kitchen look far less cluttered and chaotic.

9. Organize and Wipe the Pantry Area
A pantry deep clean usually reveals three things: expired snacks, duplicate ingredients, and crumbs hiding everywhere.
This step works because organized storage reduces waste and makes cooking less frustrating. You stop buying items you already own but couldn’t find.
Remove everything shelf by shelf. Vacuum crumbs first before wiping surfaces.
Use clear containers for dry goods if possible. They make ingredients easier to identify quickly and help reduce packaging clutter.
Group similar foods together: baking items, canned goods, snacks, breakfast foods, and spices.
Avoid overcrowding shelves because tightly packed storage quickly becomes messy again.
Check for sticky spills from syrups, oils, or sauces that may have leaked unnoticed.
In family kitchens, labeling containers helps everyone maintain organization longer.
A cleaned pantry feels oddly satisfying because it improves both appearance and daily functionality. Finding ingredients becomes easier, cooking feels faster, and grocery shopping becomes more organized.
10. Tackle Greasy Range Hoods and Filters
Range hoods are one of the dirtiest kitchen areas because they constantly trap airborne grease during cooking.
Cleaning them properly works because grease buildup reduces ventilation efficiency and creates lingering cooking odors throughout the home.
Remove filters and soak them in hot water mixed with dish soap and baking soda. Many metal filters clean surprisingly well after soaking.
Wipe the hood exterior carefully, especially underneath where grease accumulates most heavily.
Use degreasing cleaners when necessary, but avoid harsh products on stainless steel finishes.
If your kitchen lacks strong ventilation, cleaning this area becomes even more important because grease spreads faster onto nearby surfaces.
One common mistake is forgetting the top of the hood, where dust and grease combine into thick grime.
A clean range hood improves air quality noticeably. The kitchen smells fresher, and surfaces stay cleaner longer after cooking.
11. Wash Windows and Window Treatments
Kitchen windows collect grease, fingerprints, steam residue, and dust surprisingly fast.
Cleaning them thoroughly works because natural light instantly makes a kitchen look cleaner and more inviting.
Use glass cleaner or vinegar solution on windows. Wipe in sections to avoid streaks.
Wash blinds, curtains, or shades depending on the material. Fabric curtains often absorb cooking smells over time.
Pay attention to window tracks where crumbs and dust collect quietly.
Avoid cleaning windows during direct sunlight because cleaners dry too quickly and leave streaks.
In smaller kitchens especially, clean windows help the room feel more open and airy.
One overlooked benefit is improved mood. Brighter kitchens simply feel better to work in during daily cooking and cleaning routines.
12. Deep Clean the Dishwasher
It sounds strange, but dishwashers absolutely need cleaning too.
This works because grease, soap scum, and food debris build up inside over time, reducing cleaning performance and causing odors.
Start by removing and rinsing the filter. Many people don’t realize their dishwasher even has one.
Wipe door seals carefully because grime collects there constantly.
Run an empty cycle with vinegar followed by baking soda to freshen the interior naturally.
Check spray arms for clogged holes that may affect water flow.
Avoid overloading dishes regularly because trapped food buildup increases quickly in crowded machines.
A clean dishwasher actually improves how clean your dishes come out. It also removes that slightly damp smell older dishwashers sometimes develop.
13. Scrub Floors and Baseboards Properly
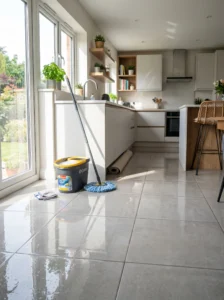
Kitchen floors handle constant traffic, spills, grease splatter, crumbs, and pet messes daily.
Deep cleaning works because mopping alone often pushes dirt around without fully removing buildup near edges and corners.
Start by vacuuming thoroughly, especially beneath cabinets and appliances if possible.
Scrub grout lines on tile floors carefully using baking soda paste or grout-safe cleaners.
Baseboards matter too. They quietly collect dust and grease that make kitchens feel dingy.
Use appropriate cleaners depending on floor material: wood, tile, laminate, or vinyl all require slightly different care.
Avoid overly wet mops on wood floors because moisture can cause warping over time.
One satisfying moment during kitchen deep cleaning is seeing floor color return after removing hidden grime buildup.
Clean floors make the entire room feel fresher immediately, even if nothing else changes visually.
14. Refresh Trash and Recycling Areas
Trash areas often stay dirty because people focus more on visible kitchen surfaces.
Cleaning this zone works because lingering odors usually come from garbage areas, not the trash itself.
Wash garbage cans inside and outside using disinfectant or warm soapy water.
Let bins dry completely before adding fresh liners.
Wipe surrounding walls and floor sections too because spills often drip unnoticed.
Consider odor-absorbing products like baking soda at the bottom of bins.
Avoid overstuffing garbage bags because leaks create long-term smells and stains.
In busy family kitchens, this area may need attention more often than expected.
A freshly cleaned trash zone changes the kitchen atmosphere immediately. The room smells cleaner overall, even before adding air fresheners or candles.
15. Finish With Maintenance Habits That Keep It Clean Longer
The hardest part of deep cleaning is often keeping the kitchen from returning to chaos two weeks later.
This step matters because small daily habits prevent future marathon cleaning sessions.
Focus on simple maintenance routines: wiping counters nightly, cleaning spills immediately, emptying expired foods weekly, and running sink sanitizing routines regularly.
Store cleaning cloths somewhere easy to access so quick wipe-downs feel convenient instead of annoying.
Avoid letting paperwork, shopping bags, or random items pile onto kitchen counters again.
In busy households, assigning small cleaning tasks to different family members helps maintain results longer.
One realistic truth is that no kitchen stays perfect all the time. The goal isn’t showroom cleanliness — it’s creating a space that feels manageable, hygienic, and comfortable to use daily.
That mindset makes kitchen maintenance feel far less exhausting.